Best Eggless Brioche Bread Recipe Highlights
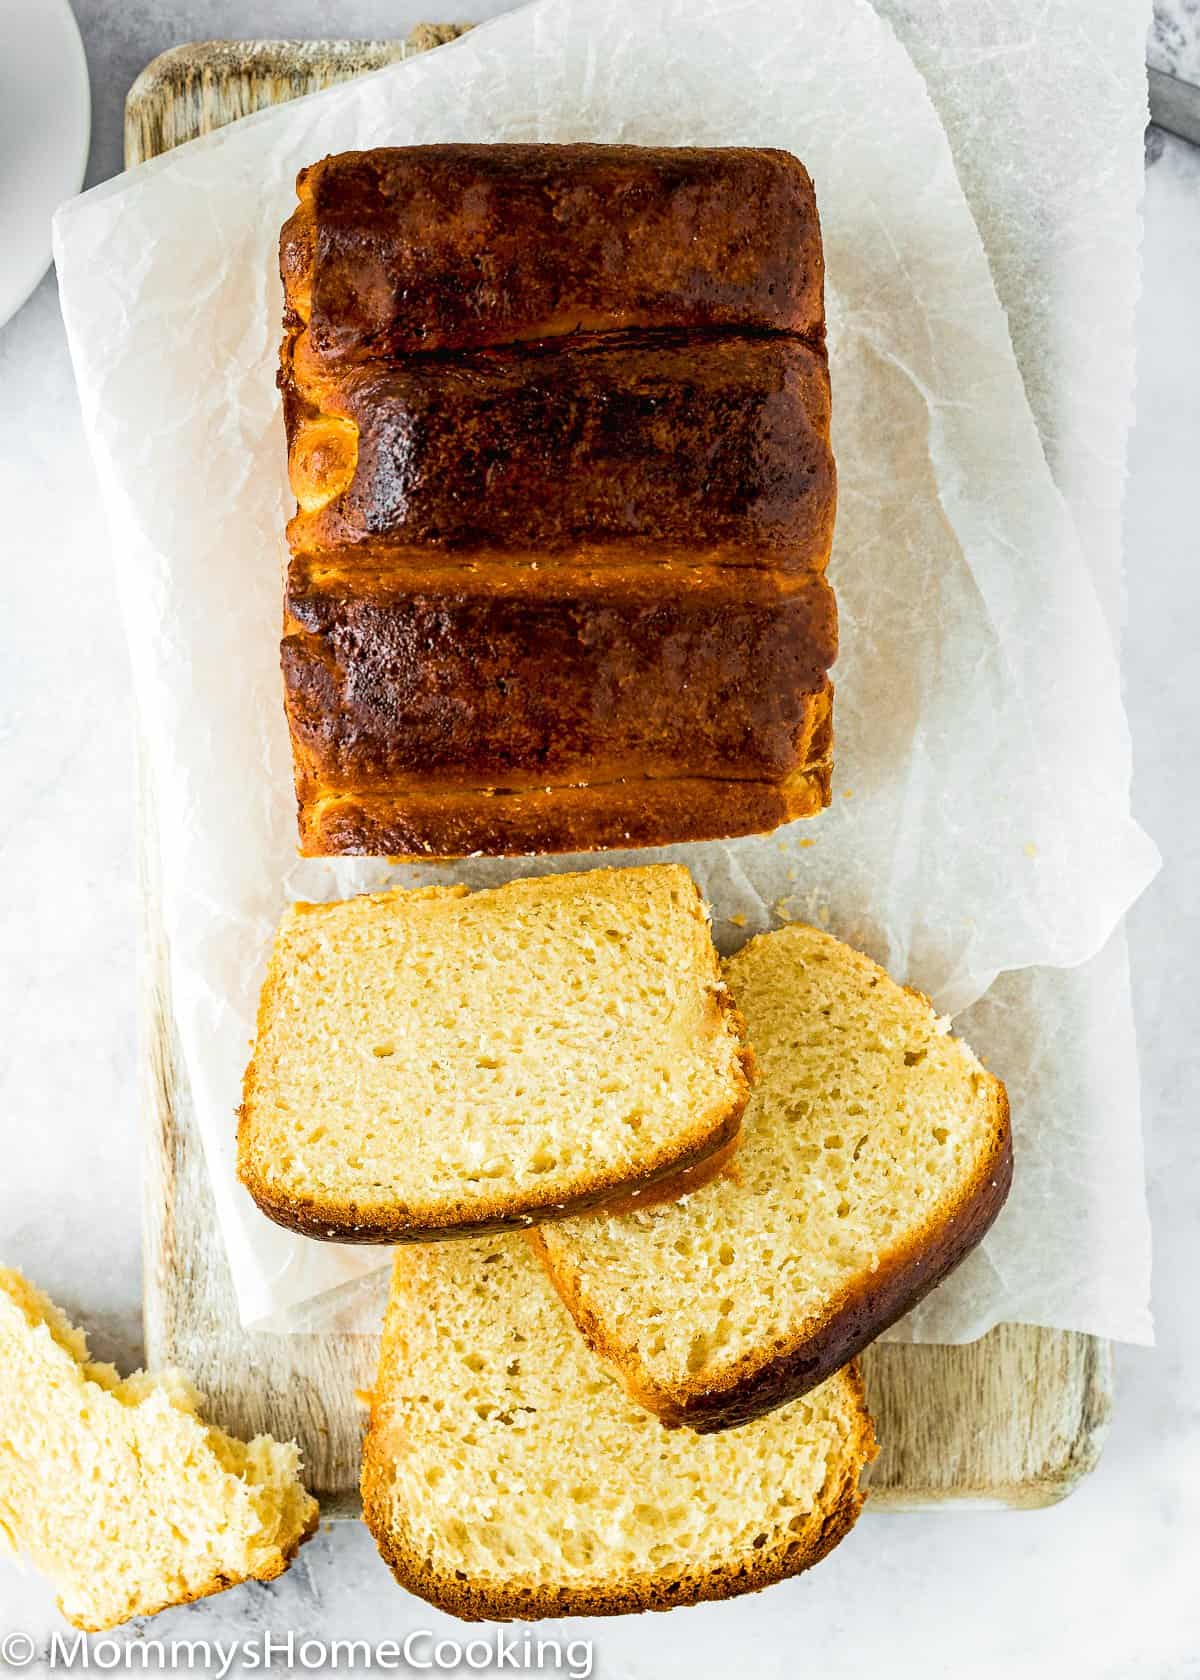
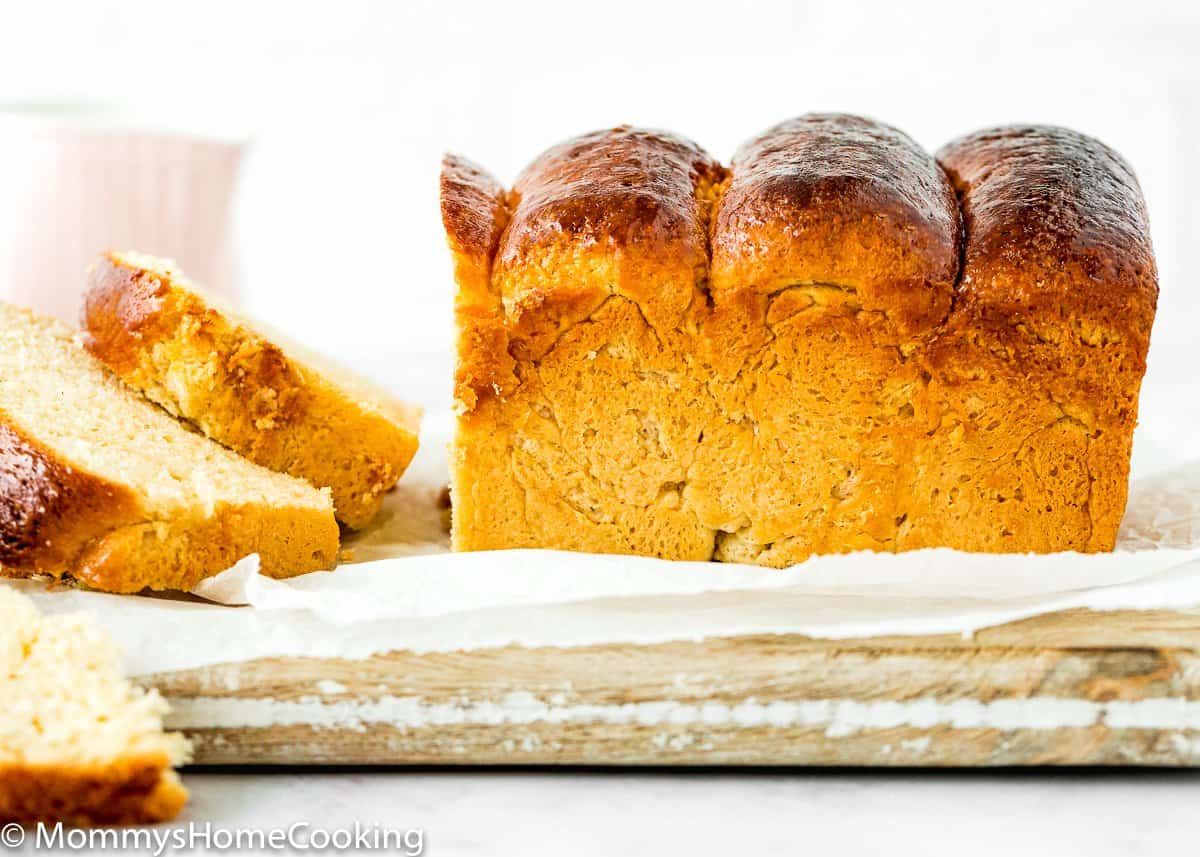
Whether you need the perfect bread loaf for a special occasion, the perfect bun for gourmet burgers, the tastiest bread for sandwiches, or the most delicious French toast you’ve ever had, this Eggless Brioche Bread is hands down the best bread to fit all of your needs. If you have never experienced Brioche bread, you are truly missing out. For bread-and-butter lovers, Brioche has to be near the top of the list of favorite varieties. This Eggless Brioche is the perfect kind of flaky bread that literally melts in your mouth. It is extremely soft, fluffy, and rich. My Eggless Brioche Bread recipe is perfect for any sort of sandwich, hot or cold, and will also be the perfect addition to brunch for Eggless French toasts. But honestly, this bread is so delicious that you can just eat it plain! This homemade Eggless Brioche Bread is heaven when it comes out of the oven!
What Is Brioche?
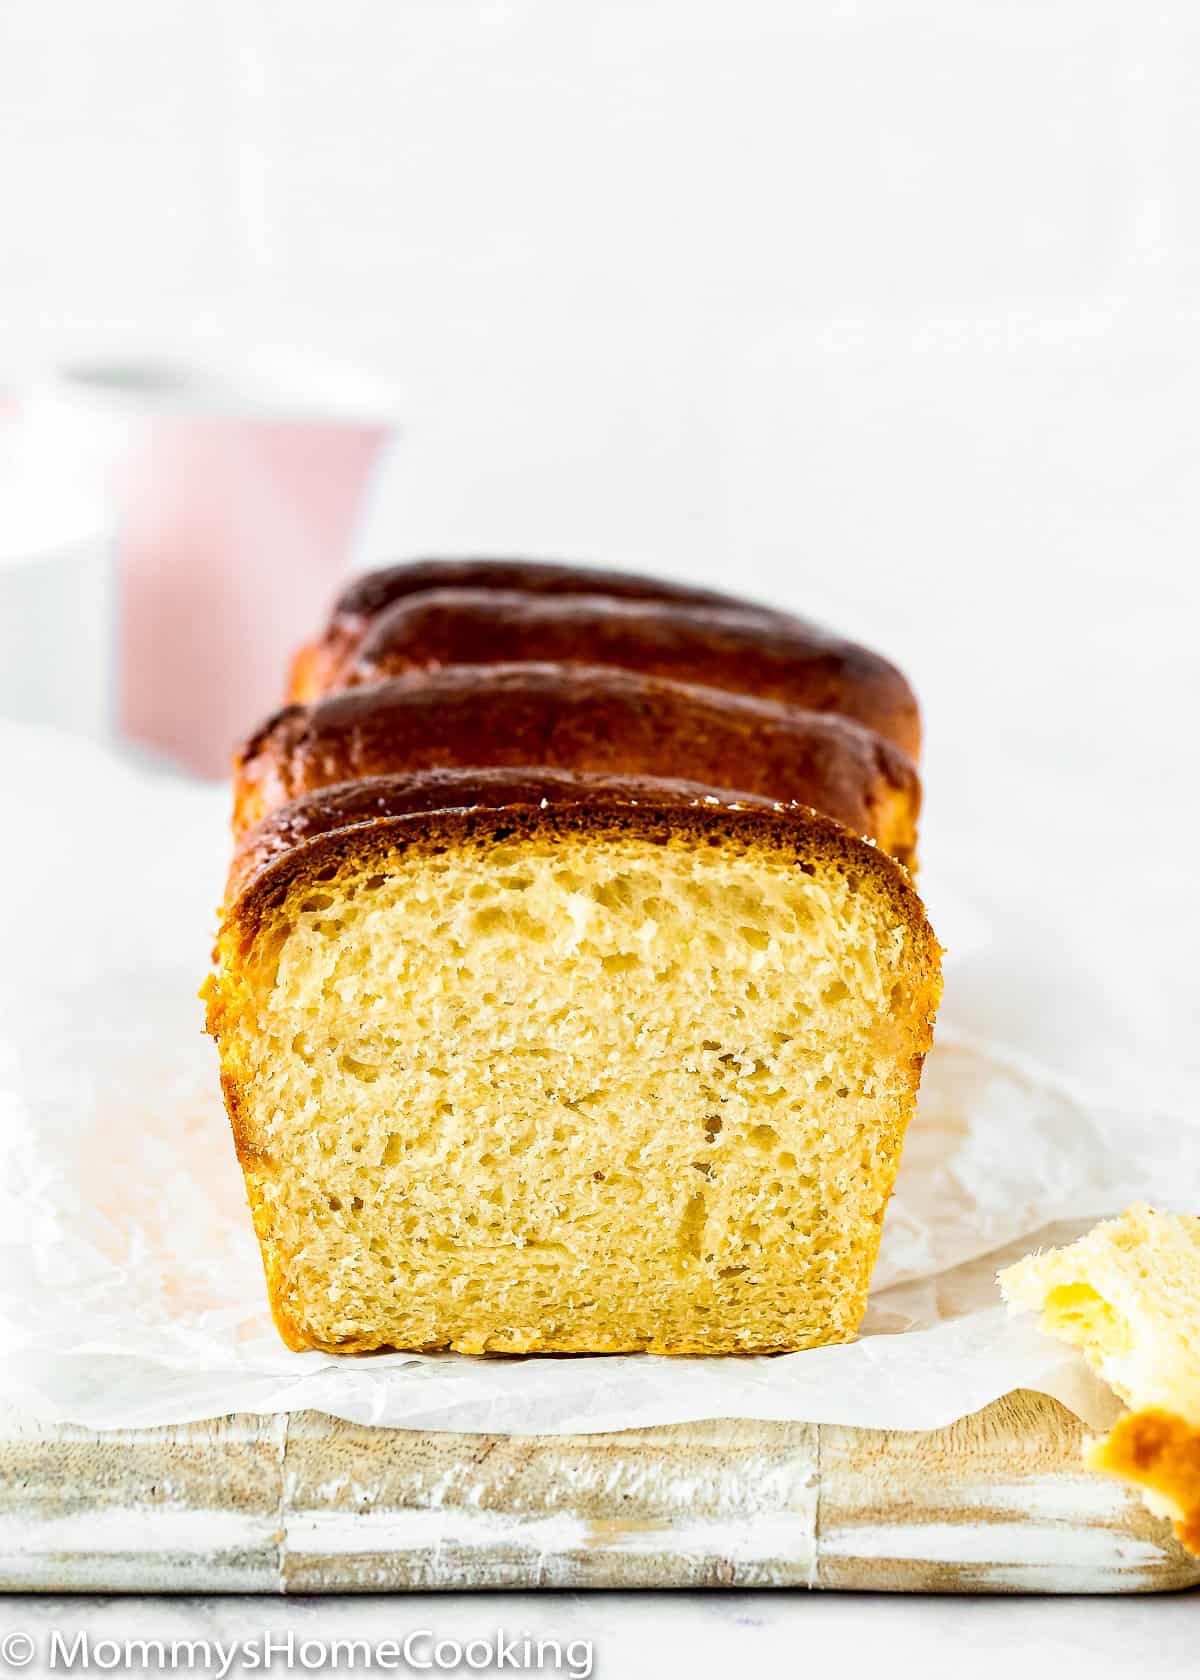
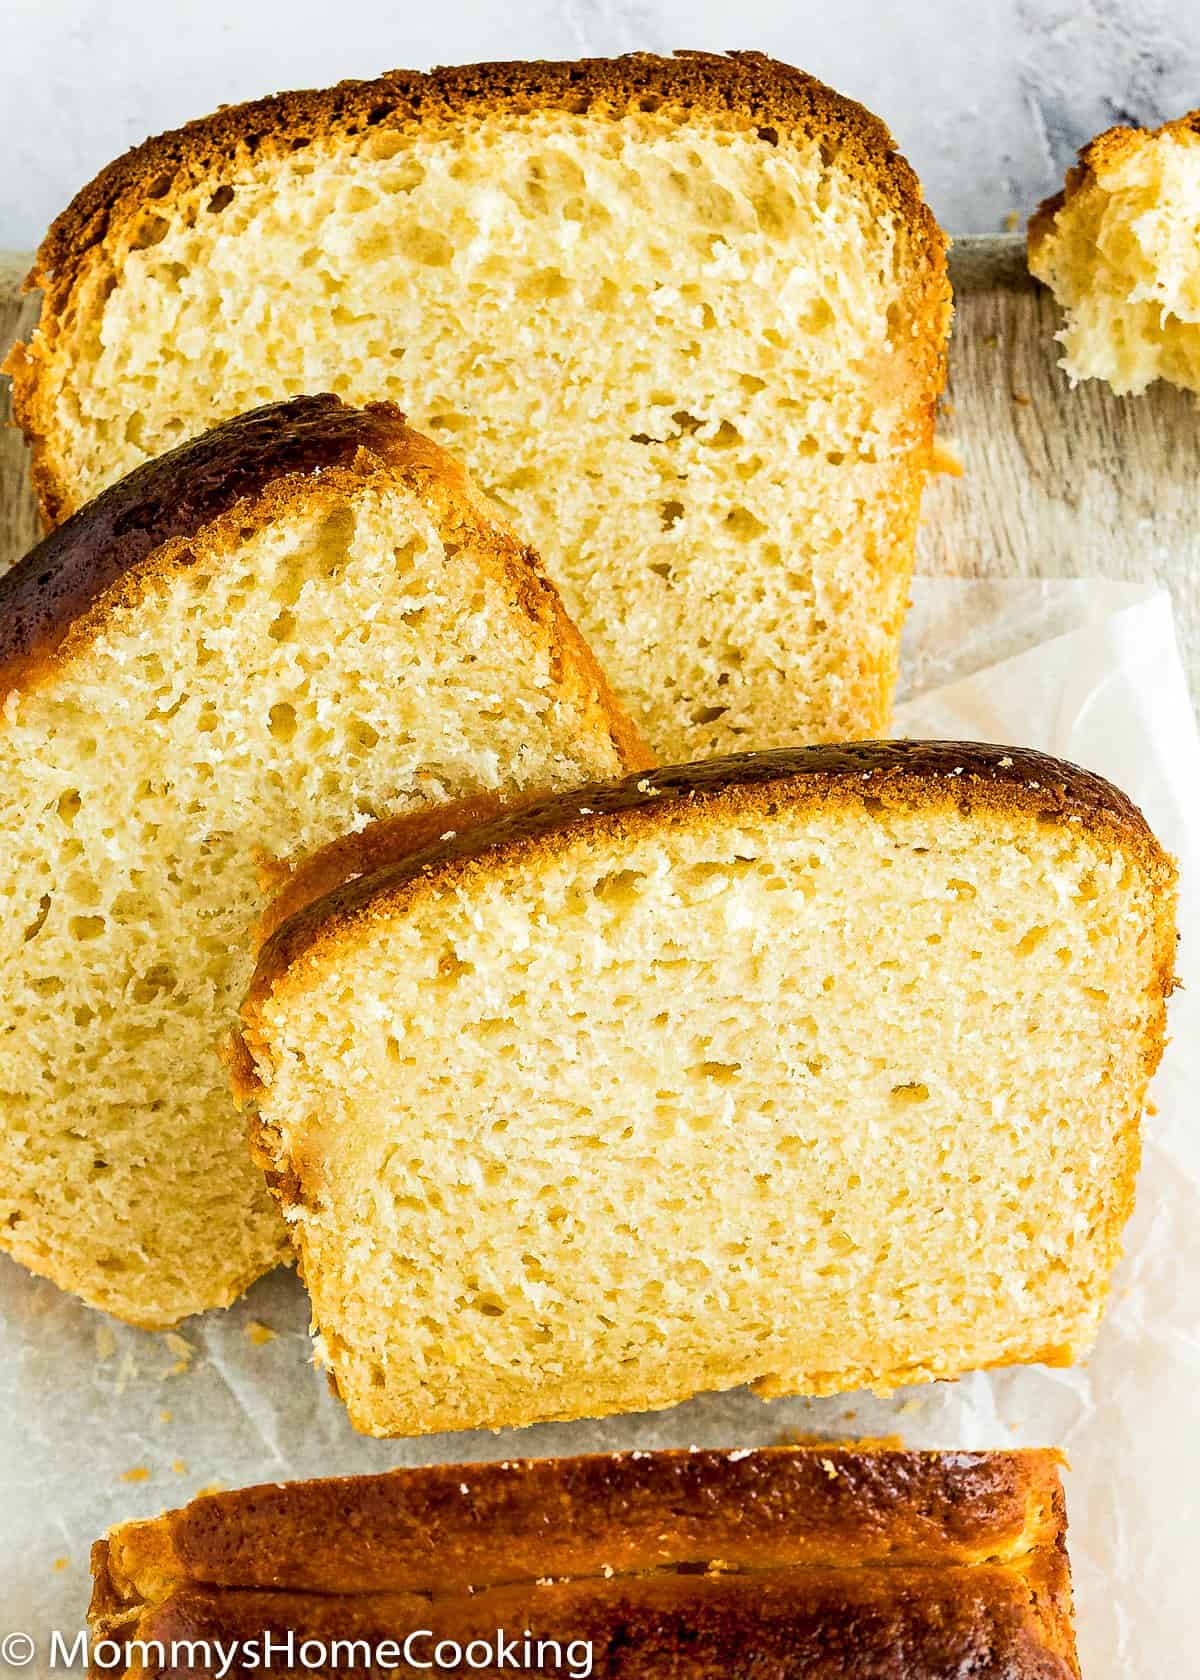
The difference between standard bread and brioche bread is that brioche includes butter and eggs, giving it the rich flavor and light, puffy texture that makes it so delightful. Since this French bread is traditionally made with several eggs, I was a little intimidated to make an eggless version. But I am so glad I tried. The results cannot be better. This Eggless Brioche Bread is dreamy! It’s not difficult to make, but it requires time; nevertheless, it’s well worthy of all the time invested in it. Let’s get started!
Ingredients You’ll Need
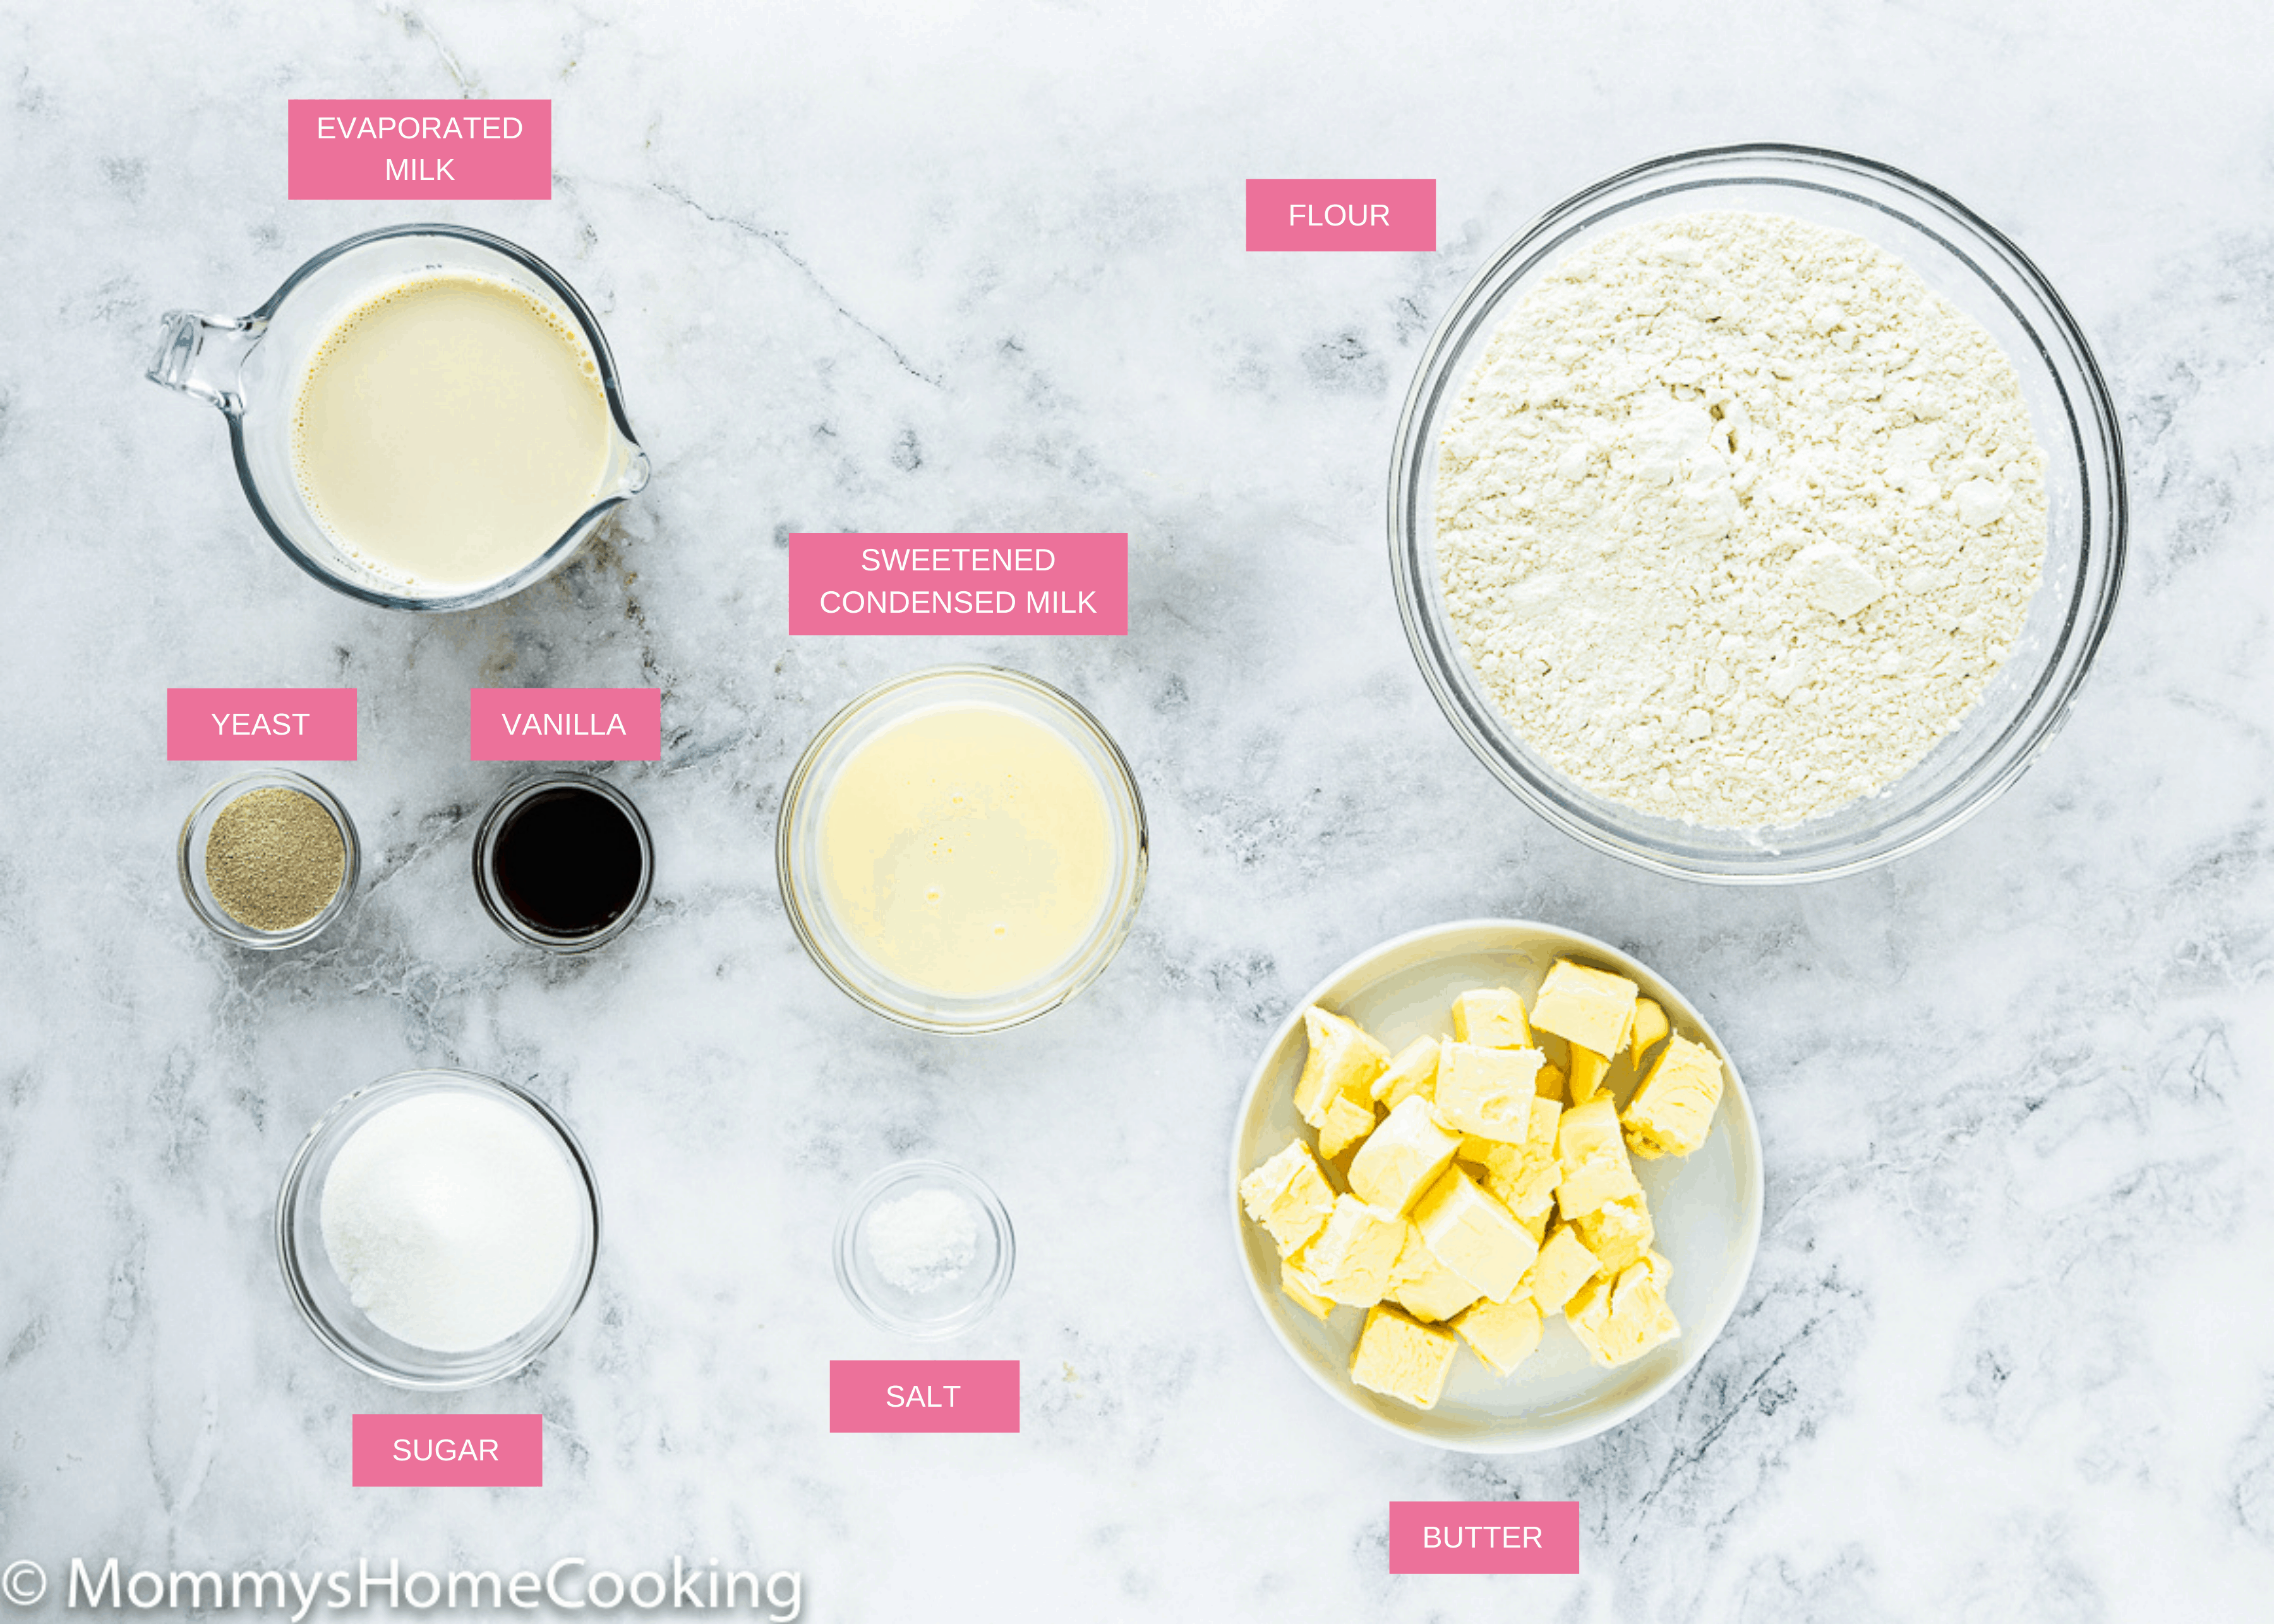
With less than 10 ingredients, Eggless Brioche is simple, fairly inexpensive, and guaranteed tasty! Here’s a list of the ingredients you’ll need (for the full recipe, scroll down!): You’ll also use a little more butter and sweetened condensed milk to make an eggless egg wash for the brioche.
Flour: Standard all-purpose flour works best here; skip the bread flour and wheat flour.Sugar: Regular white granulated sugar o caster sugar.Yeast: I recommend and use instant yeast since it doesn’t need to be activated; just mix it with the dry ingredients.Salt: I prefer kosher or sea salt. If you only have table salt handy, I recommend reducing the amount to half.Evaporated Milk: You don’t have evaporated milk? No problem!! Check out my post about How to Make Evaporated Milk at home. Sweetened Condensed Milk: Make sure you use the full-fat version.Vanilla Extract: For optimal flavor, reach for pure vanilla instead of imitation. Even better, try homemade vanilla extract!Butter: I prefer to use unsalted butter, but if you only have salted butter handy, you can use it. In this case, skip the salt called in the recipe.
Storing & Freezing Instructions
Store your Eggless Brioche at room temperature wrapped well in plastic wrap after it has completely cooled. It will keep this way for up to two days, and then you can move it to the refrigerator for up to five days.
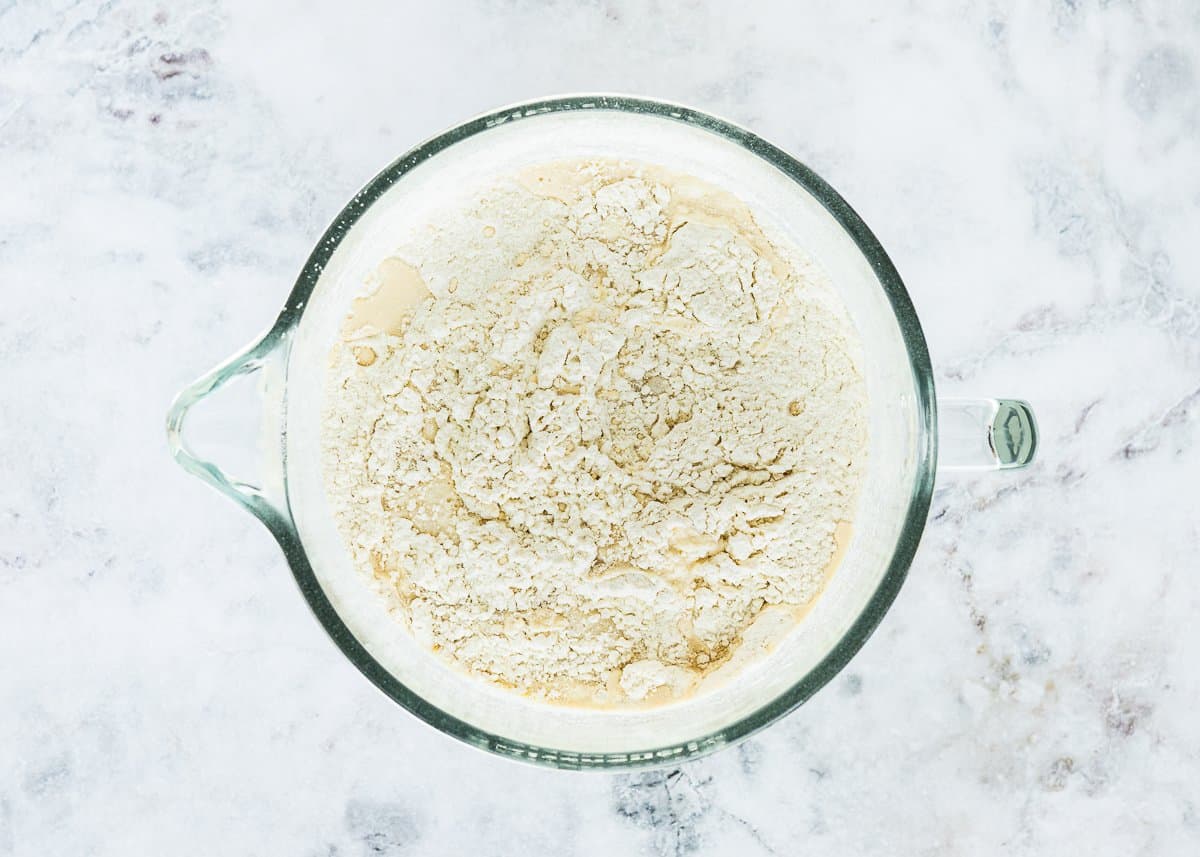
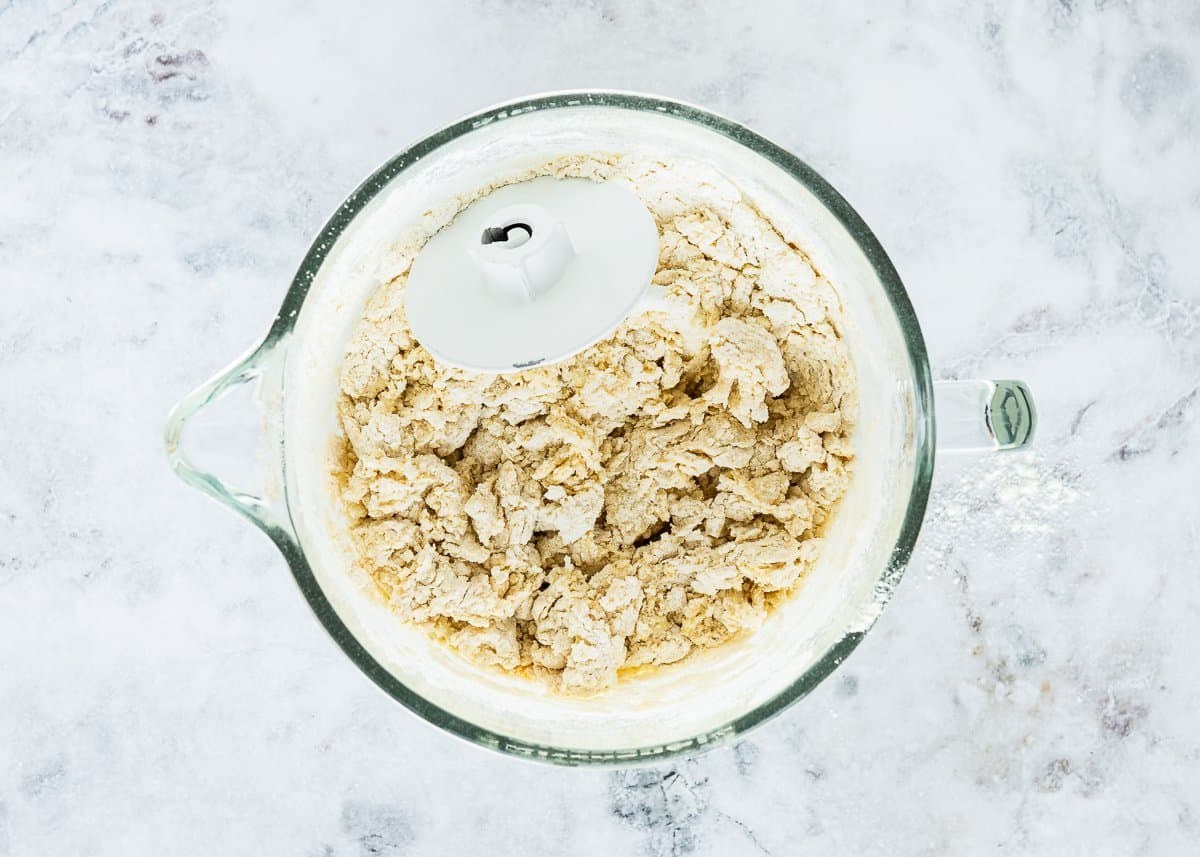
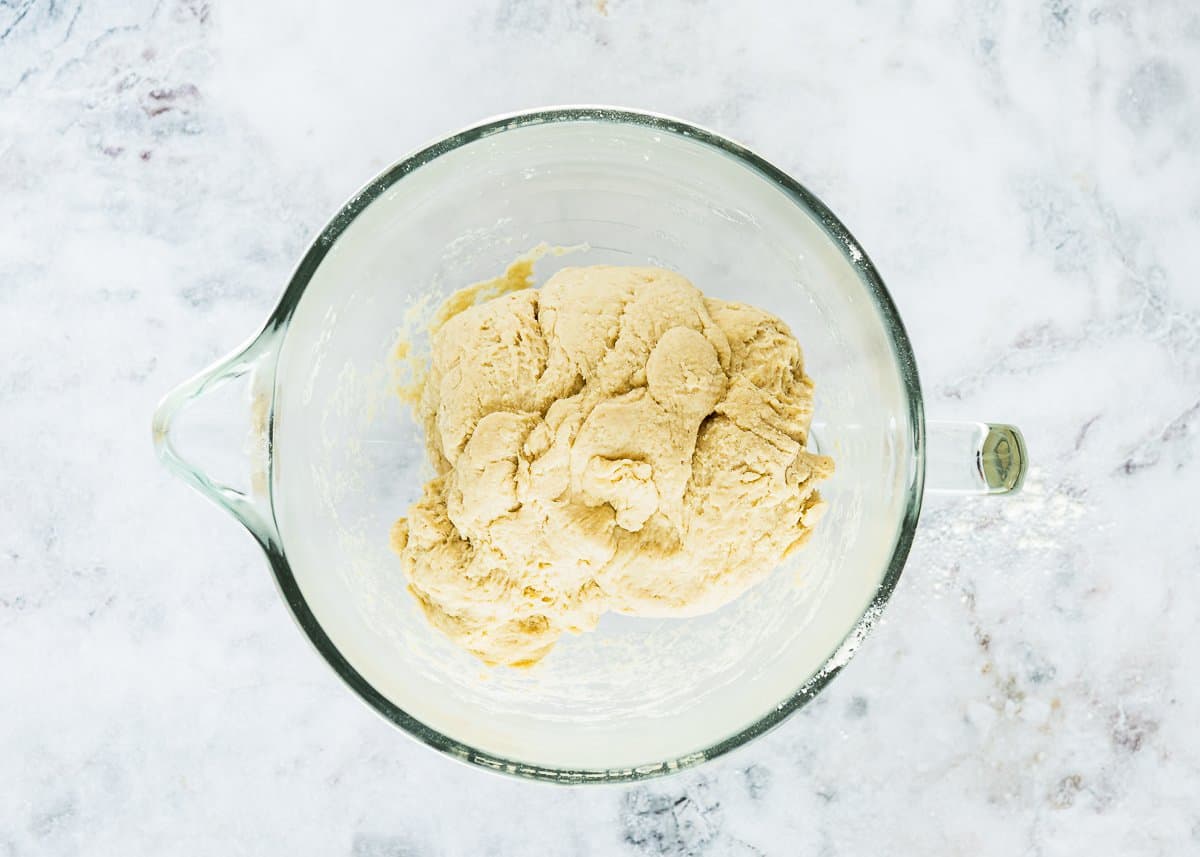
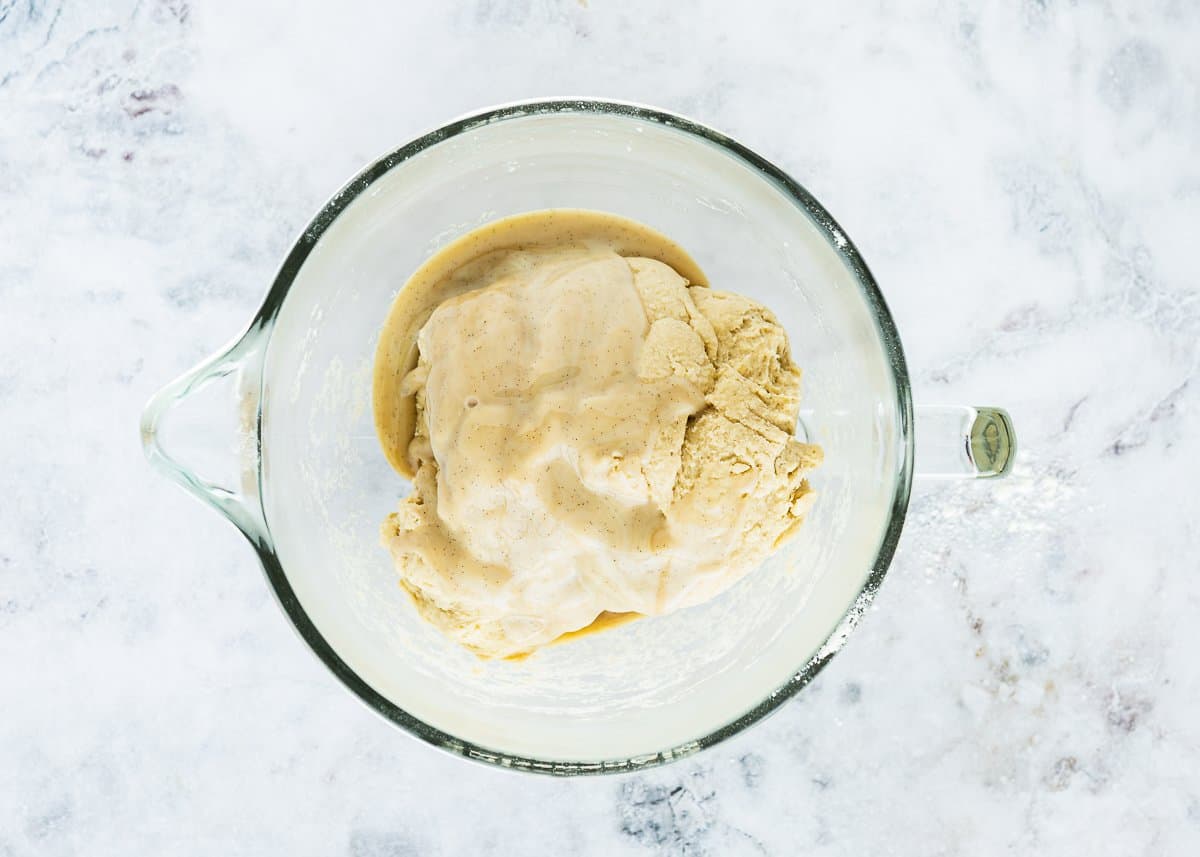
1 – Make the Dough
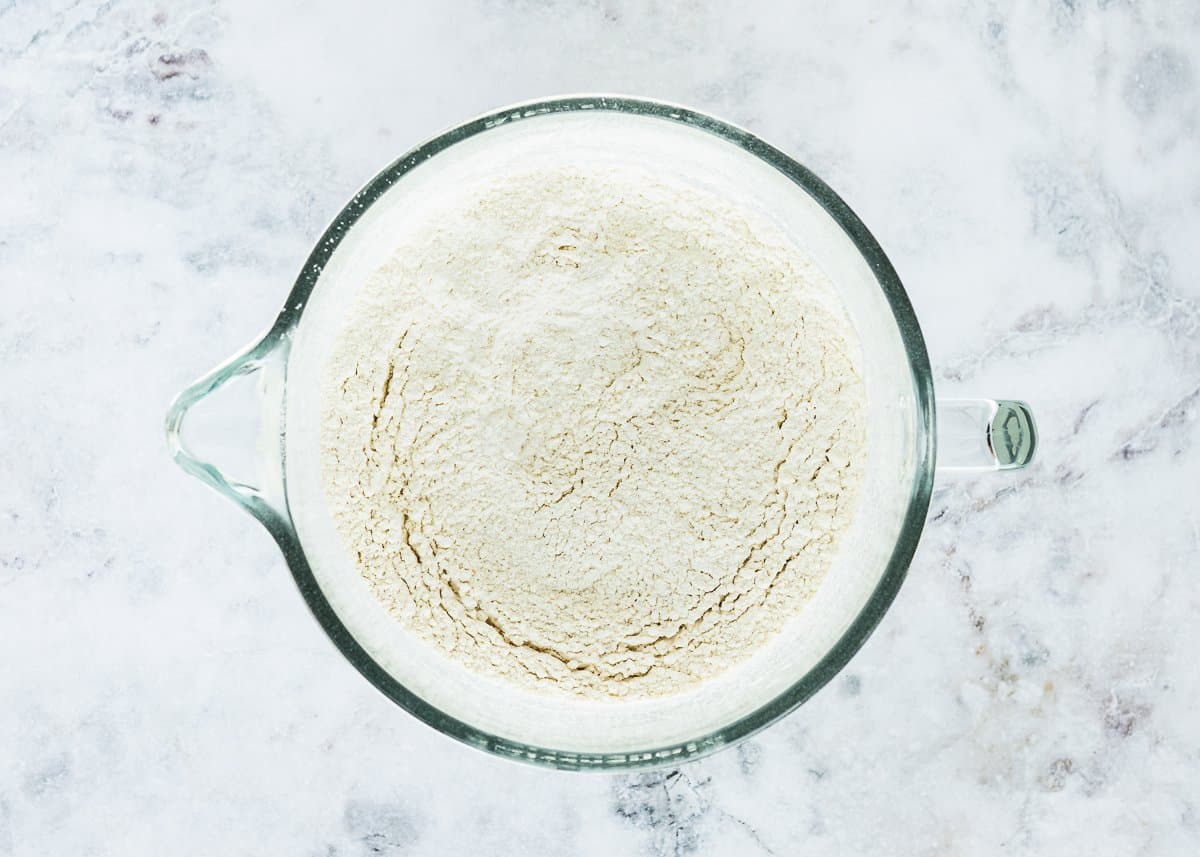
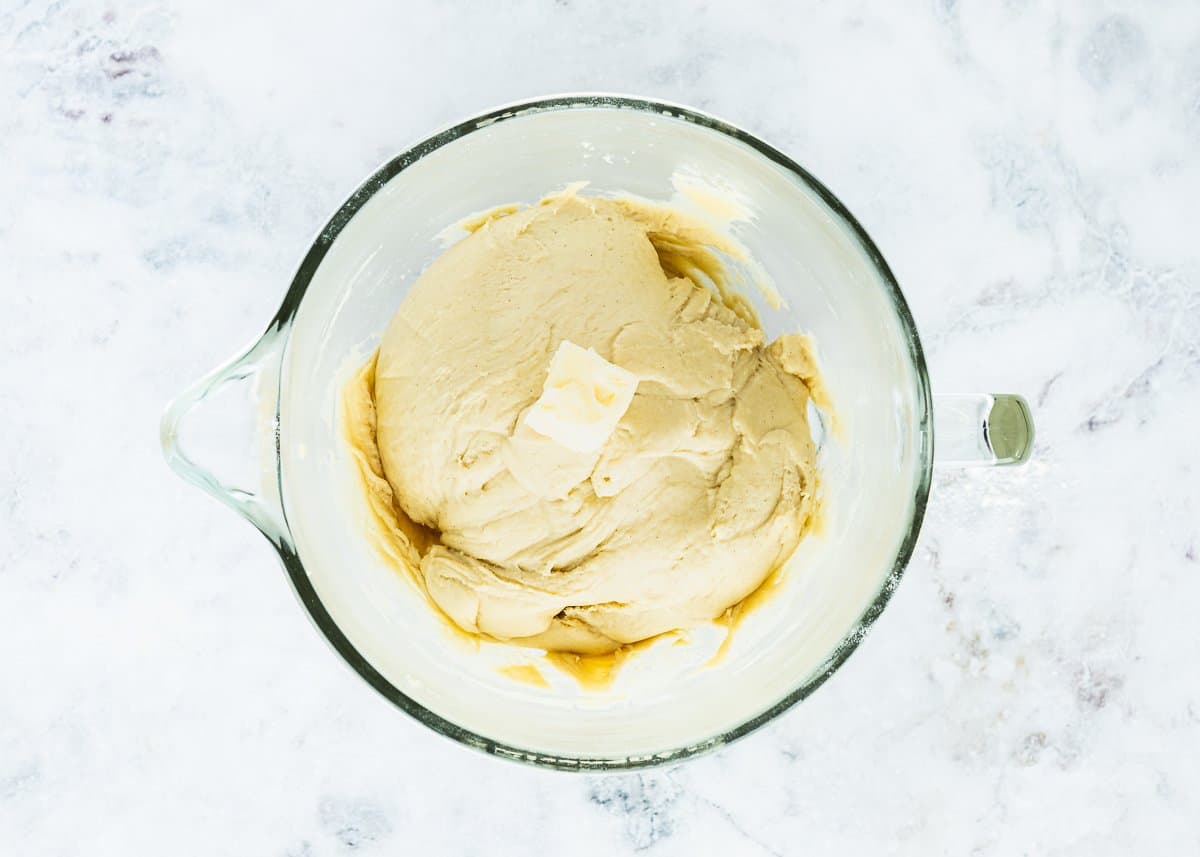
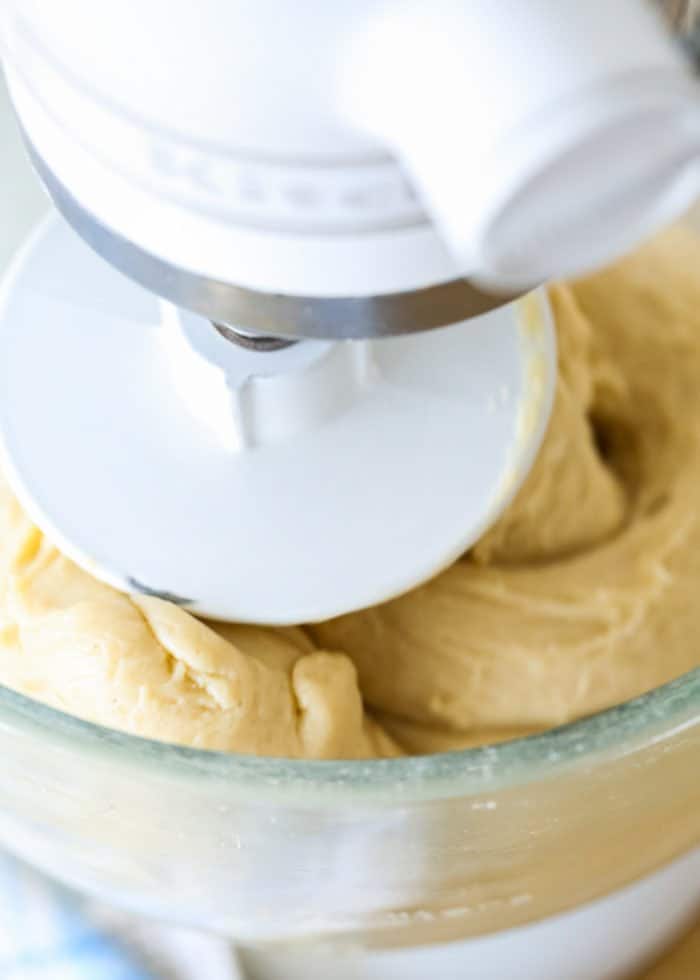
Toss the dry ingredients together in a mixing bowl and give them a stir. Add warm evaporated milk to the bowl with the flour mixture. Beat with a dough hook on low speed for 2 – 3 minutes until combined. Add the sweetened condensed milk and vanilla and mix with the dough hook until a dough forms. Keep mixing for 8 – 10 minutes, until the dough looks smooth and elastic. Then, add the butter with the mixer running, one tablespoon at a time, and make sure each piece incorporates before adding the next. I like to add one tablespoon of butter and mix for 2 minutes; I even set the timer on my phone to make sure I am mixing long enough. After adding all the butter, keep mixing the dough for 10 – 20 minutes, or until the dough passes the windowpane test.
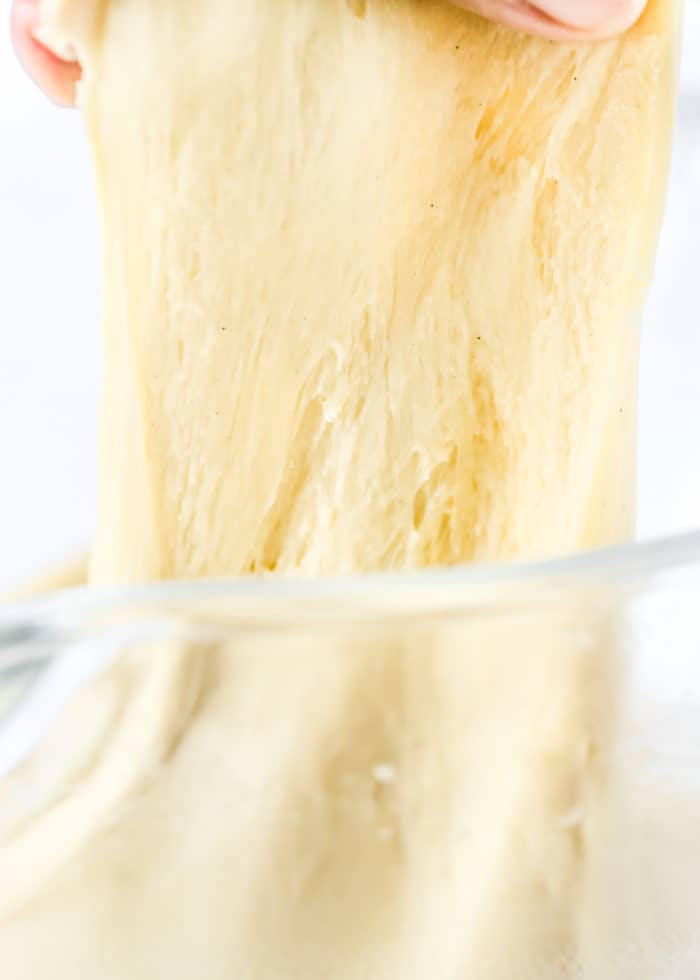
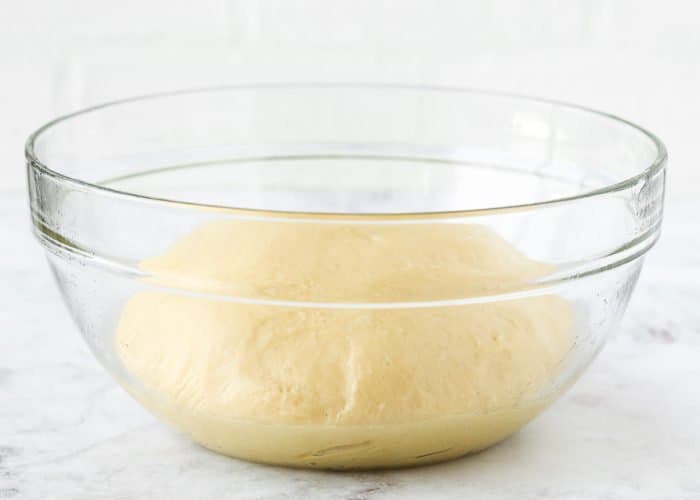
2 – First Rise
Roll the dough into a ball and place it in a lightly greased bowl. Cover and let it set in a warm place for 1 – 2 hours, or until double in size. The windowpane test is one of the best ways to tell if you’ve sufficiently kneaded your bread dough. If properly kneaded, the dough should stretch, without tearing or breaking, into a thin membrane that you can see through. It means that the gluten is well-developed, and your dough is ready to rise. To bake the same day: Once the dough has doubled in size, turn it out onto a floured surface and punch down the dough. To bake the next day: Once the dough has doubled in size, punch down to deflate the dough completely, then cover the bowl with plastic wrap and refrigerate overnight or for up to 48 hours.
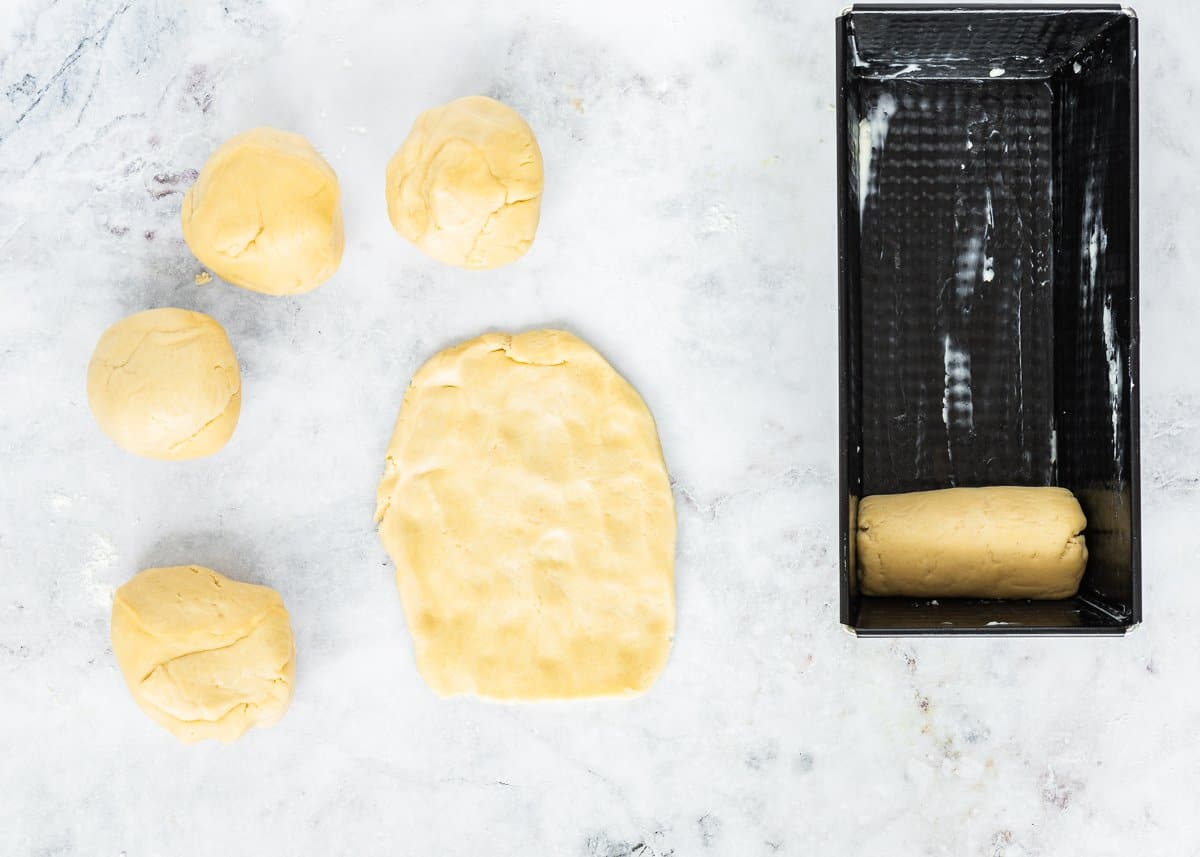
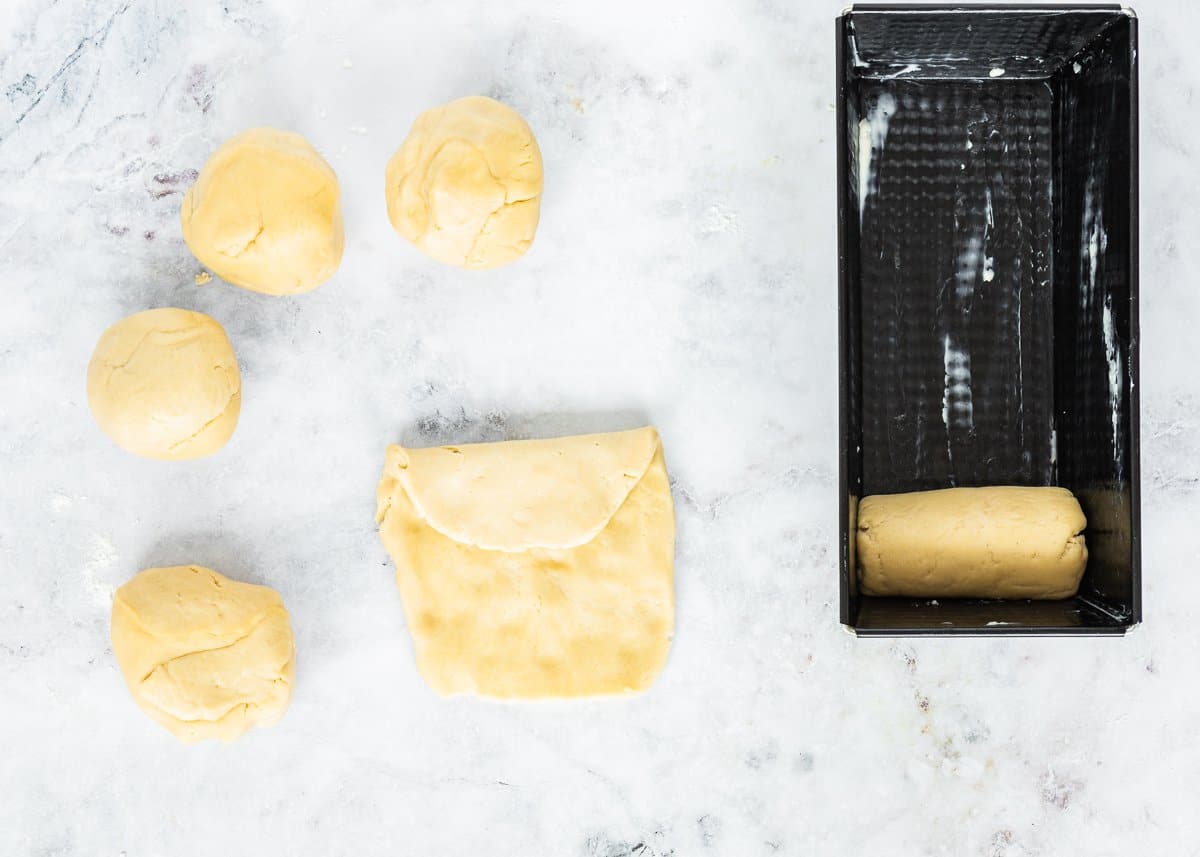
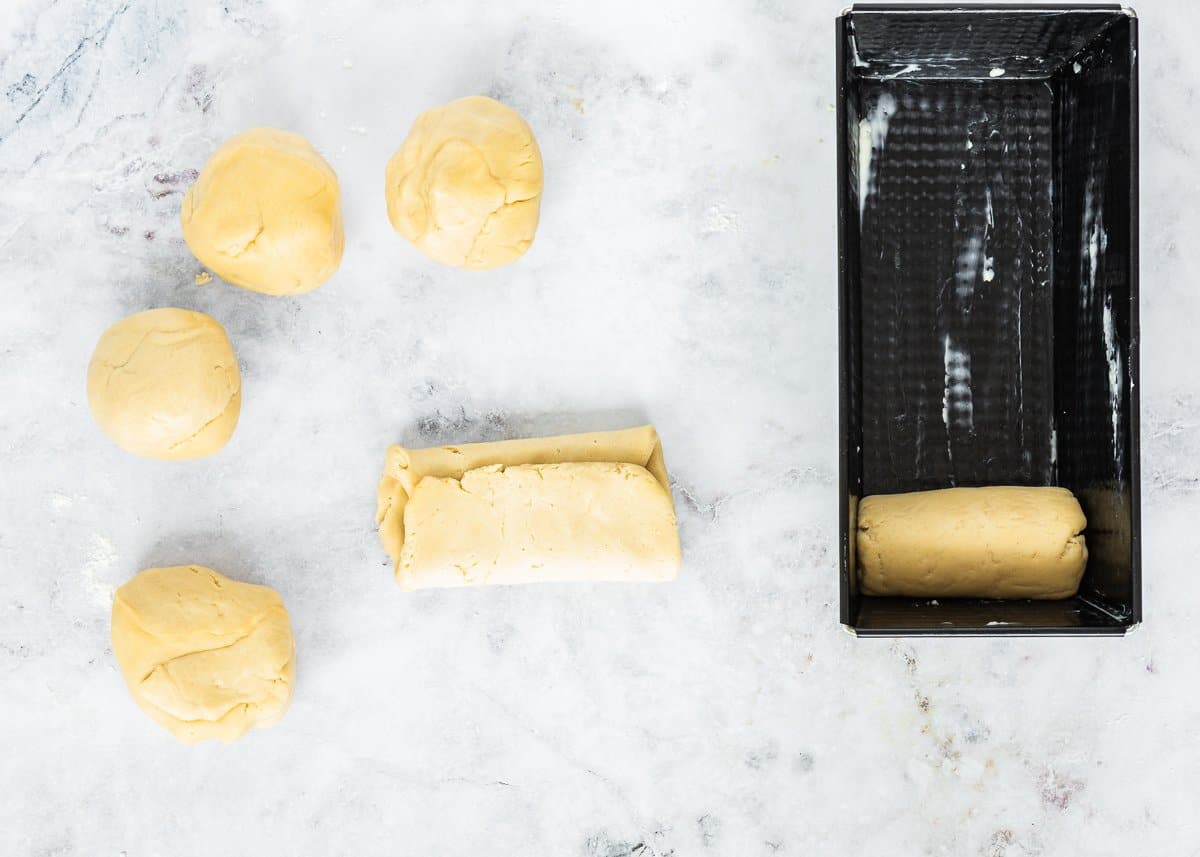
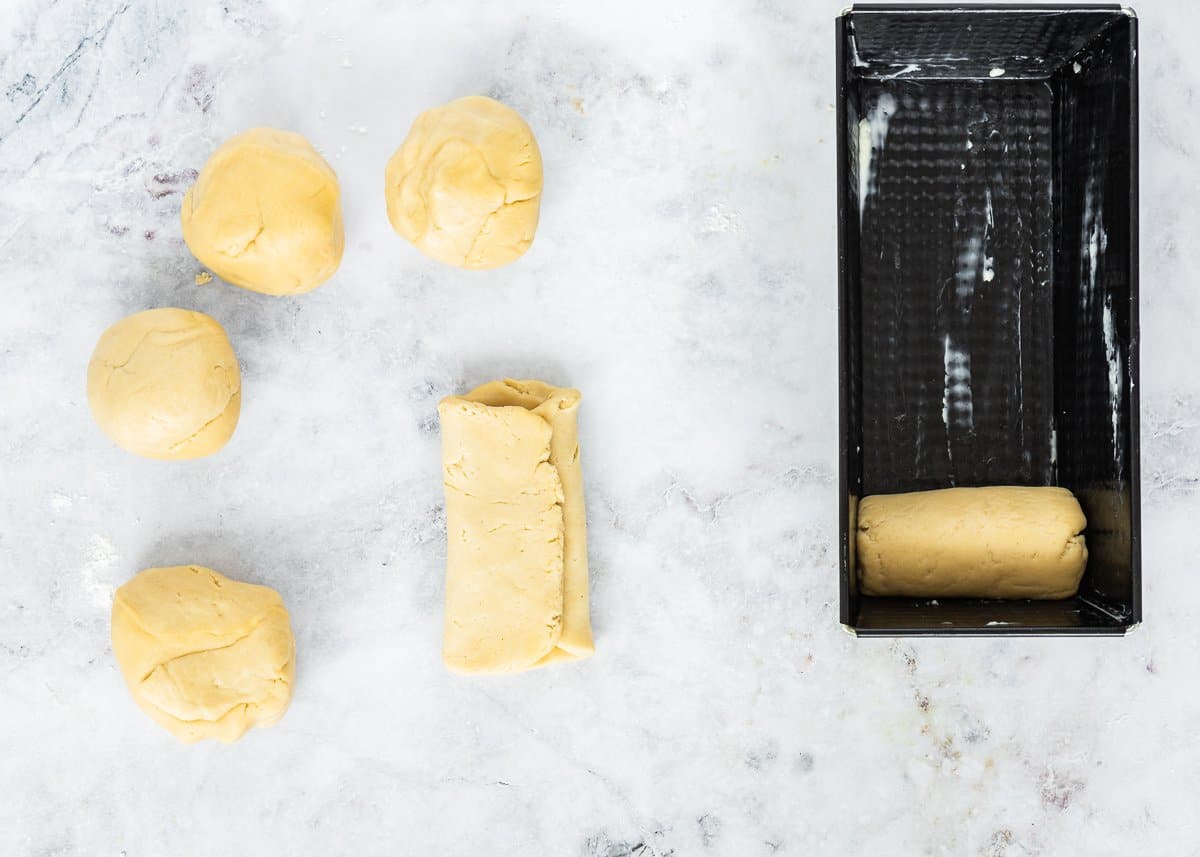
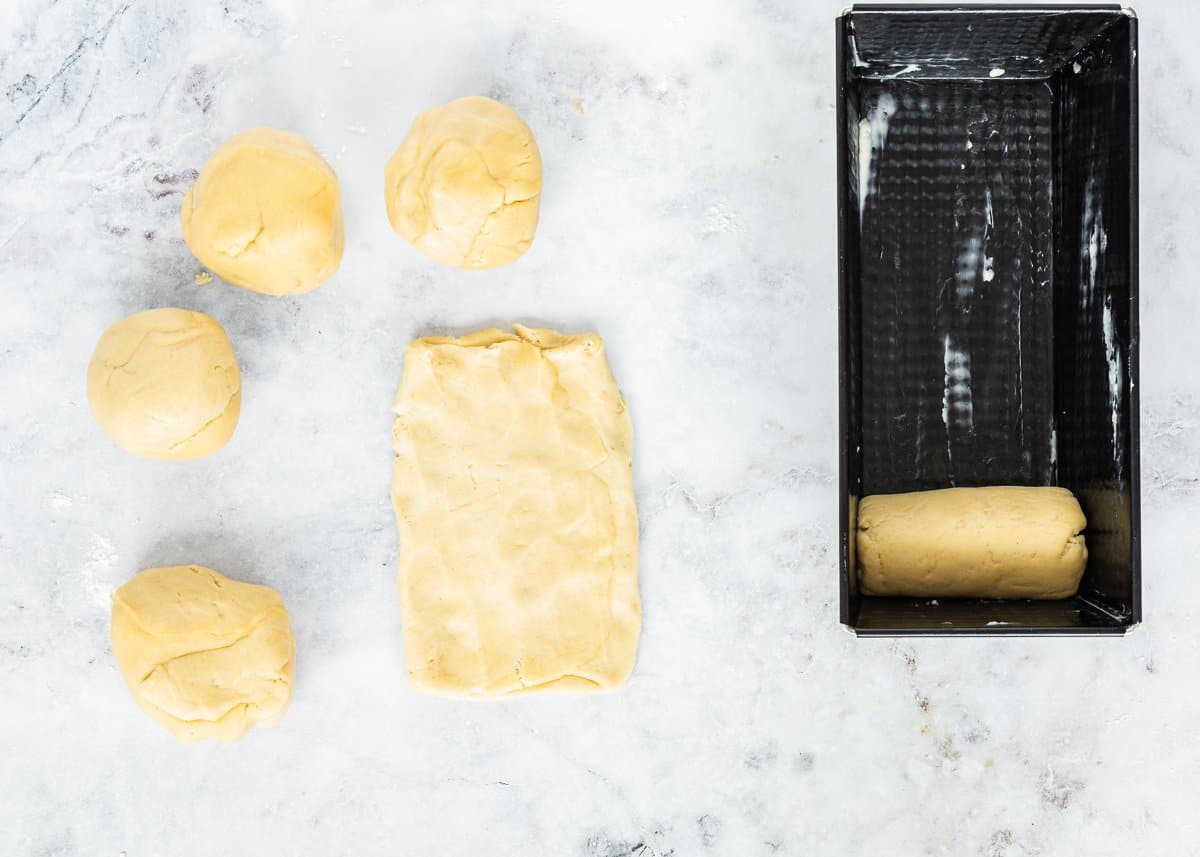
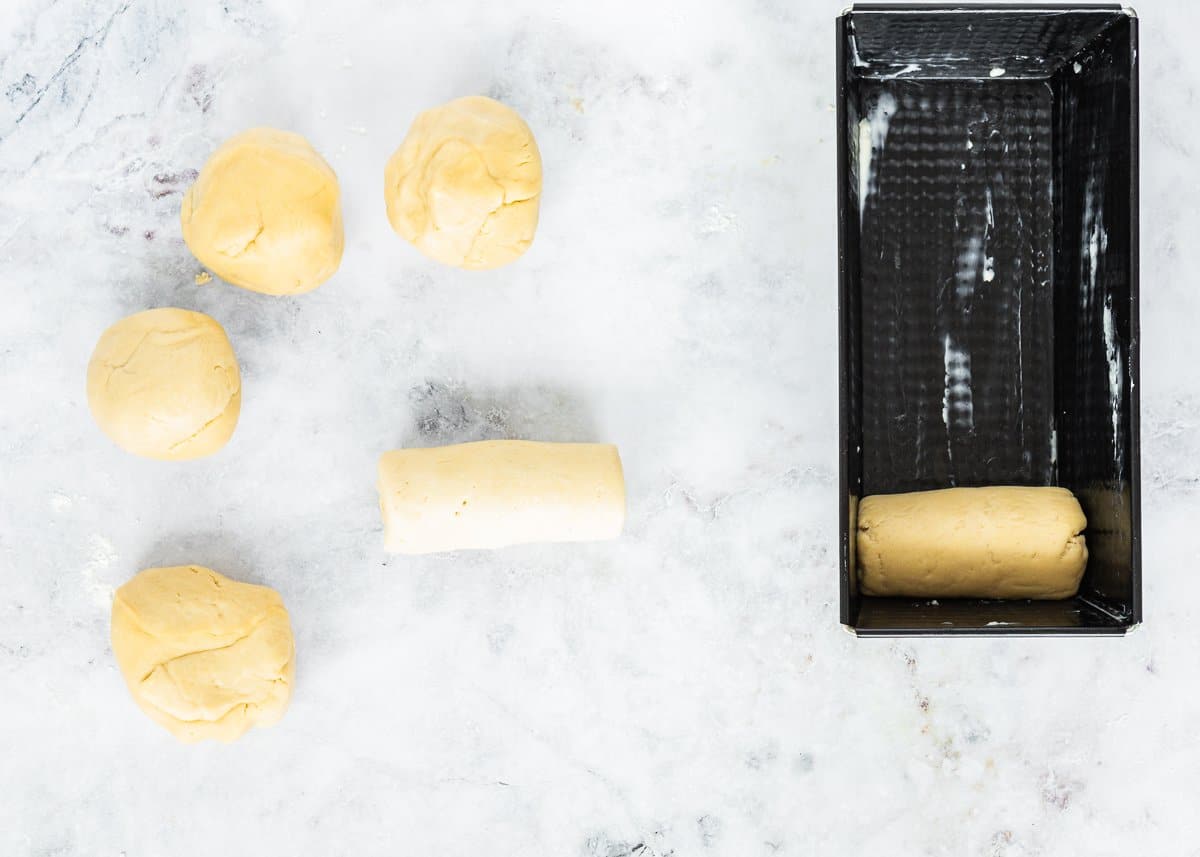
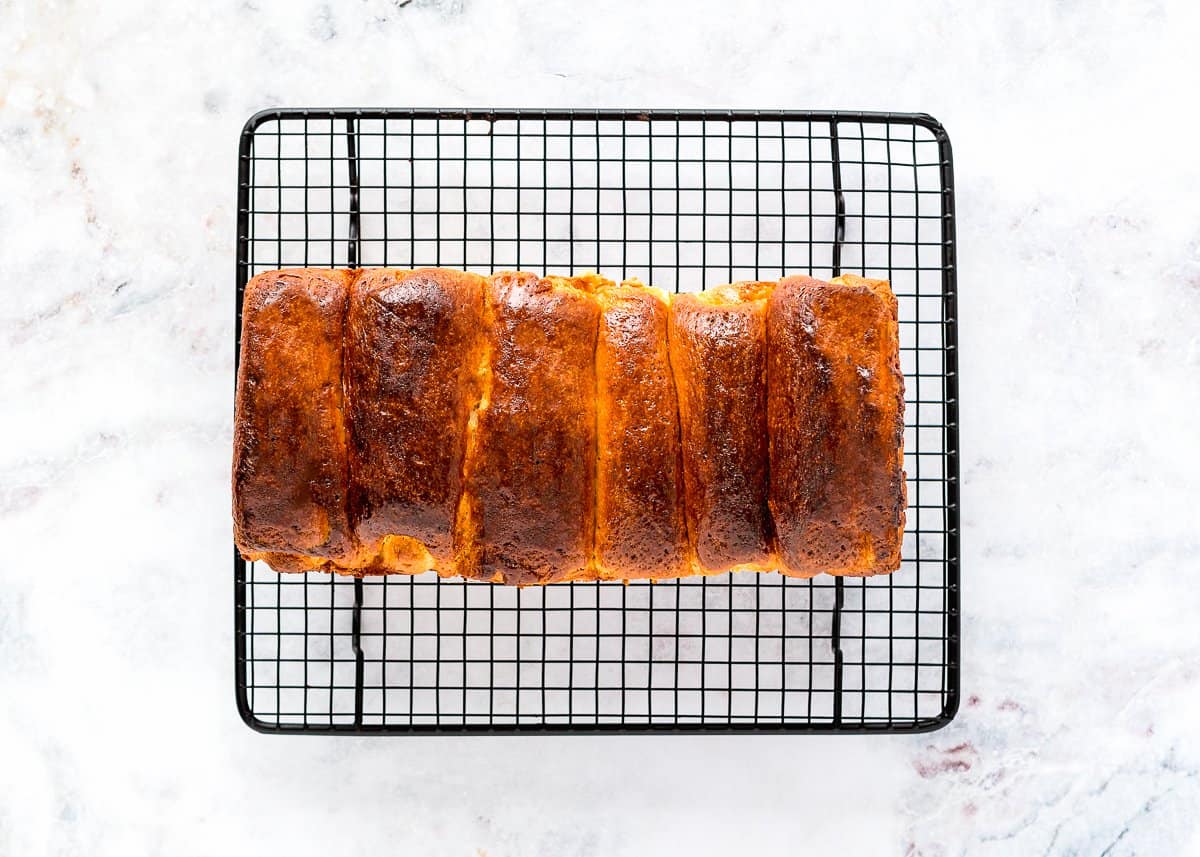
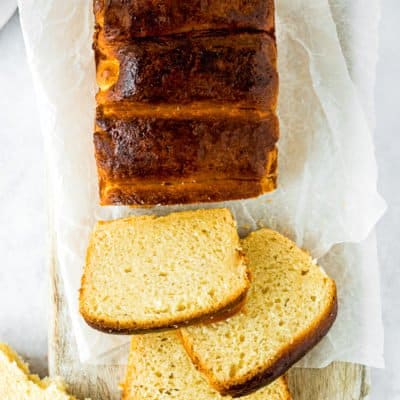
3 – Form The Loaf
There are many ways you can shape your brioche. You can make a plain loaf, a braided loaf, individual buns, etc…Totally up to you! Letter Fold Loaf: Divide the dough into six equal pieces (140 g each approx.). Flatten each piece into a rectangle, then fold short ends in towards each other. Flatten again and tightly roll into a log. Repeat with all pieces. Grease 8”-x-5” loaf pan with butter. Place 6 pieces of dough seam-side down in one straight row into each prepared pan. Cover. Braid: Divide the dough into three equal pieces (280 g each approx.). Roll the pieces out into long strands that are about 1 1/2 times as long as your pan. Pinch one of the ends together. Braid the three pieces together, and then pinch the other end together. Tuck the ends underneath and transfer the dough to a lightly greased loaf pan. Cover. Mini Buns: Divide the chilled dough into 12 pieces (70 g each approx.) to make mini brioche buns. Place individual balls over a baking tray. After arranging the dough balls on your baking trays, flatten them slightly. Cover the buns loosely with plastic wrap. This is important to prevent skin from forming on the dough, as it rises. NOTE: If you refrigerate the dough overnight, it might be a bit stiffer to work with, so you can use a rolling pin to help shape it into the desired width and length.
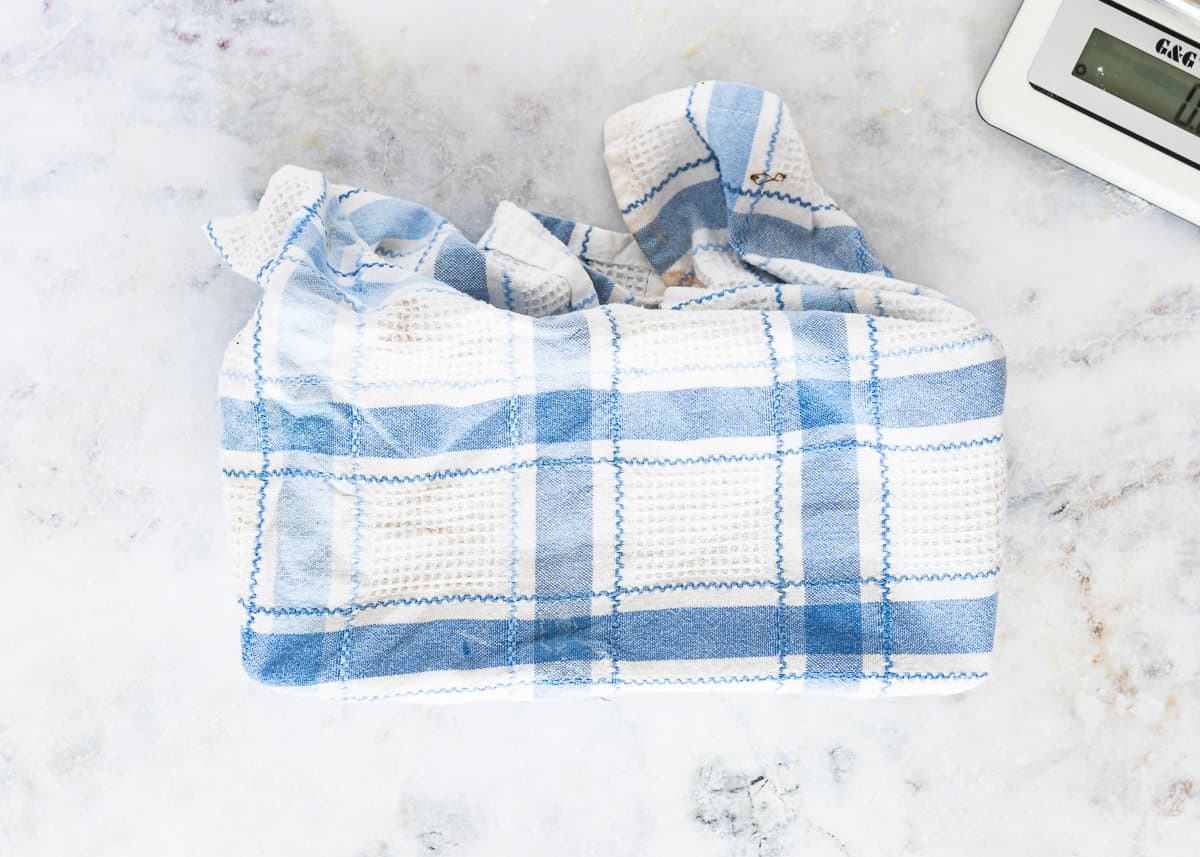
4 – Second Rise
Cover the shaped bread and let it set in a warm place for 1 hour, or until double in size. This process might take longer depending on the temperature of the dough. If you refrigerate the dough overnight, the second rise can take up to 3 hours. Be patient! The second proof is important to get a beautifully risen, airy, and light bread loaf. If you under-proof the bread dough, you’ll end up with a smaller bread loaf that is denser and has less volume. How To Know When Your Bread Loaf Is Ready to Be Baked The bread is ready to bake when it has doubled or tripled the size, and when you press into the dough with your finger, an indentation is formed, and it remains. If the dough bounces back without leaving an indentation, then the dough is under-proofed. If the indentation causes the dough to deflate, then the dough has over-proofed, and you may need to re-knead and re-form the dough and proof it once again.
5 – Bake
Preheat your oven to 375º F (190º C) and place the oven rack in the lower half. If your bread is too close to the top of the oven it will get too brown. Eggless “Egg” Wash: Mix 2 tablespoons of sweetened condensed milk + 2 tablespoons of melted butter in a bowl. Brush the surface of the loaf with eggless “egg wash”. Bake for 30 to 35 minutes, tenting with foil after 15 to 20 minutes. The internal temperature should read between 180ºF-190ºF, and up to 205°F for a crustier loaf. OPTIONAL: Mix 2 teaspoons of sugar with 1 tablespoon of water until the sugar is completely dissolved. As soon as the bread comes out of the oven, brush it with the sugar mixture to give it that shiny finish. Take out butter a few hours before you begin to soften. The butter is soft enough when you press it with your finger, and you would easily leave a mark with no resistance. Make sure the sweetened condensed milk is at room temperature. And the evaporated milk is warmed to 100ºF/38ºC. Add the butter slowly! If you add the butter too fast, it will not “emulsify” into the dough and result in an oily, broken dough. I recommend adding one tablespoon at a time and mixing for 2 minutes before adding the next. This dough requires an extensive amount of mixing, so doing this by hand will result in a very long, very arduous process. A stand mixer is highly recommended to knead the dough until smooth and velvety. Do NOT use a hand mixer – it will be too much of a strain on the motor. Stay near the mixer! You might have to hold it in place as it might start dancing across your countertop with so much mixing.
Freeze your Eggless Brioche bread for up to a month. Before freezing, wrap the bread tight with plastic wrap. To serve, thaw to room temperature and reheat as desired.
More Egg-Free Bread Recipes You’ll Love!
If you love my Eggless Brioche, here are a few more eggless bread recipes that I think you’ll enjoy!
Homemade Eggless Monkey BreadSoft No-Knead Eggless Dinner RollsEggless Homemade Hawaiian RollsEggless Honey Whole Wheat RollsEasy Eggless Cinnamon Rollsmore eggless bread recipes…
You’ve asked, and I’ve answered! Read on for a handful of answers to the most frequently asked questions about eggless baking. Originally posted in April 2021, the post content was edited to add more helpful information, with no change to the recipe in July 2022.