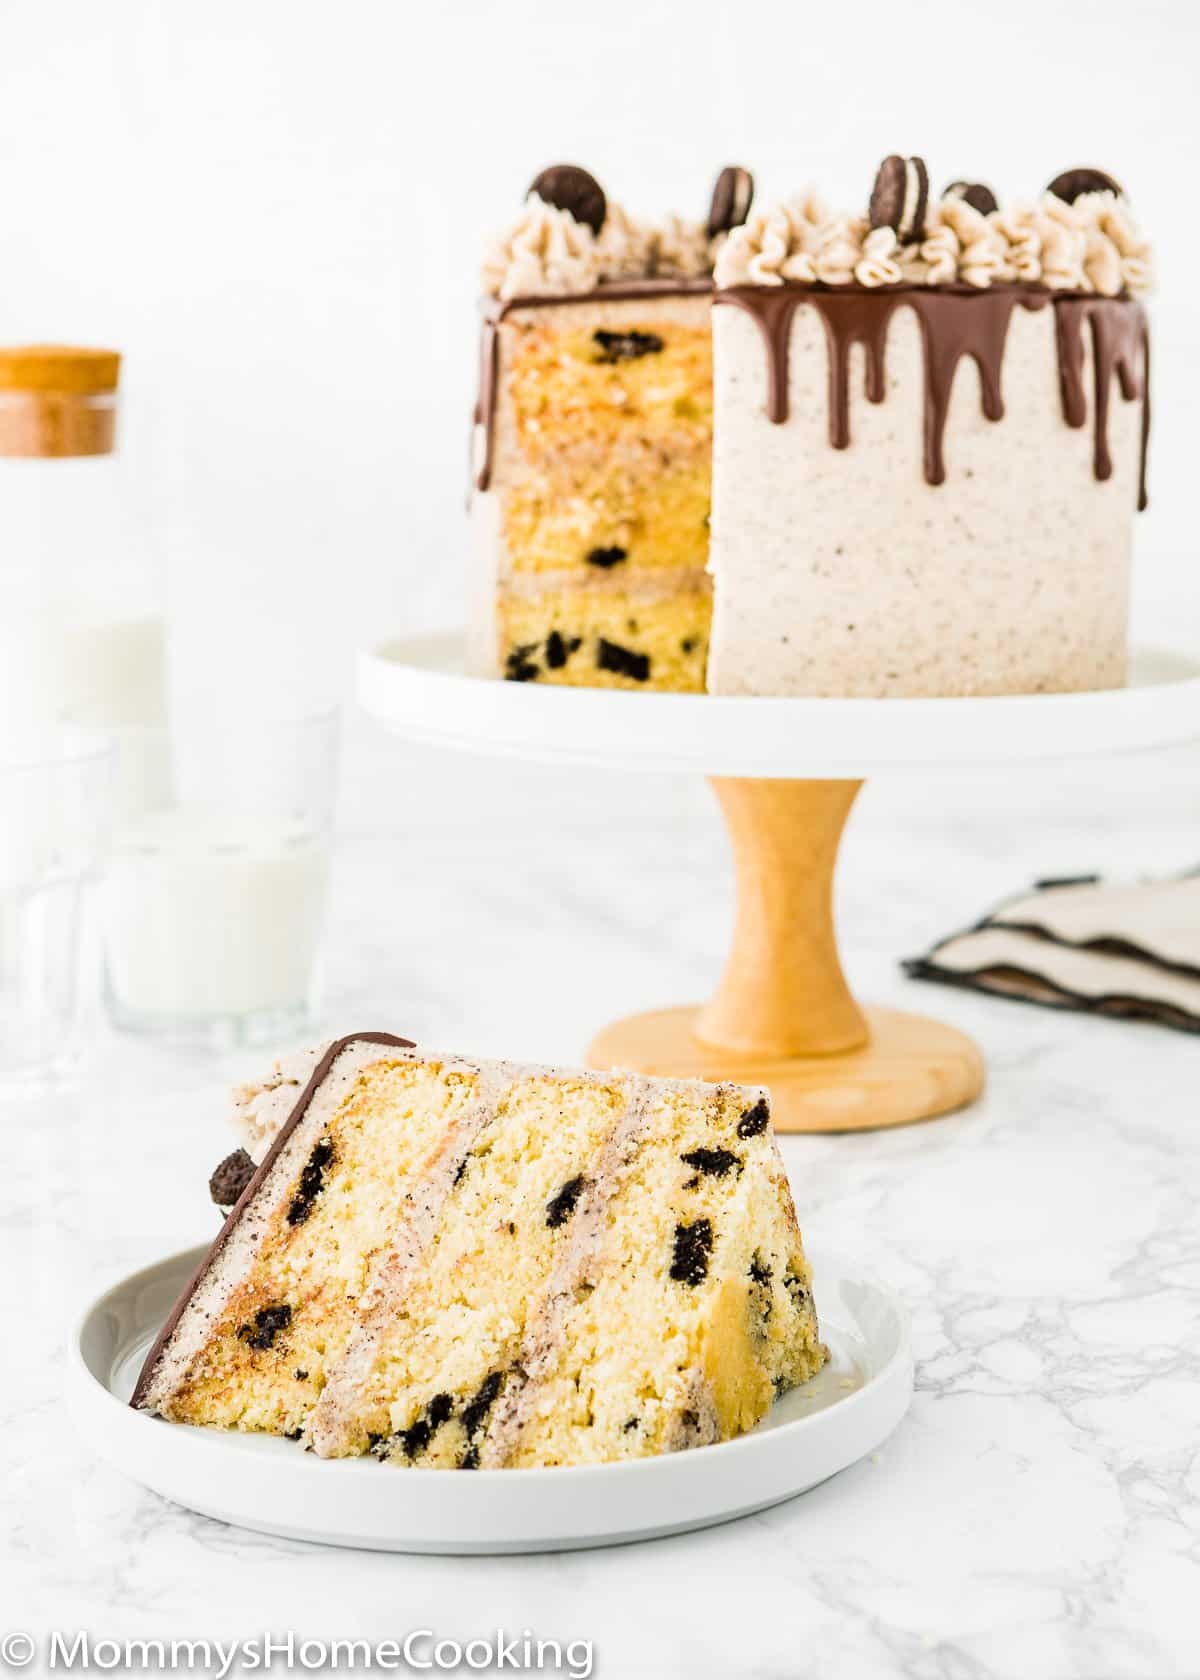
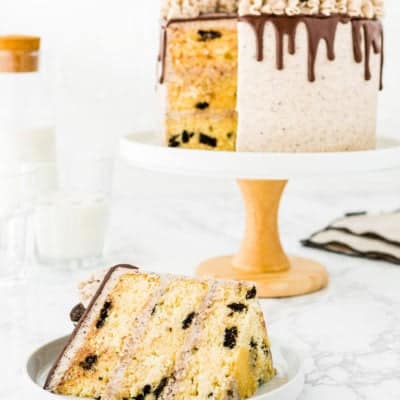
This Oreo cake is beyond delicious! You’ll love this fluffy, made-from-scratch egg-free cake filled with cookie pieces and covered with a to-die-for Oreo buttercream.
Easy and Fluffy Eggless Oreo Cake Recipe Highlights
It’s soft and buttery. The texture is amazingly light, springy, and fluffy.Plenty of sweet Oreo cookies.The cake batter doesn’t require anything complicated.It’s made with simple ingredients.
Pro Tip: If you want to store it for later use, I recommend not adding the crushed Oreos; add them only when you are ready to use the buttercream. Otherwise, the cookies will lose their crunchiness.
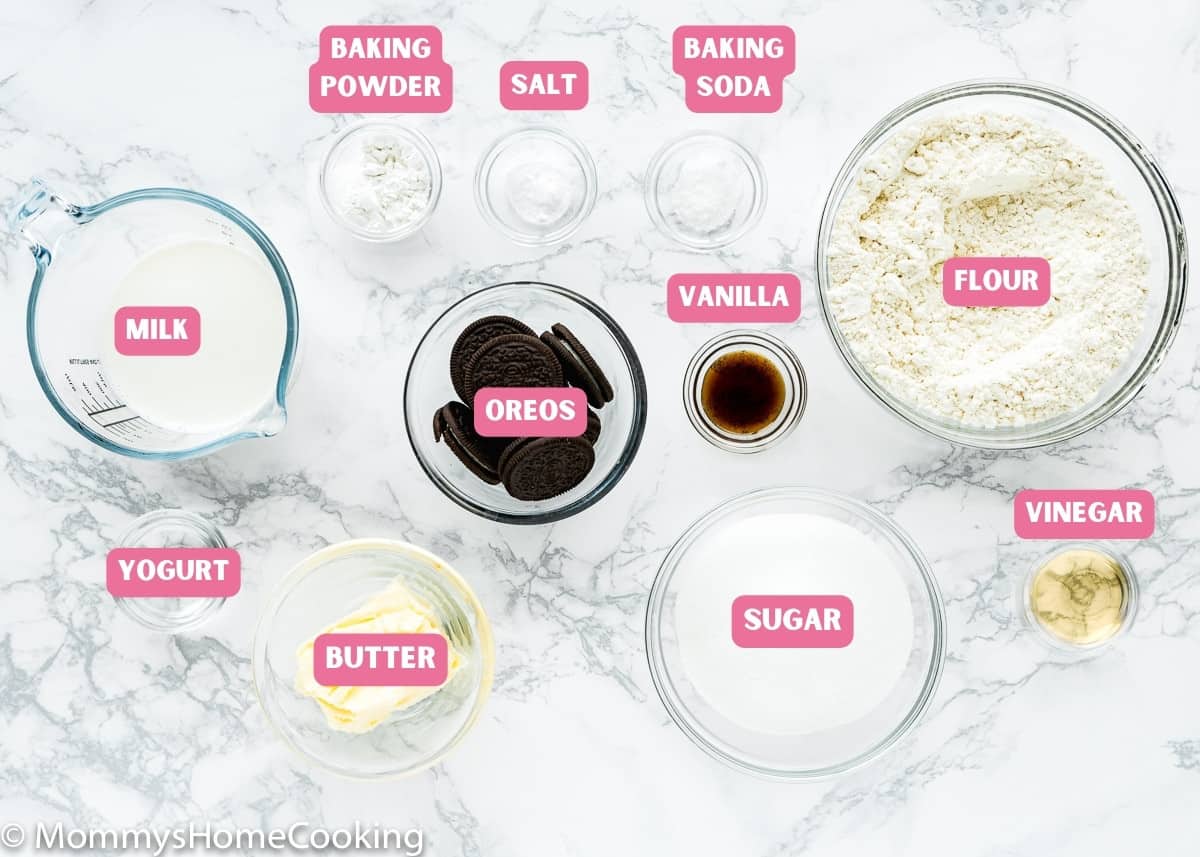
Flour: Standard all-purpose flour works best here, skip the cake flour, bread flour and wheat flour.Baking powder & Baking soda: Make sure they’re not expired.Salt: I prefer kosher or sea salt. If you only have table salt handy, I recommend reducing the amount to half.Milk: For baking, I like to use whole milk. However, you can use any milk you have handy.Vinegar: You can also use apple cider vinegar or white vinegar.Butter: I prefer to use unsalted butter, but if you only have salted butter handy, you can use it. In this case, skip the salt called in the recipe.Sugar: Regular white sugar, also known as caster sugar. Yogurt: You can substitute plain yogurt for plain sour cream. I recommend using the full-fat versions. If sour cream is difficult to find in your country, learn How to Make Sour Cream at Home.Vanilla: For optimal flavor, reach for pure vanilla instead of imitation. Even better, try homemade vanilla extract!Oreo cookies: I recommend scraping the cream filling from the Oreos, since it will melt during the baking time and leave big holes in the cake. You can discard or save the cream to mix into your frosting.
1 – Mix Dry Ingredients
Sift the flour, baking powder, baking soda, and salt together into a large bowl.
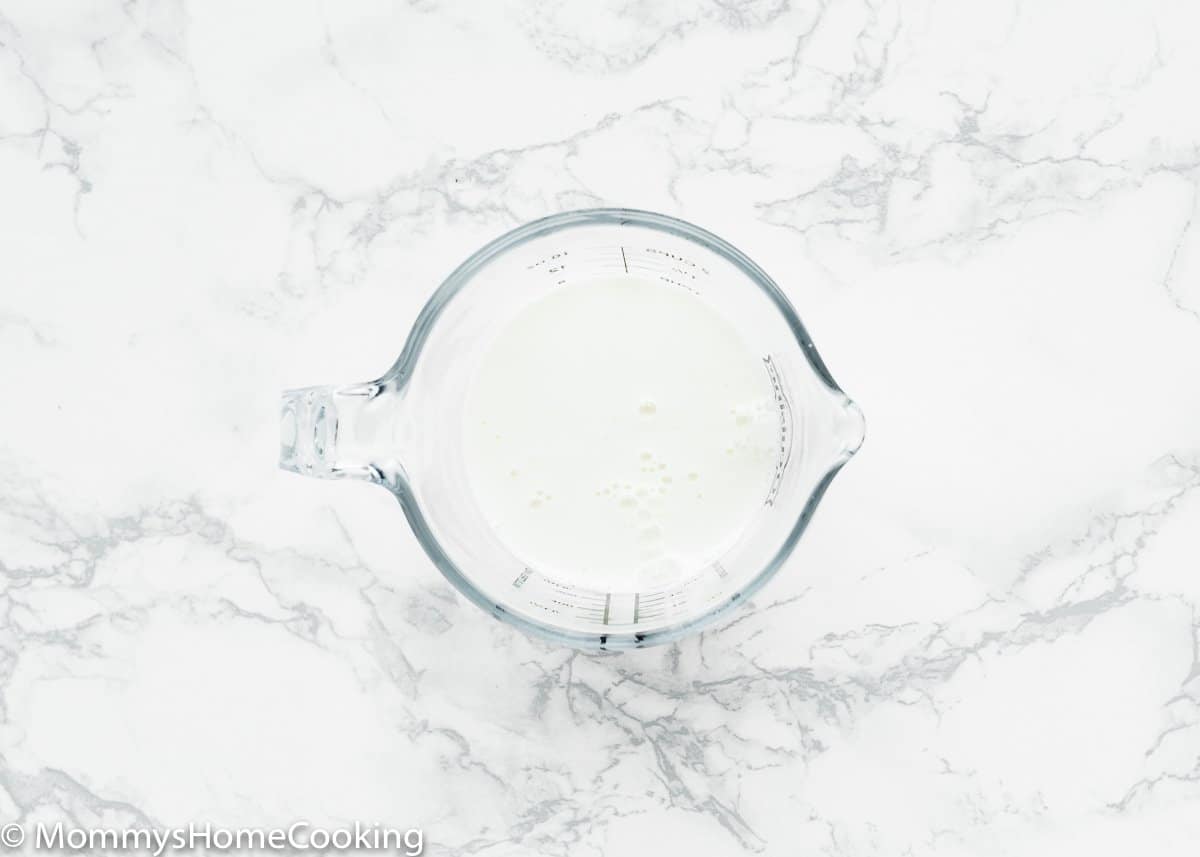
2 – Combine Milk and Vinegar
In a mixing bowl or liquid measuring cup, combine the milk and vinegar. Let the mixture rest for 5 to 8 minutes, until thickened and curdled.
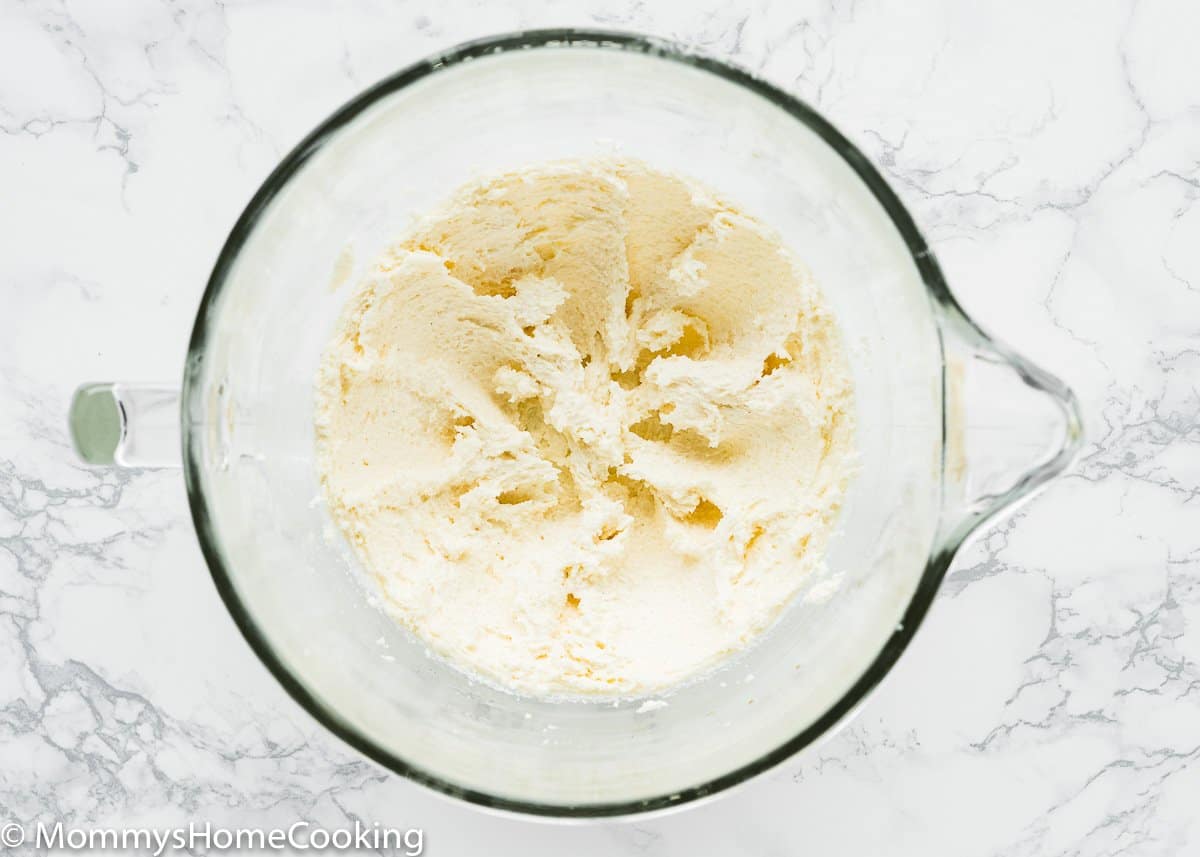
3 – Cream The Butter and Sugar
Using an electric hand mixer or a stand mixer, beat the butter and sugar until creamed and pale, scraping down the sides and up the bottom of the bowl with a rubber spatula as needed. Then add the yogurt and vanilla; continue beating.
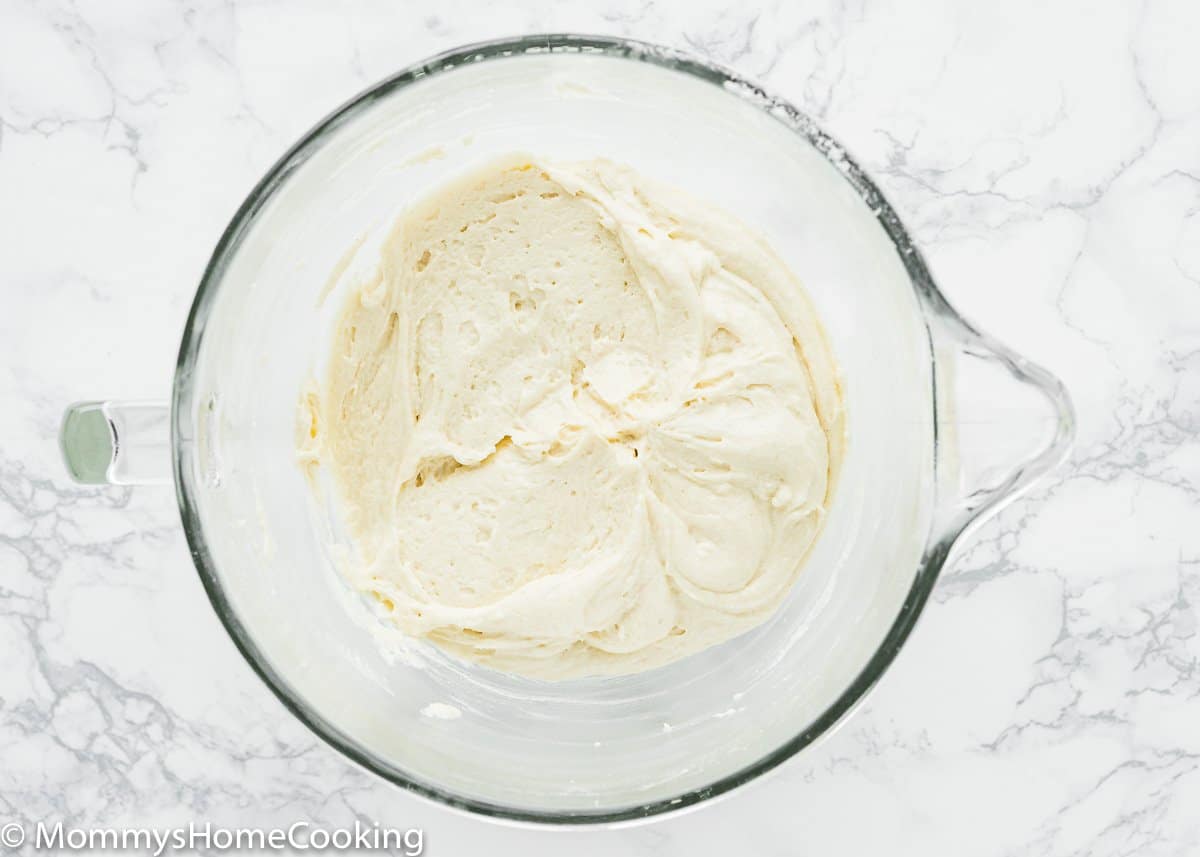
4 – Add Dry Ingredients and Milk
Add the flour mixture in three batches, alternating with the milk mixture, beginning and ending with the flour mixture.
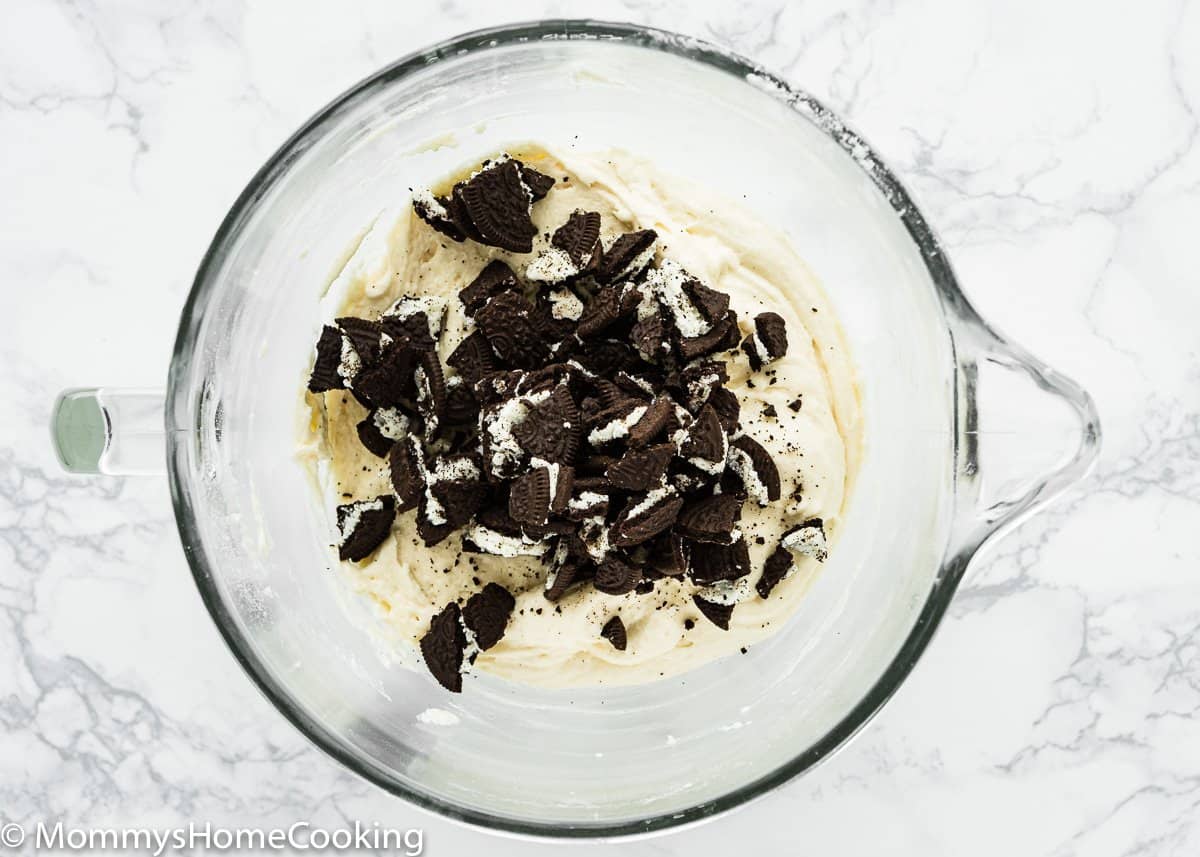
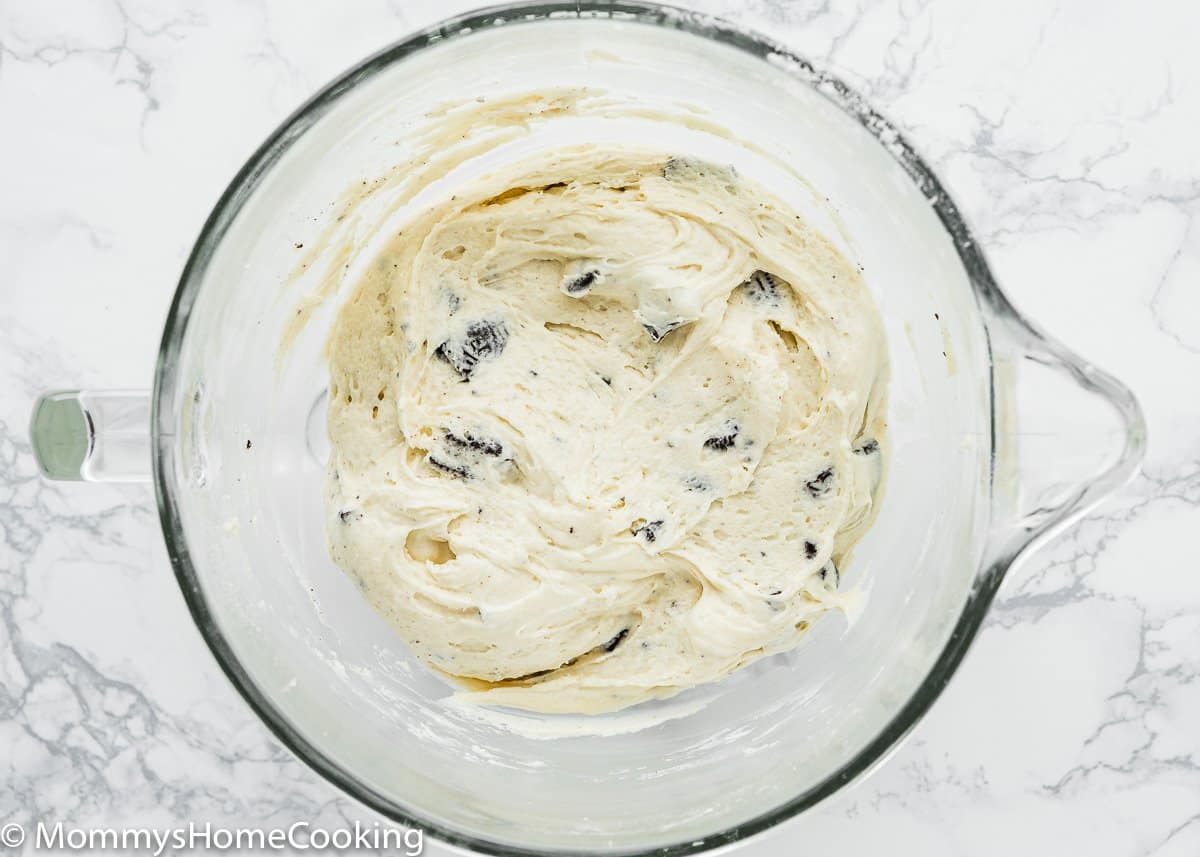
5 – Add the Chopped Oreos
Fold in the crushed Oreos.
6 – Divide The Batter & Bake
Evenly divide the batter among the prepared pans. Bake until a toothpick inserted in the center comes out clean.
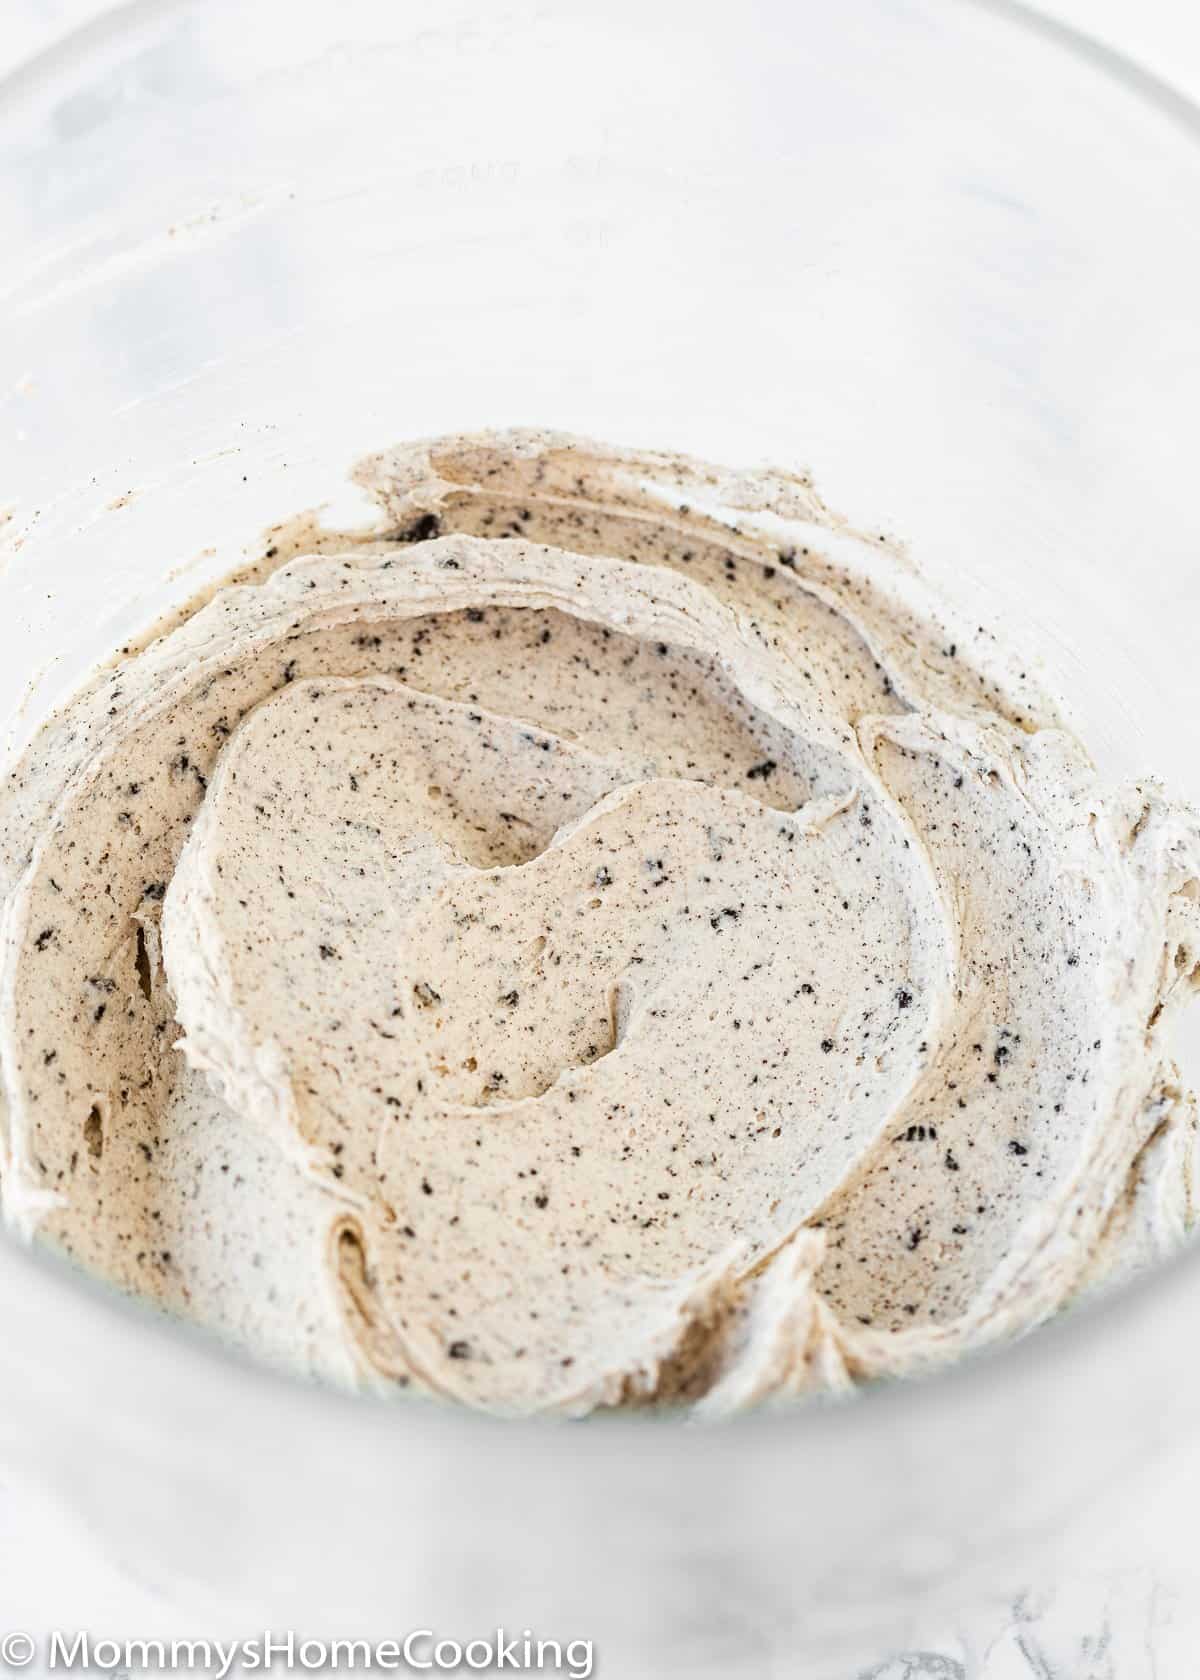
7 – Make The Buttercream
Using an electric hand mixer or a stand mixer on medium speed, beat the butter until smooth and creamy, 3 to 4 minutes. Add the confectioners’ sugar, and keep mixing until incorporated. Add the milk, vanilla, and salt; beat on low speed for 1 minute, then increase the speed to medium-high and beat for 4 to 5 minutes until the frosting is smooth, fluffy, and spreadable, scraping down the bowl once or twice. Add the crushed Oreos and whip until smooth.
Storing & Freezing Instructions
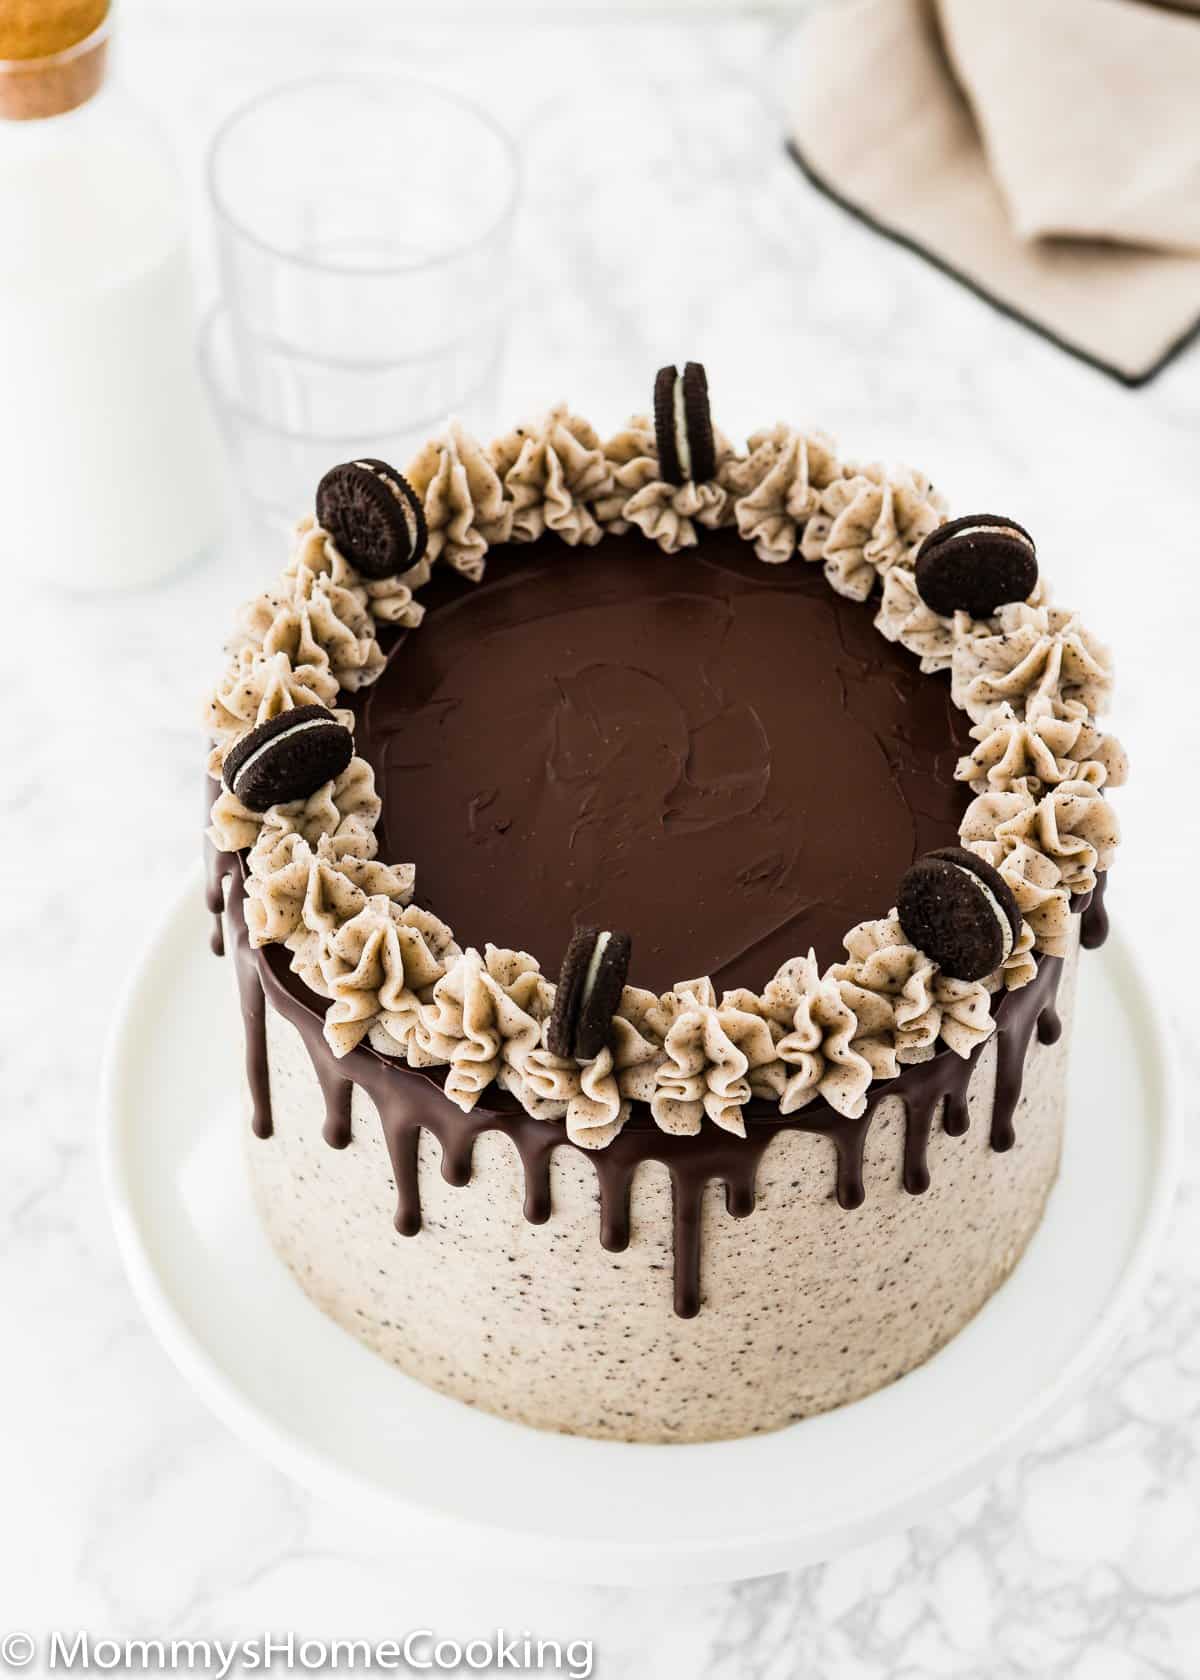
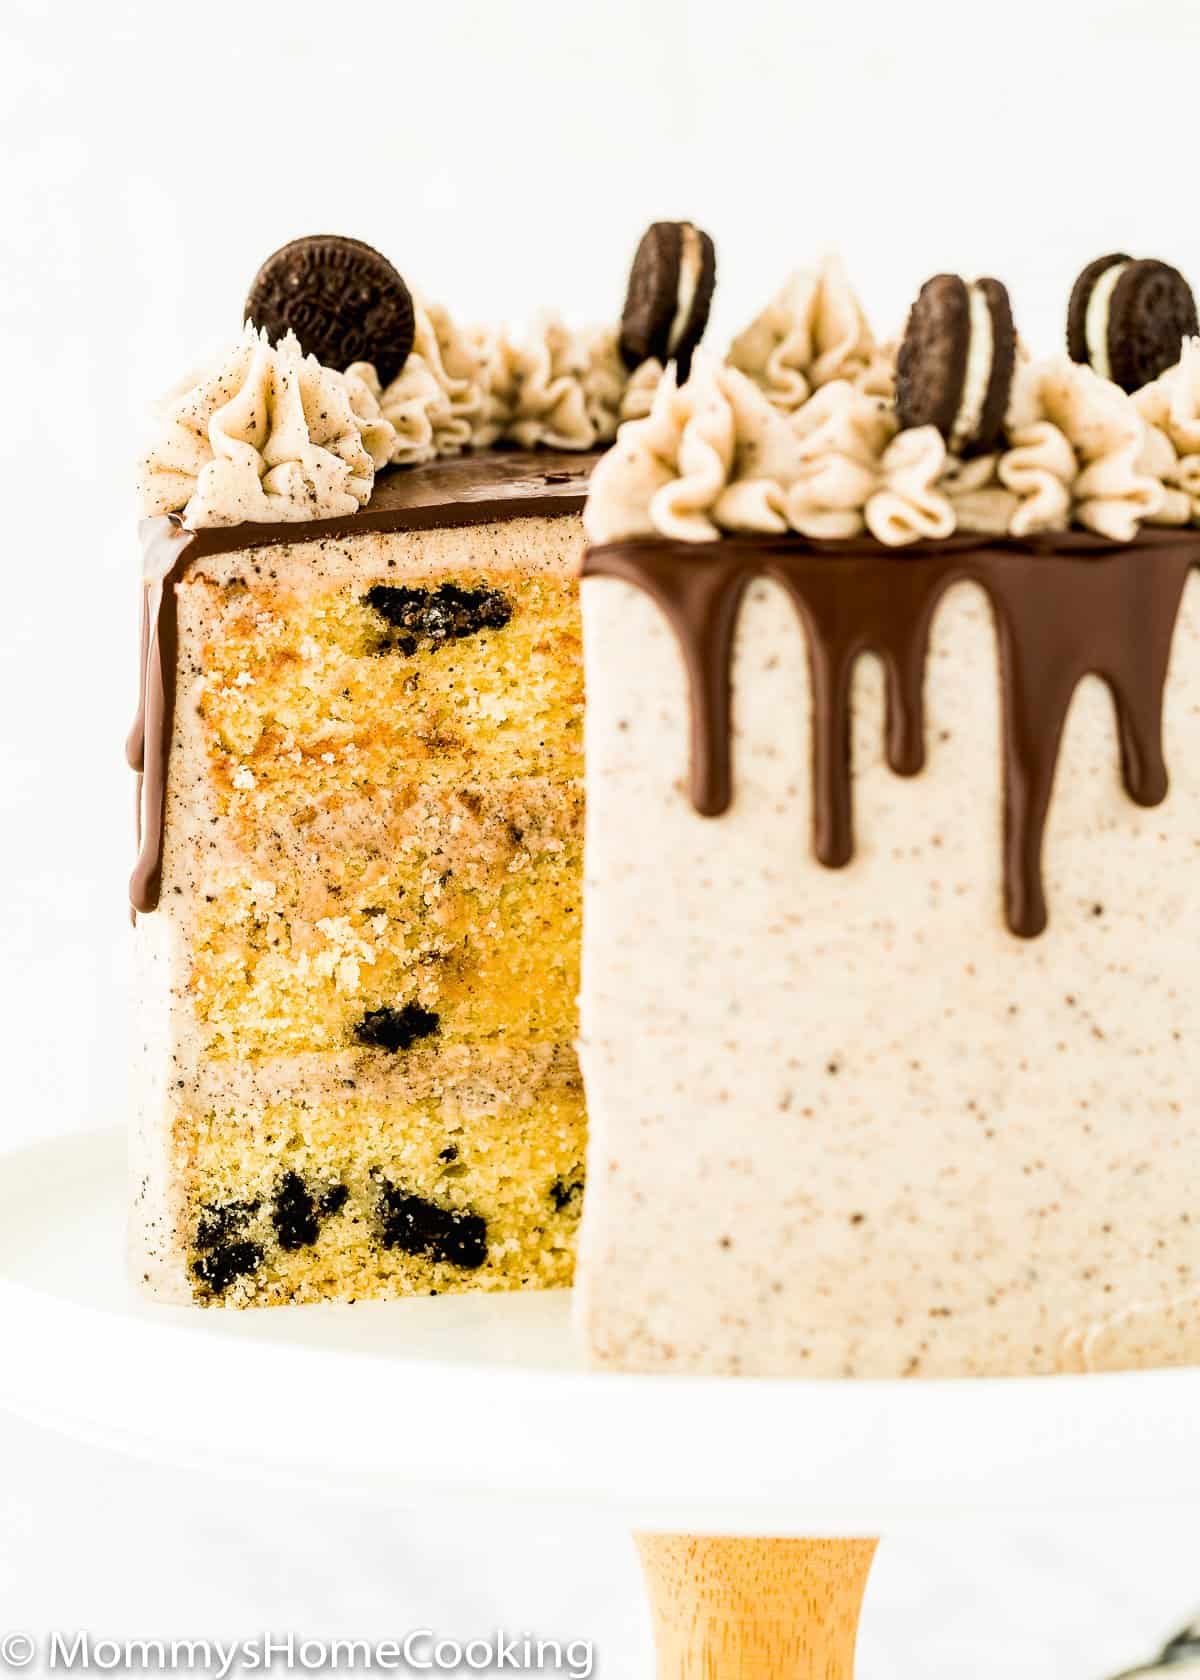
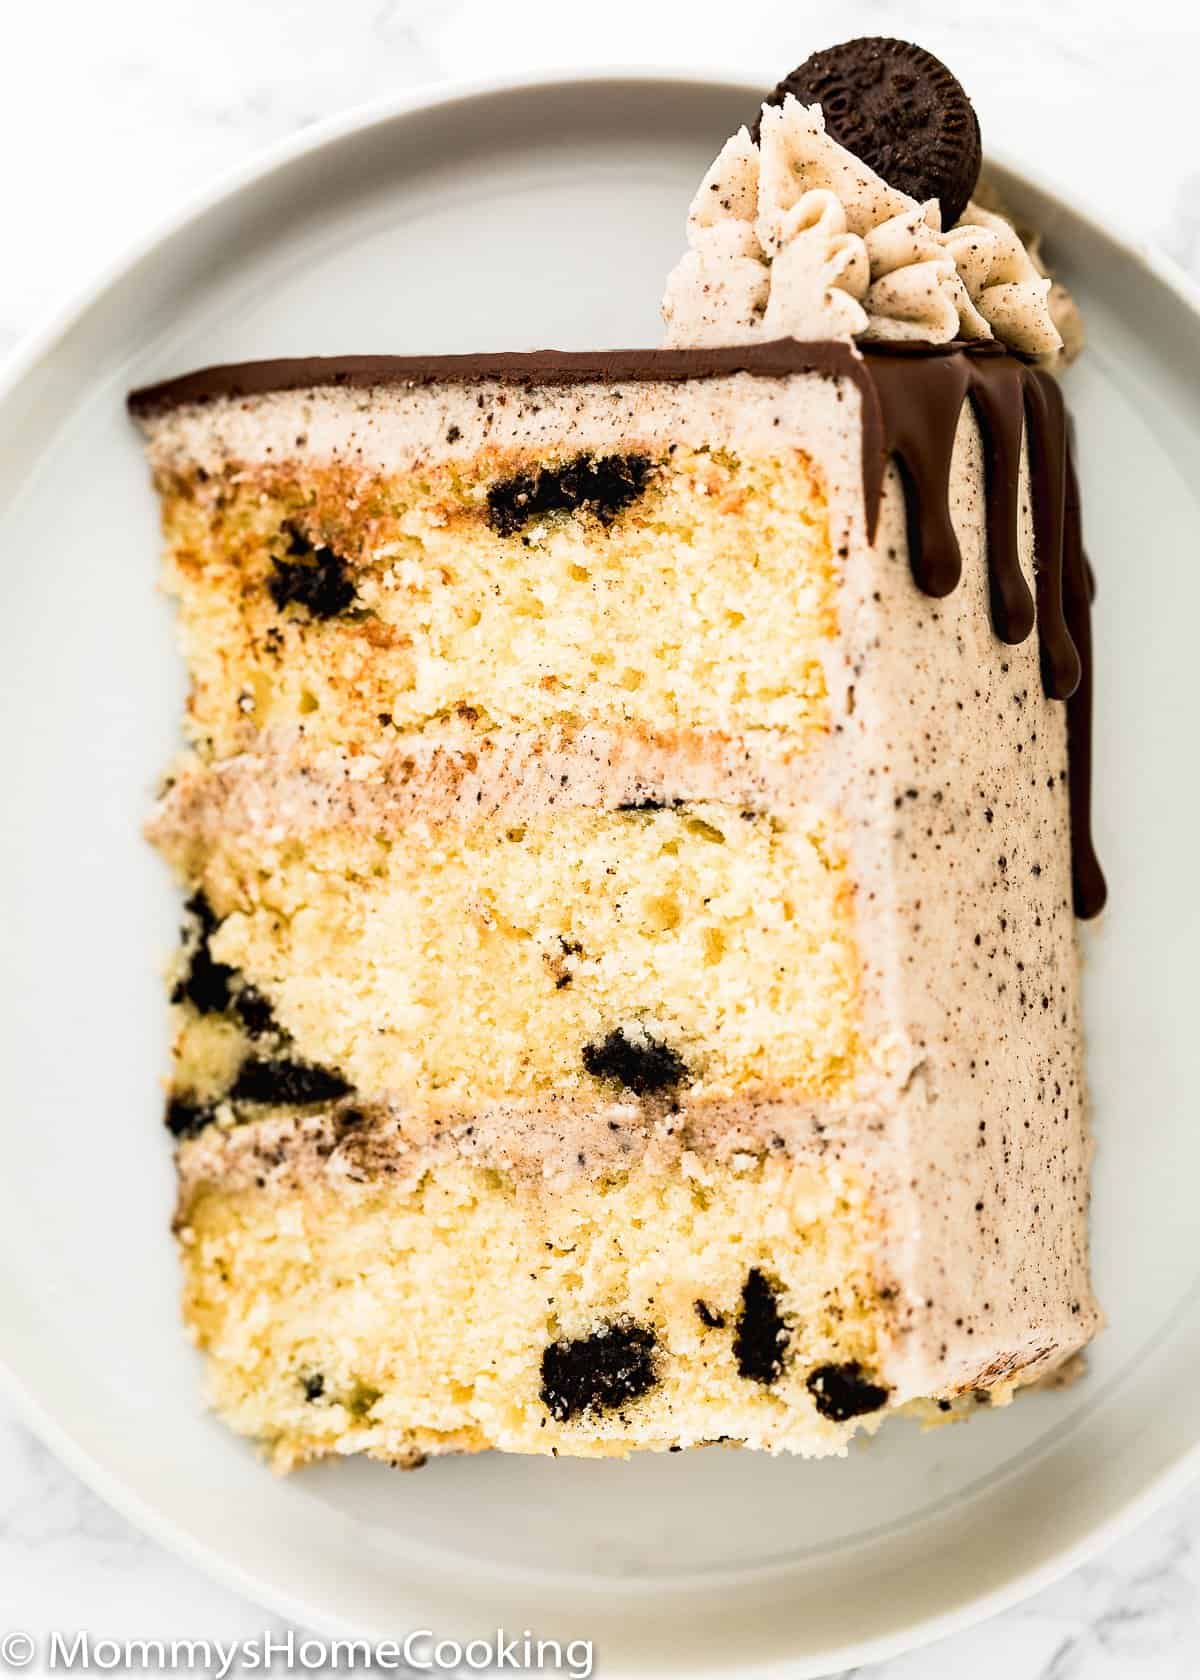
Unfrosted cake layers can be stored at room temperature for up to 2 days. A frosted cake can be stored at room temperature for up to 2 days or in the refrigerator for up to 5 days. This time, I frost the cake with Oreo Buttercream and then added a ganache drip on top. Finished it up with a few buttercream swirls and mini-Oreos. For a simple look, frost the cake with buttercream and add more chopped Oreos on top. To know more about how to assemble cakes, check out my How To Stack A Layer Cake For Beginners post. The Oreos for the cake batter must be just roughly chopped. I do this by hand, so I make sure they are not super small. You can also put them in a Ziploc bag and whack ’em with a rolling pin. The Oreos for the buttercream must be crushed until super-fine crumbs, I like to use a food processor. Otherwise, when you pipe the swirls on top, the cookie pieces will clog the piping tip. After adding the chopped Oreos to the cake batter, don’t over-mix or you’ll end up with a grey cake. Measure the ingredients correctly. I highly recommend using a kitchen scale. Don’t be intimidated by using a kitchen scale for baking. It’s so easy to use and saves you from wasting ingredients, time, and effort. Preheat the oven at least 15 minutes before getting started to give it plenty of time to reach the ideal recipe temperature. Don’t overmix the batter. Instead, mix just until you’ve evenly distributed the ingredients throughout the batter. Bake the batter as soon as it is ready. Don’t open the oven door until your baked good has set. Leave the oven closed until the minimum time stated in the recipe. Every oven is different, so baking times always have to be taken with a grain of salt. Oven thermostats can be wildly off, and that will all affect baking time, so keep an eye on yours. Yogurt: You can substitute plain yogurt for plain sour cream. I recommend using the full-fat versions. Extra White Cake: if you want to keep the crumb of the Oreo cake lighter in color, substitute pure vanilla extract for clear vanilla. I like McCormick Culinary Clear Imitation Vanilla Extract. Oreos: You can substitute chocolate Oreos or vanilla Oreos, or another flavor of Oreos you want.
Another Cake Pans
Two Layer Cake: Divide the batter between 2 9-inch round pans. Bake at 350ºF (180ºC) for around 24-26 minutes or until the cakes are baked through. To test for doneness, insert a toothpick into the center of the cake. If it comes out clean, the cakes are done. The frosting yields enough for filling and frosting a 2- or 3-layer cake. Sheet Cake: Pour batter into prepared a 9×13 inch cake pan. Bake for around 32-35 minutes or until the cake is baked through. To test for doneness, insert a toothpick into the center of the cake. If it comes out clean, it is done. Allow cake to cool completely in the pan set on a wire rack. The cake must be completely cool before frosting. Cupcake: To make cupcakes, use my Eggless Oreo Cupcakes recipe. Pro Tip: When adapting cake recipes for another cake pan, my #1 tip is to only fill each cake pan ¾ of the way full – NO higher! Use the extra batter, if any, to make cupcakes or mini cupcakes. Keep in mind dark-colored pans typically take less time in the oven and light-colored pans usually require longer. Gluten-Free: Substitute all-purpose flour for 1-to-1 Gluten-Free flour. This is my favorite brand. Dairy-Free: Use your favorite plant-based milk, dairy-free, or vegan butter. Make sure to use an unflavored, unsweetened variety of non-dairy milk. Soy and oat milk have the best consistency and very neutral flavors. My favorite dairy-free butter brands for baking are:
Miyoko’s Creamery Organic Vegan Butter. Earth Balance Vegan Buttery Sticks
Also, use dairy-free yogurt. To freeze, skip frosting the cake. Instead, let the cake layers cool completely, wrap the cake or slices tightly in plastic wrap and place it in a plastic double zipper quart freezer bag. Freeze the cakes for up to 2 months. Thaw at room temperature before frosting and serving. Keep in mind that the cakes will lose some of their fluffiness if refrigerated or frozen.
More Eggless Cake Recipes You’ll Love!
Eggless Vanilla Cake RecipeThe Best Eggless Chocolate Cake EverEggless Red Velvet Bundt CakeEggless Lemon CakeEasy Eggless Coffee CakeBrowse more egg-free cake recipes
You’ve asked, and I’ve answered! Read on for a handful of answers to the most frequently asked questions about eggless baking.