Oriana’s Thoughts On The Recipe
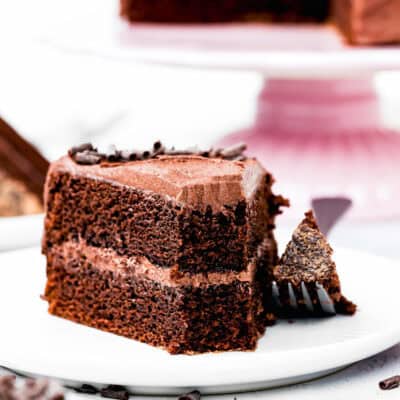
Today, I’m excited to share one of my all-time favorite recipes with you: my Easy Egg-Free and Dairy-Free Fluffy Chocolate Cake. This chocolate cake is super simple to make, requiring only basic ingredients you probably already have in your pantry. What I love most about this cake is how it manages to be both incredibly moist and fudgy, yet still light and airy. It’s like magic! Plus, it’s completely egg and dairy-free, making it perfect for anyone with food allergies, dietary restrictions, or those just looking to enjoy a plant-based treat. The deep, rich chocolate flavor is so satisfying – it’s like a hug in cake form. Whether it’s a birthday, anniversary, or just because, this cake is perfect for any celebration. Trust me, once you try it, you’ll be making it for every special occasion. So, let’s get baking!
Ingredients You’ll Need, Substitutions & Notes
Please check the recipe card at the bottom of the post for exact quantities and detailed instructions (scroll down). Easy-Peasy Preparation: This cake is incredibly straightforward to make. With just a handful of simple ingredients, you can whip up a decadent dessert without spending hours in the kitchen. Perfect for busy moms and novice bakers alike! Super Moist and Fudgy Crumb: Despite being vegan, this cake boasts a super moist and fudgy crumb that melts in your mouth. The texture is light and airy, yet rich and satisfying – a perfect balance that’s hard to beat. Deep, Rich Chocolate Flavor: The combination of cocoa powder and optional espresso powder gives this cake a deeply chocolatey and rich flavor that’s sure to please any chocolate lover. It’s indulgent without being overwhelming. Perfect for Any Celebration: Whether it’s a birthday, anniversary, or just a regular Wednesday, this cake is ideal for any celebration. It’s versatile and universally loved, making it a go-to dessert for any occasion.
Tips To Mitigate These Cons
To avoid these issues, make sure to follow the recipe closely and measure your ingredients accurately. For the frosting, ensure the butter is at room temperature and beat it well with the other ingredients to achieve a smooth and creamy consistency. If you prefer a lighter cake, you can sift the dry ingredients to incorporate more air into the batter. For The Vegan Chocolate Cake:
All-Purpose Flour: The base of your cake, providing structure. Cocoa Powder: Gives the cake its rich chocolate flavor. Granulated Sugar: Sweetens the cake and helps with texture. Baking Powder: Acts as a leavening agent to help the cake rise. Salt: Enhances the flavor of the chocolate. Milk (Non-Dairy or Dairy): Adds moisture. Note: Soy or oat milk are great vegan options. Vinegar: Reacts with the baking powder to give the cake a nice rise. Note: You can use apple cider vinegar or white vinegar. Oil: Keeps the cake moist. Note: Use a neutral-tasting oil, such as vegetable, canola, or sunflower oil. Vanilla: Adds depth of flavor. Espresso Powder (Optional): Intensifies the chocolate flavor. Note: This is optional, but I recommend its addition because it enhances the chocolate flavor. Adding a little bit will make things taste more “chocolatey” without giving a coffee flavor.
For The Vegan Chocolate Frosting:
Dairy-Free Butter: Adds creaminess and stability. Note: I recommend using the vegan butter that comes in blocks (not the spreadable version), my favorite is Miyoko’s Creamery Organic Vegan Butter. Vanilla: Enhances the chocolate flavor. Salt: Balances the sweetness. Powdered Sugar: Sweetens and thickens the frosting. Cocoa Powder: The base of your frosting. Dairy-Free Milk or Heavy Cream: Helps achieve the right consistency. Note: I like to use Silk Heavy Whipping Cream Alternative.
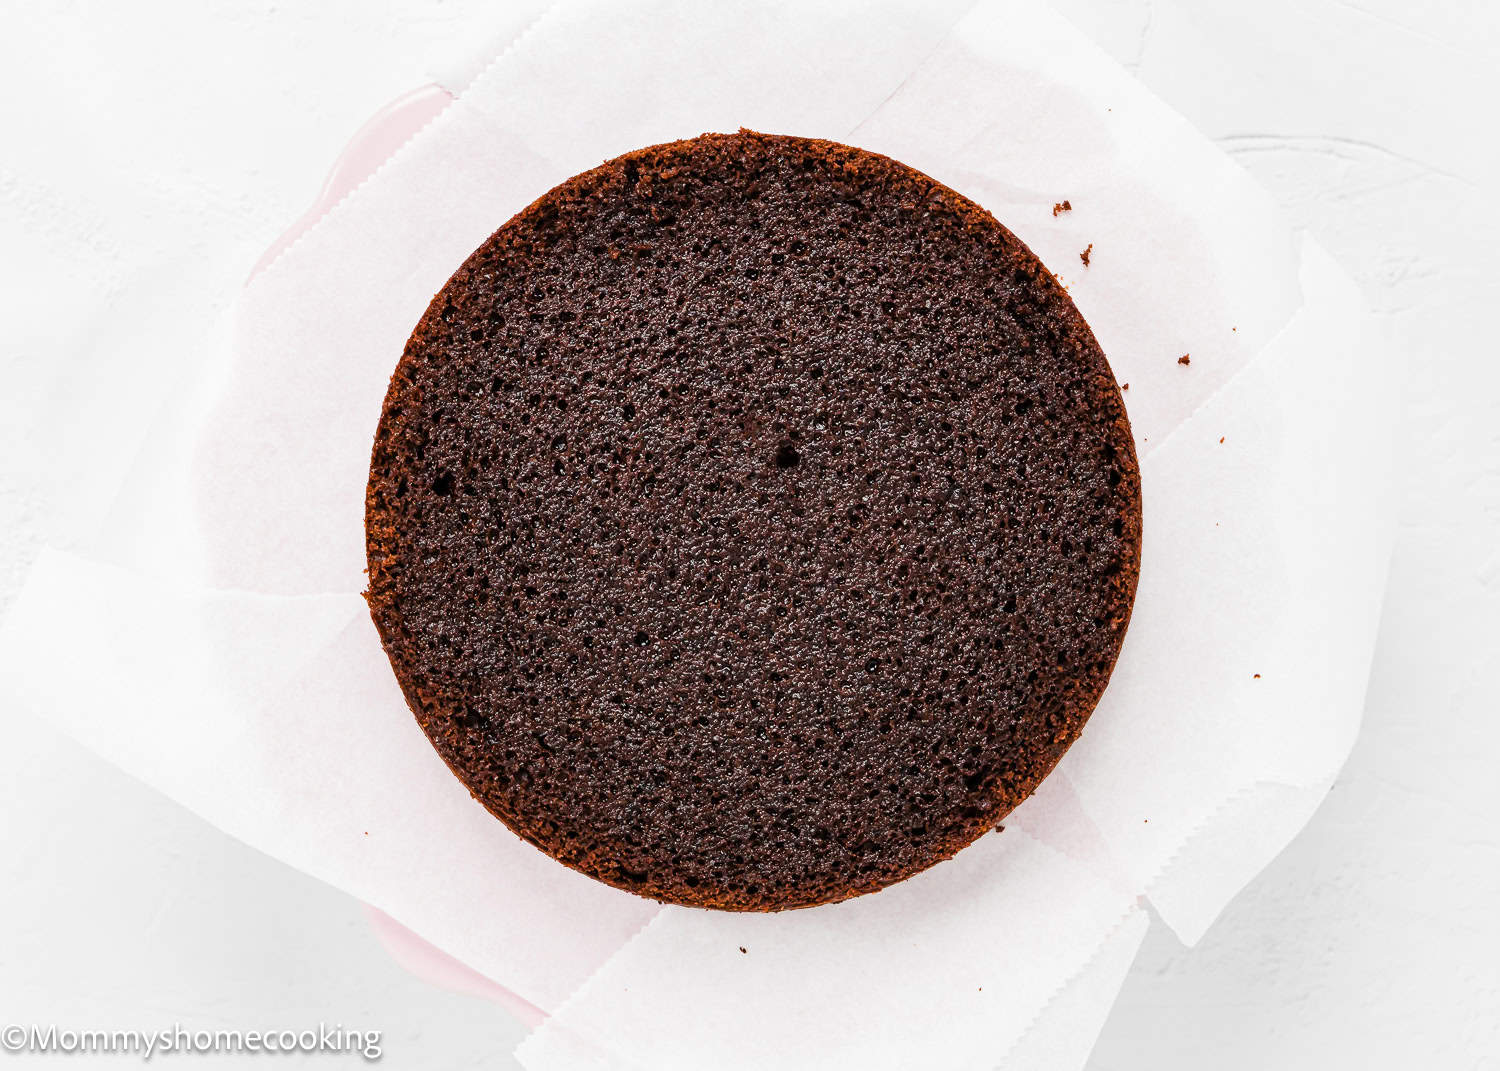
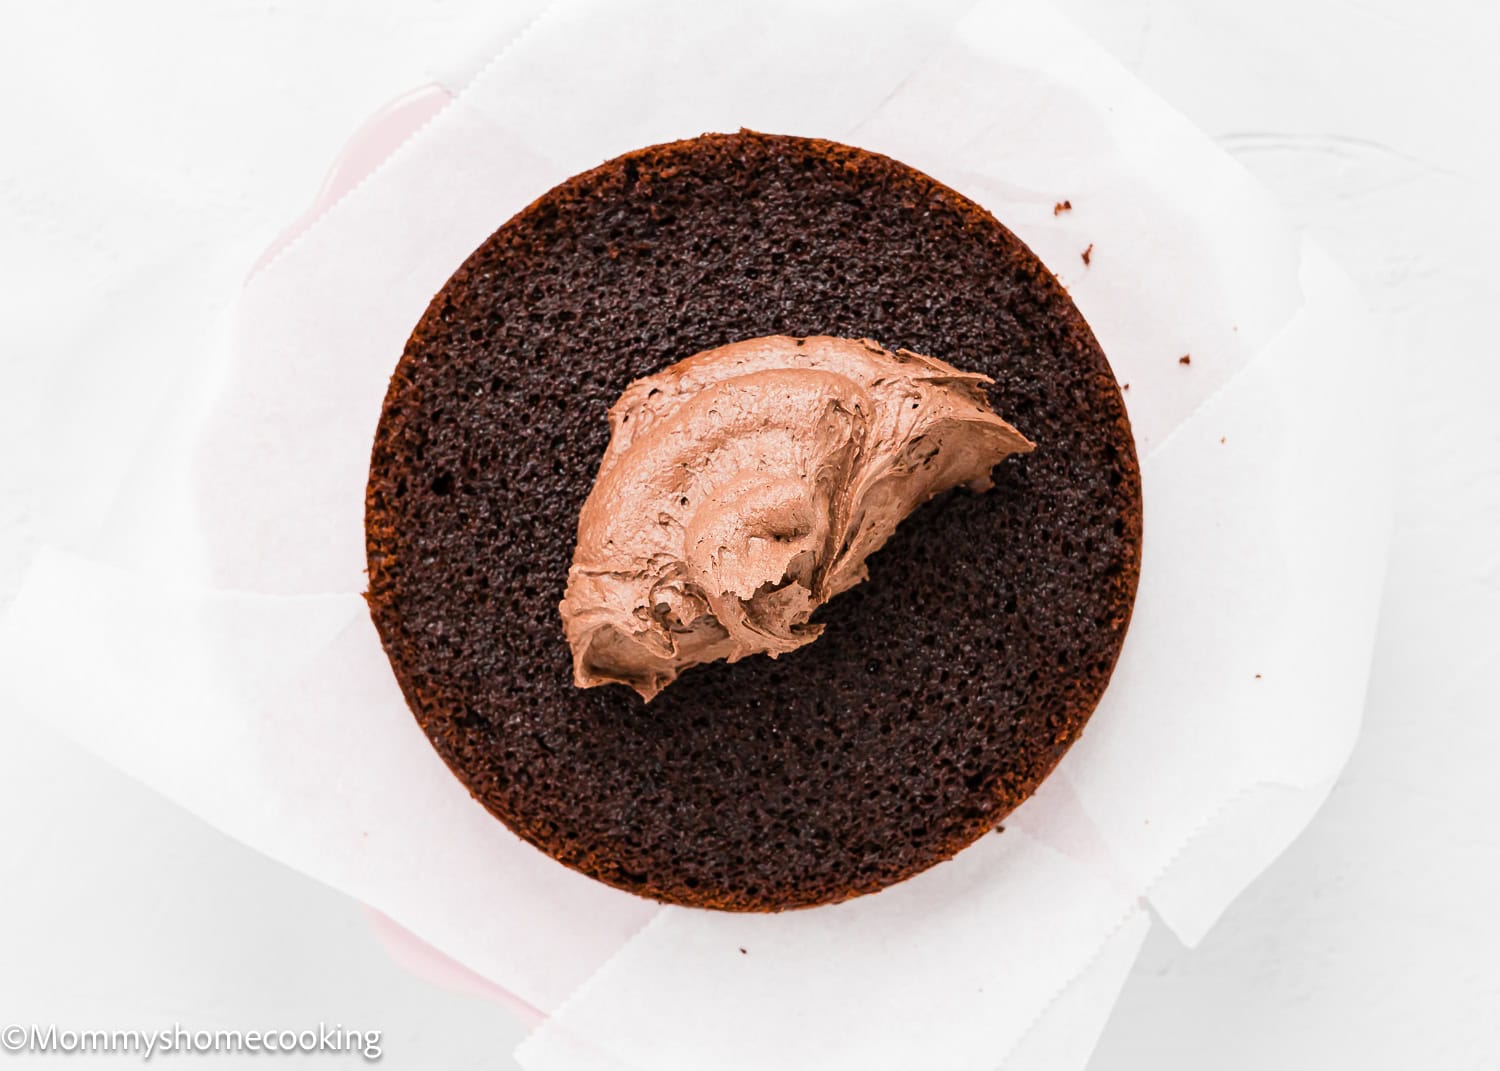
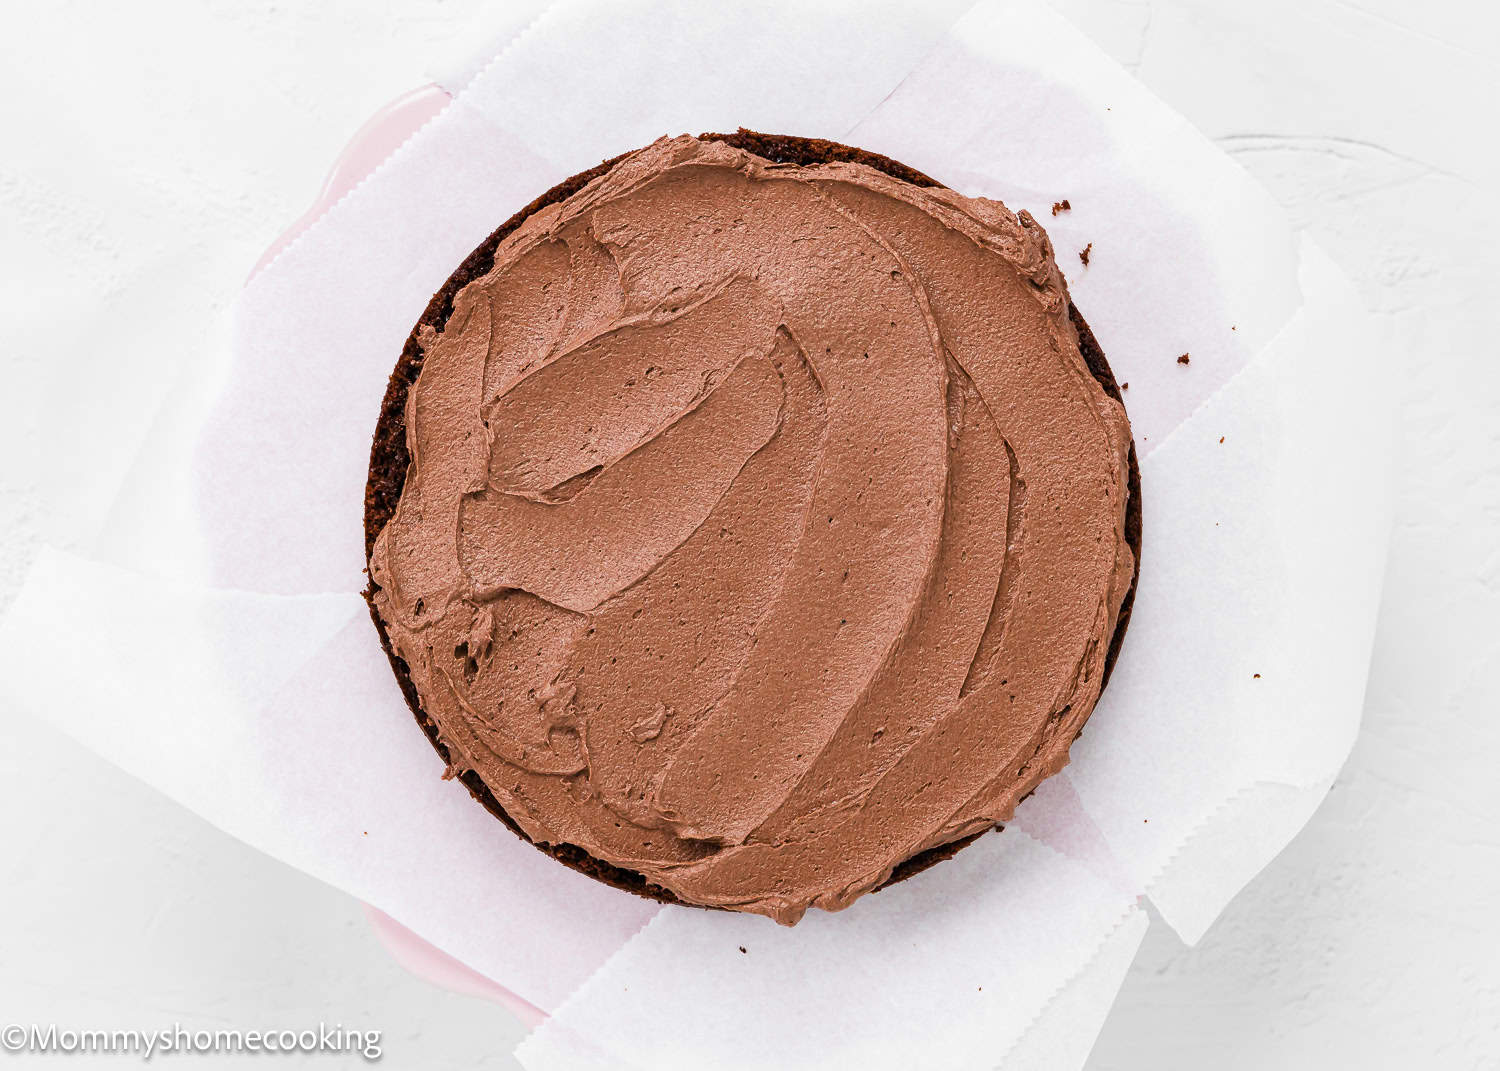
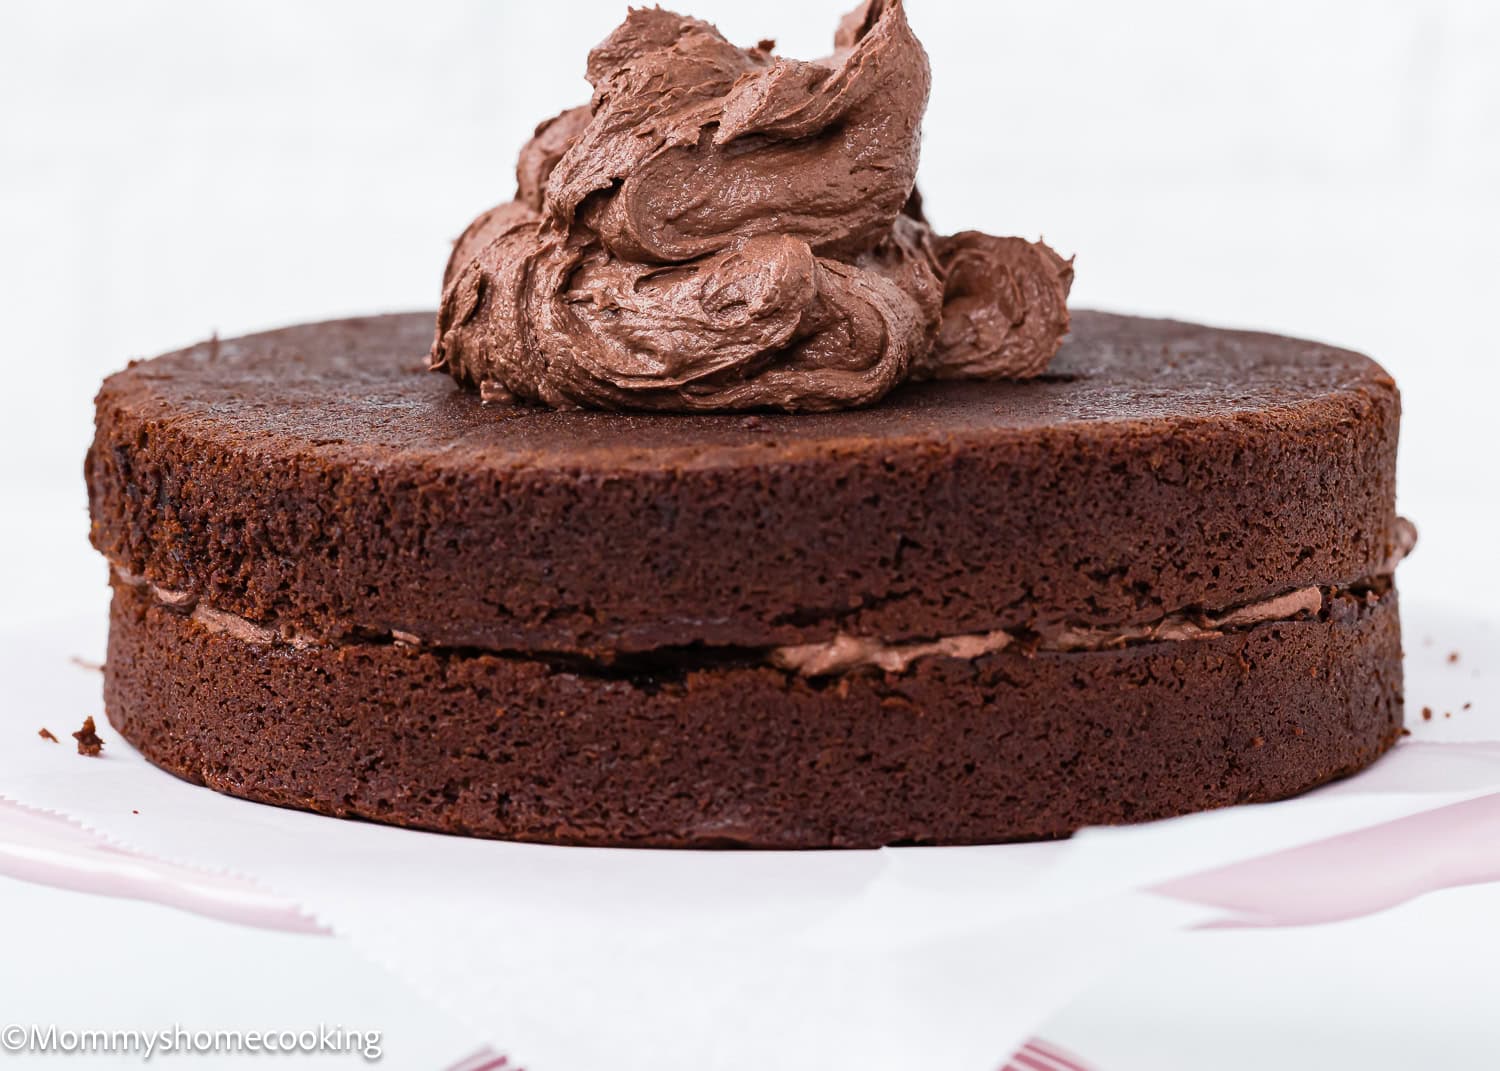
Process Overview: Step-by-Step Photos
Please check the recipe card at the bottom of the post for exact quantities and detailed instructions (scroll down).
Step 1 – Make The Cakes
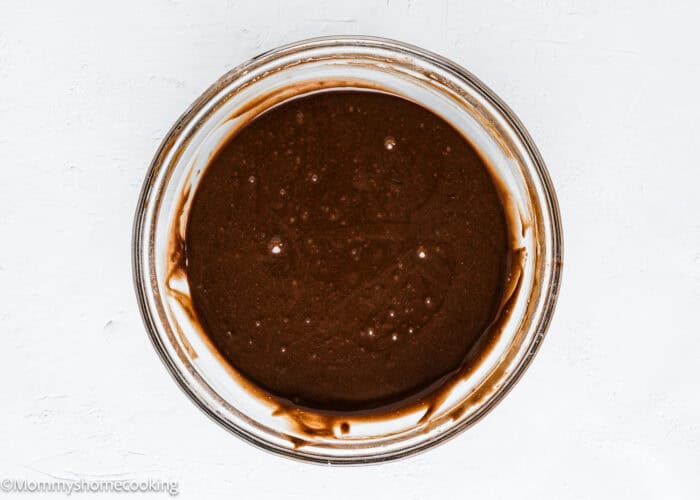
In a large bowl, whisk together flour, cocoa powder, sugar, baking powder, and salt. Set aside. In another mixing bowl, whisk together milk, vinegar, vanilla, oil, and espresso powder. Add wet ingredients to the dry ingredients; mix to combine. Divide batter evenly between the prepared cake pans. Bake for 30 – 35 minutes until a toothpick inserted in the middle of the cake comes out clean with just a few crumbs attached.
Step 2 – Make The Frosting
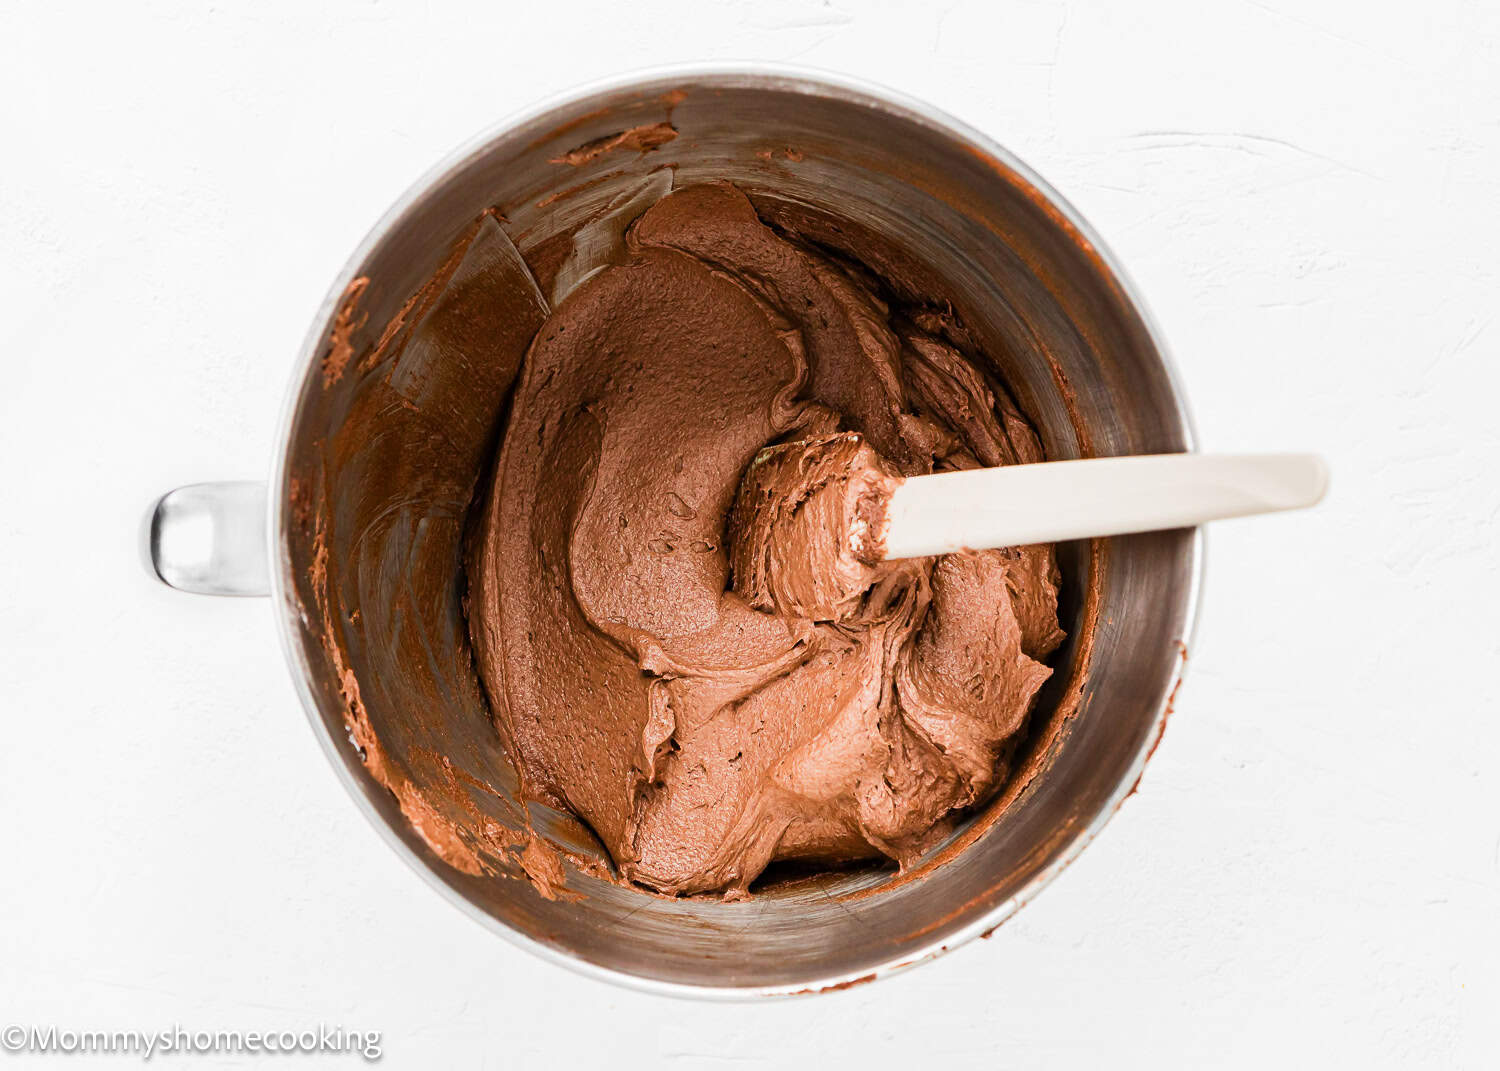
Using an electric hand mixer or a stand mixer at medium speed, beat the unsalted butter, vanilla extract, and salt in a large bowl until smooth and creamy for about 3 – 4 minutes. Add confectioners’ sugar, cocoa powder, and heavy cream. Beat at low speed for 30 seconds, then increase to high speed and beat for 3 full minutes. Do not over-whip. If the frosting is too thin, add 1/4 cup more confectioners’ sugar or cocoa powder, or 1-2 more tablespoons of heavy cream if it’s too thick. Taste. Add another pinch of salt if desired. Tip: Before using, mix the frosting by hand with a wooden spoon or large spatula to push out the air pockets to create a silky-smooth frosting.
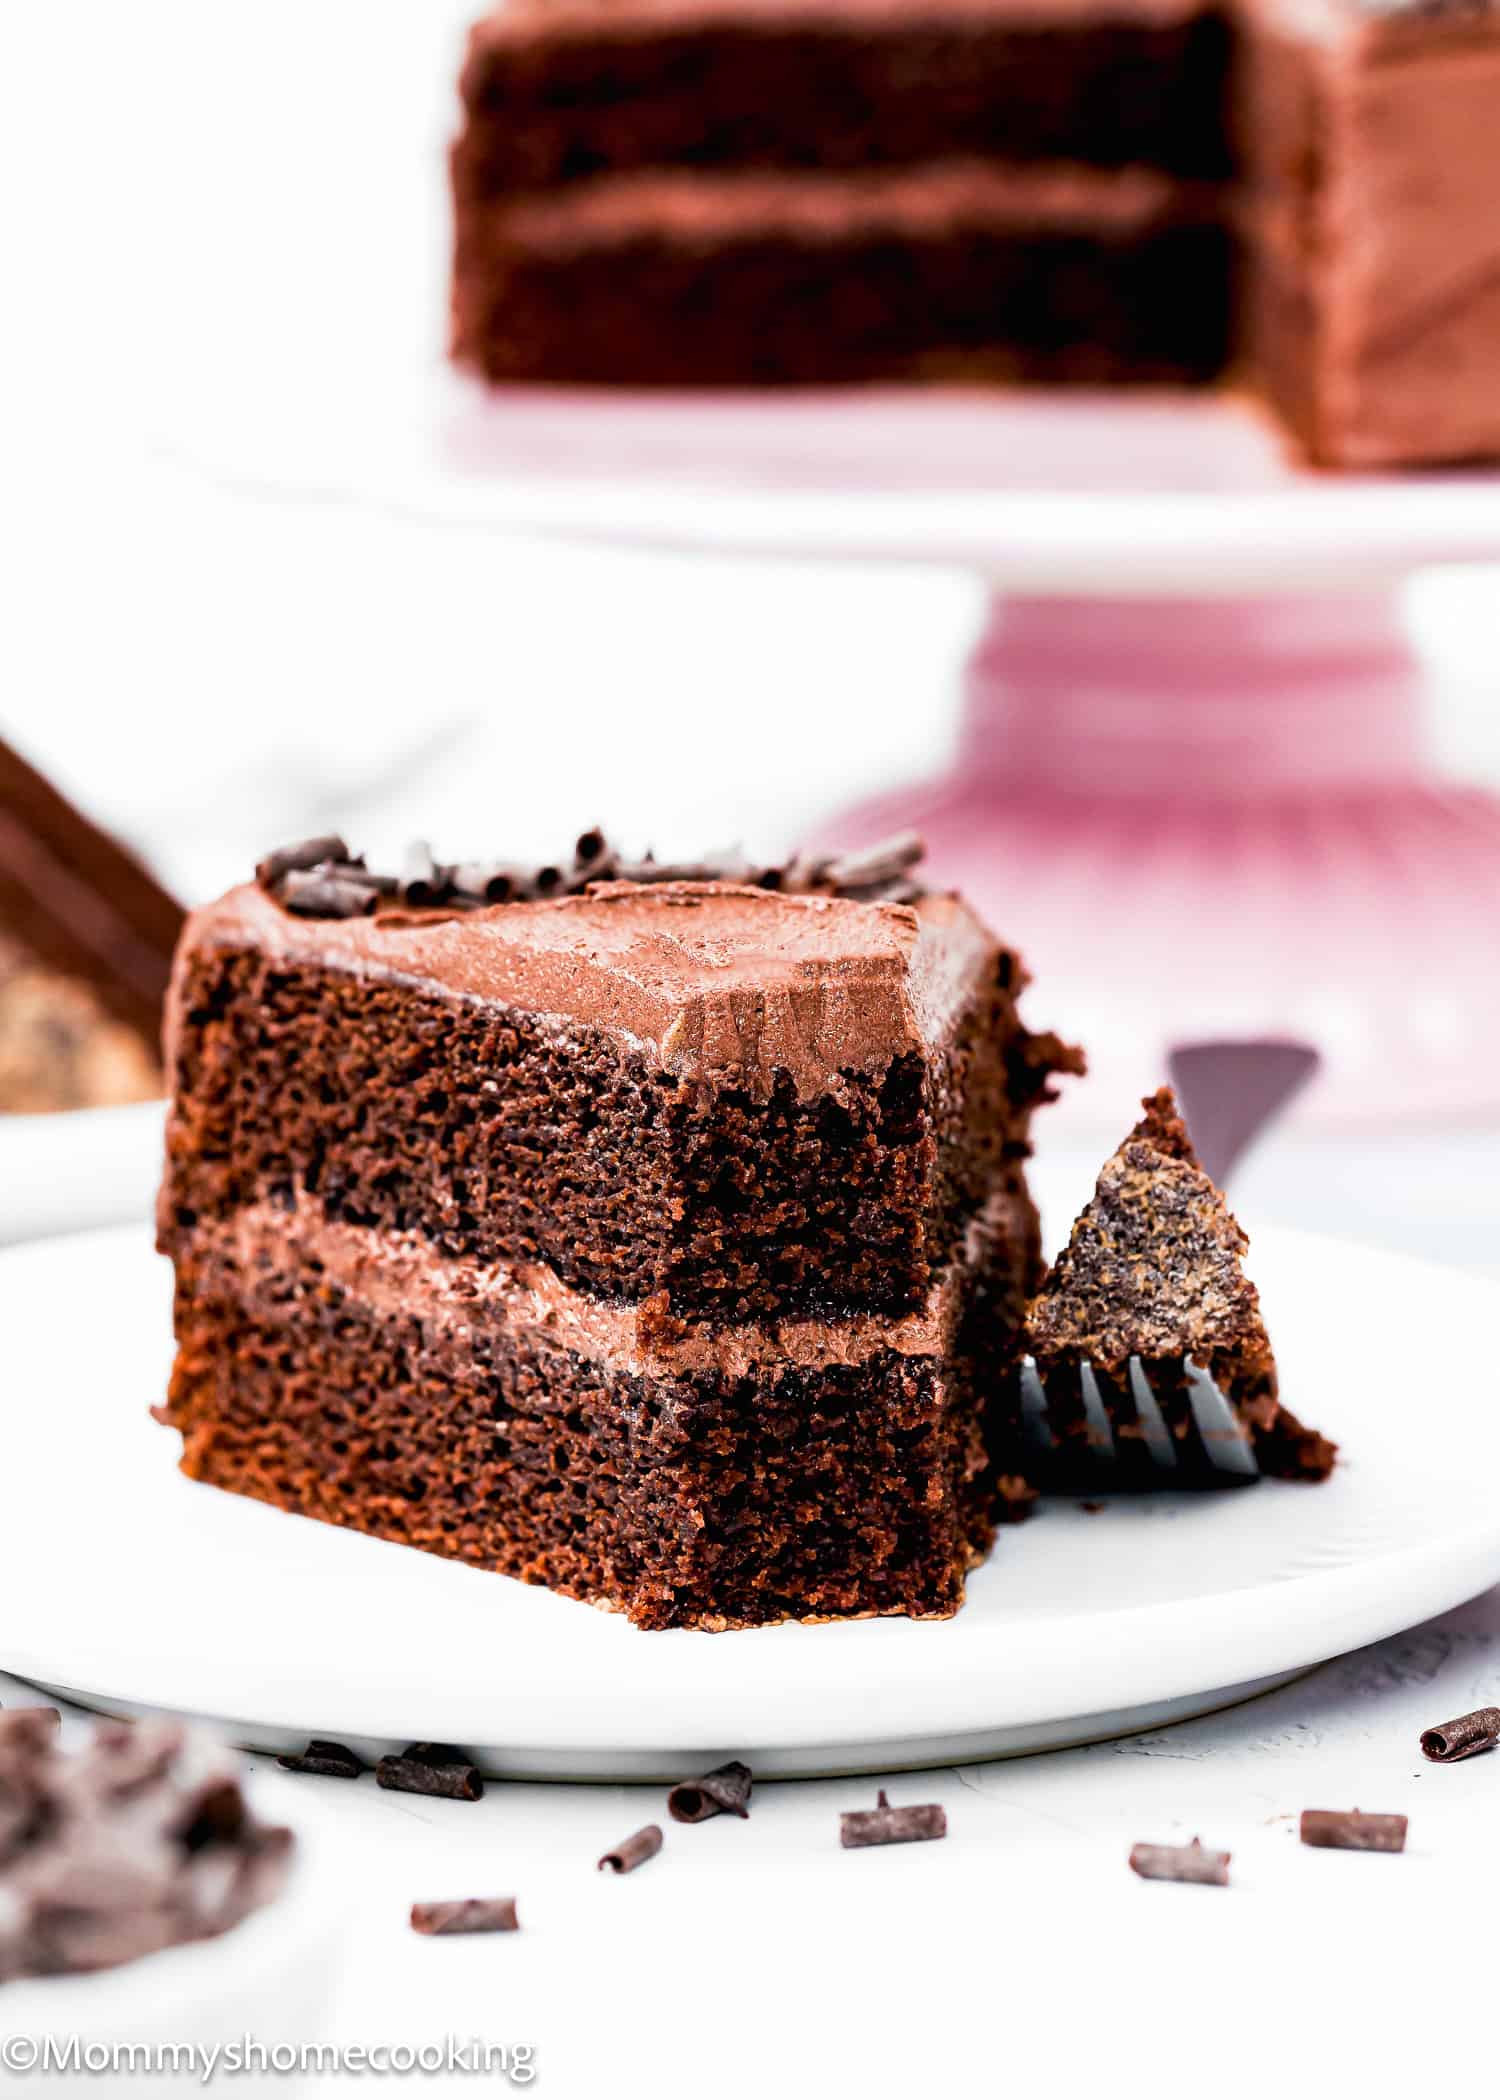
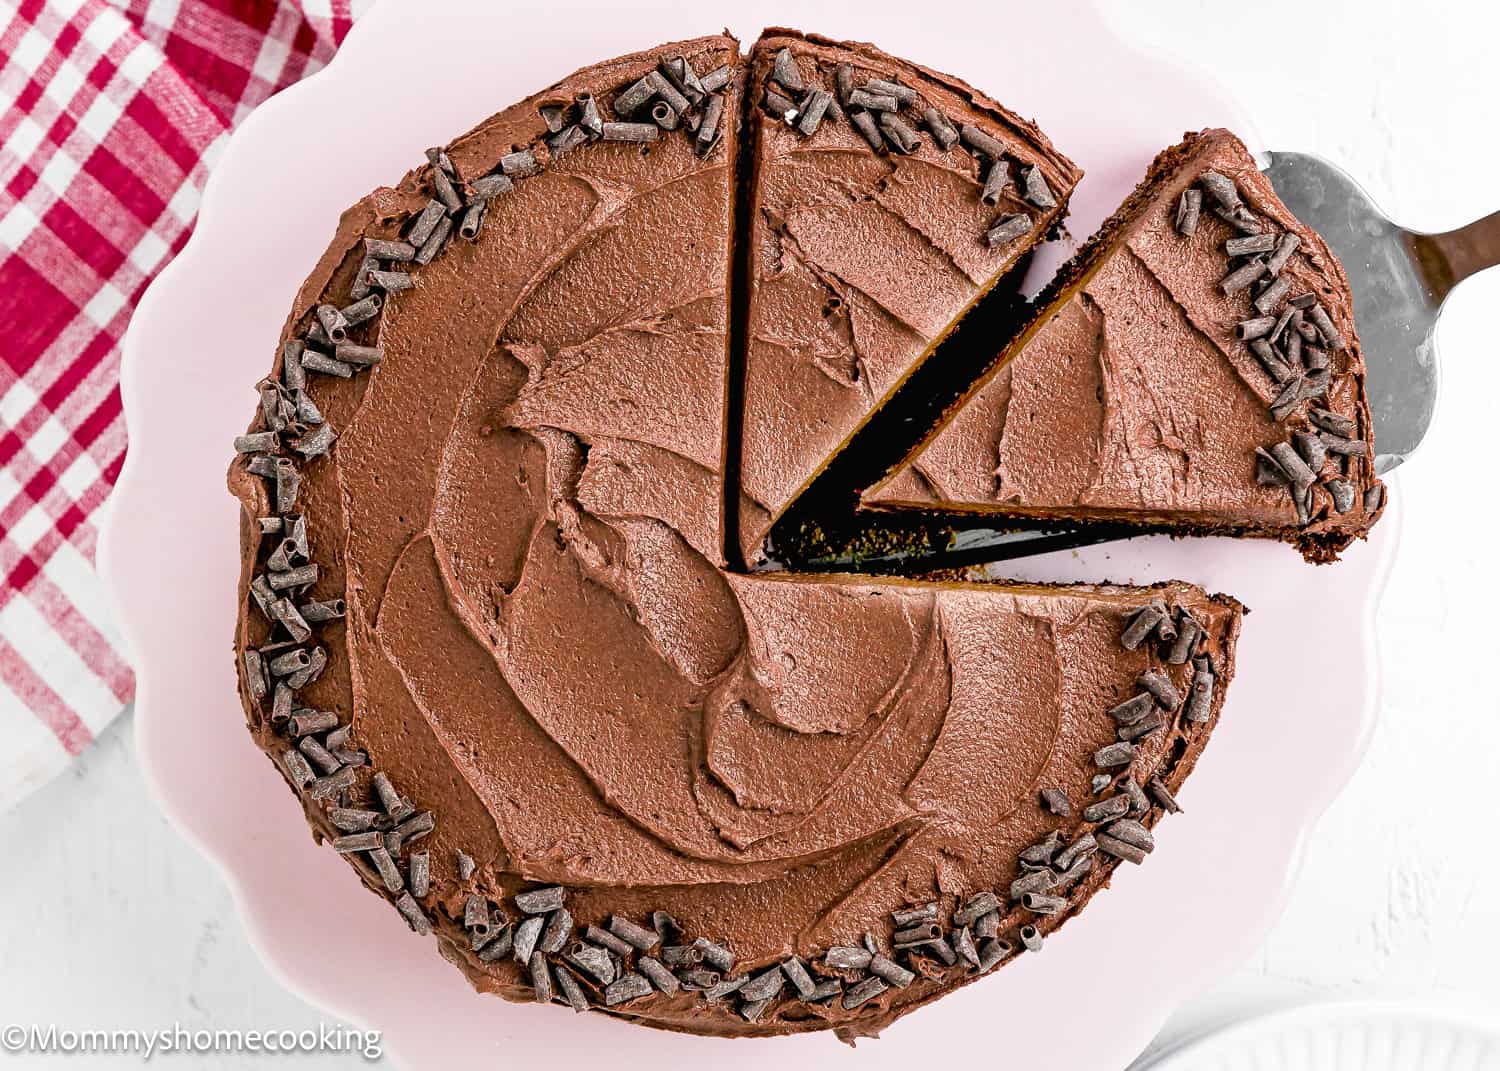
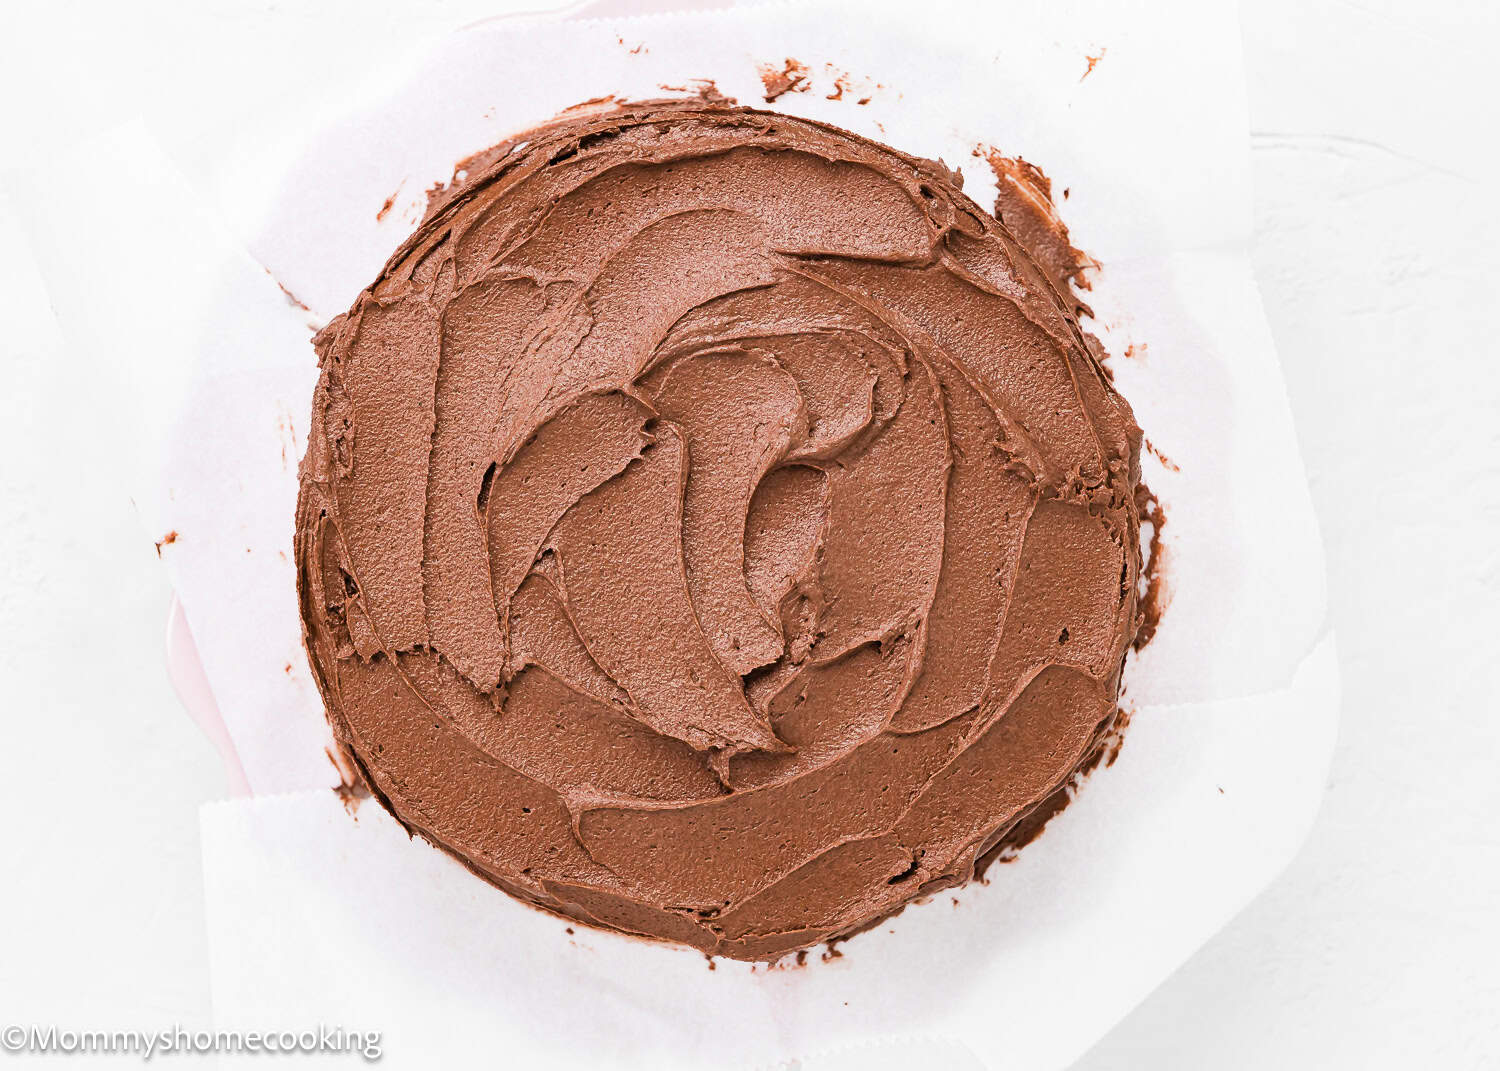
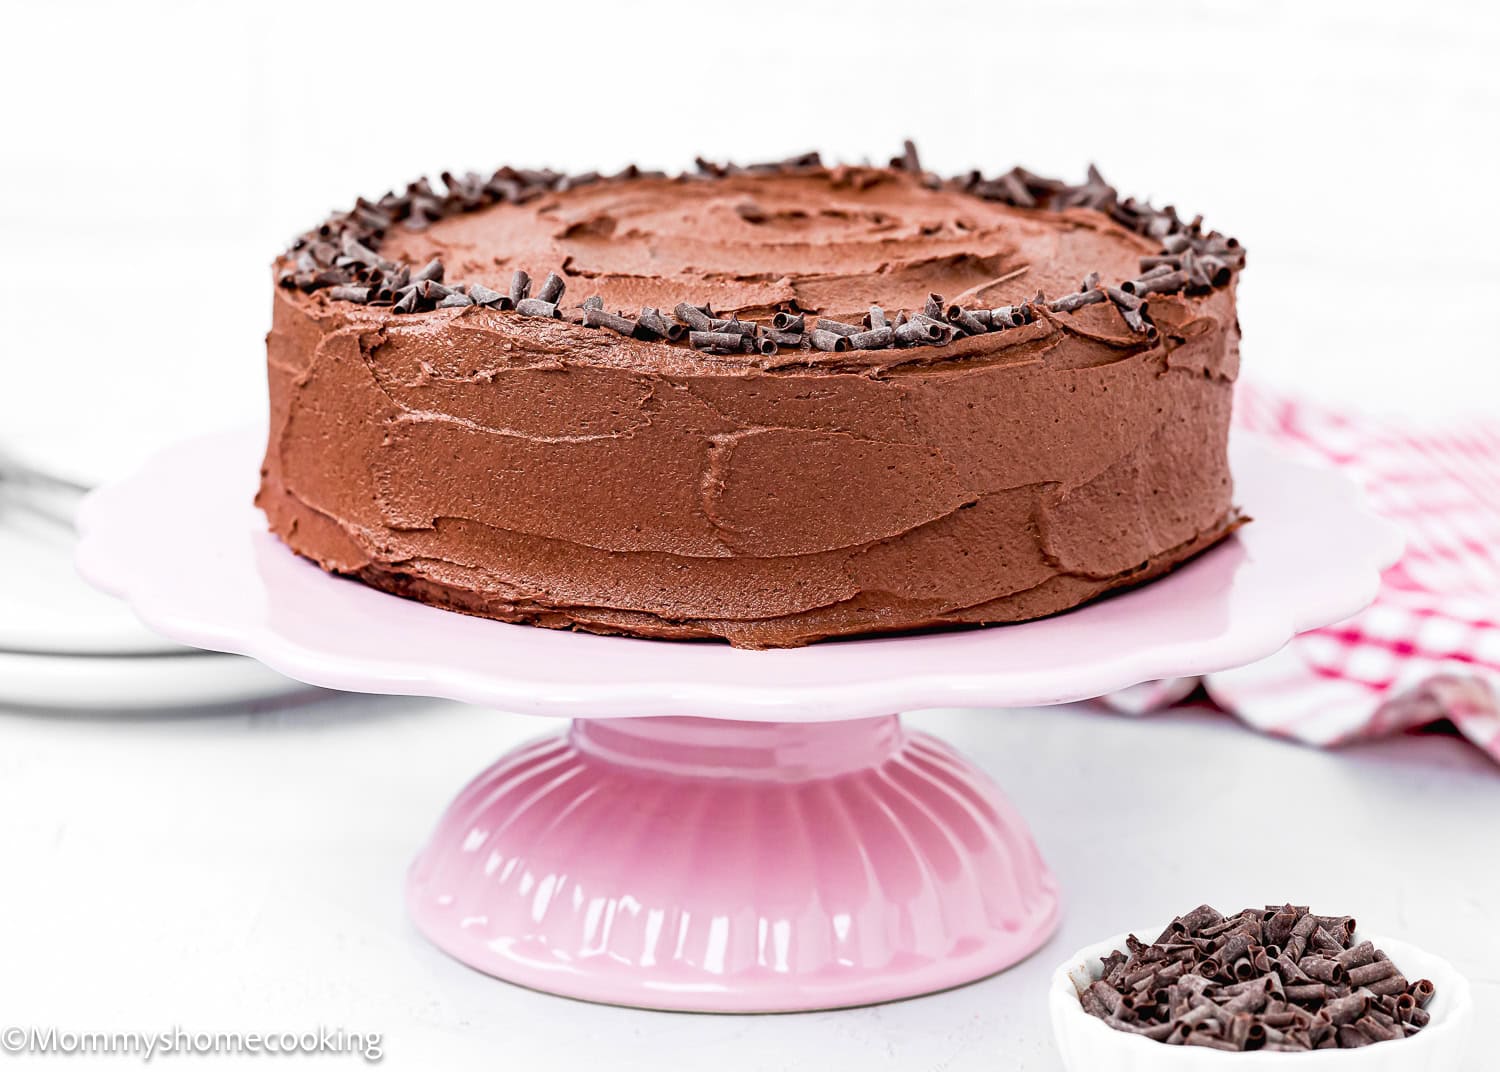
Step 3 – Assemble and Decorate
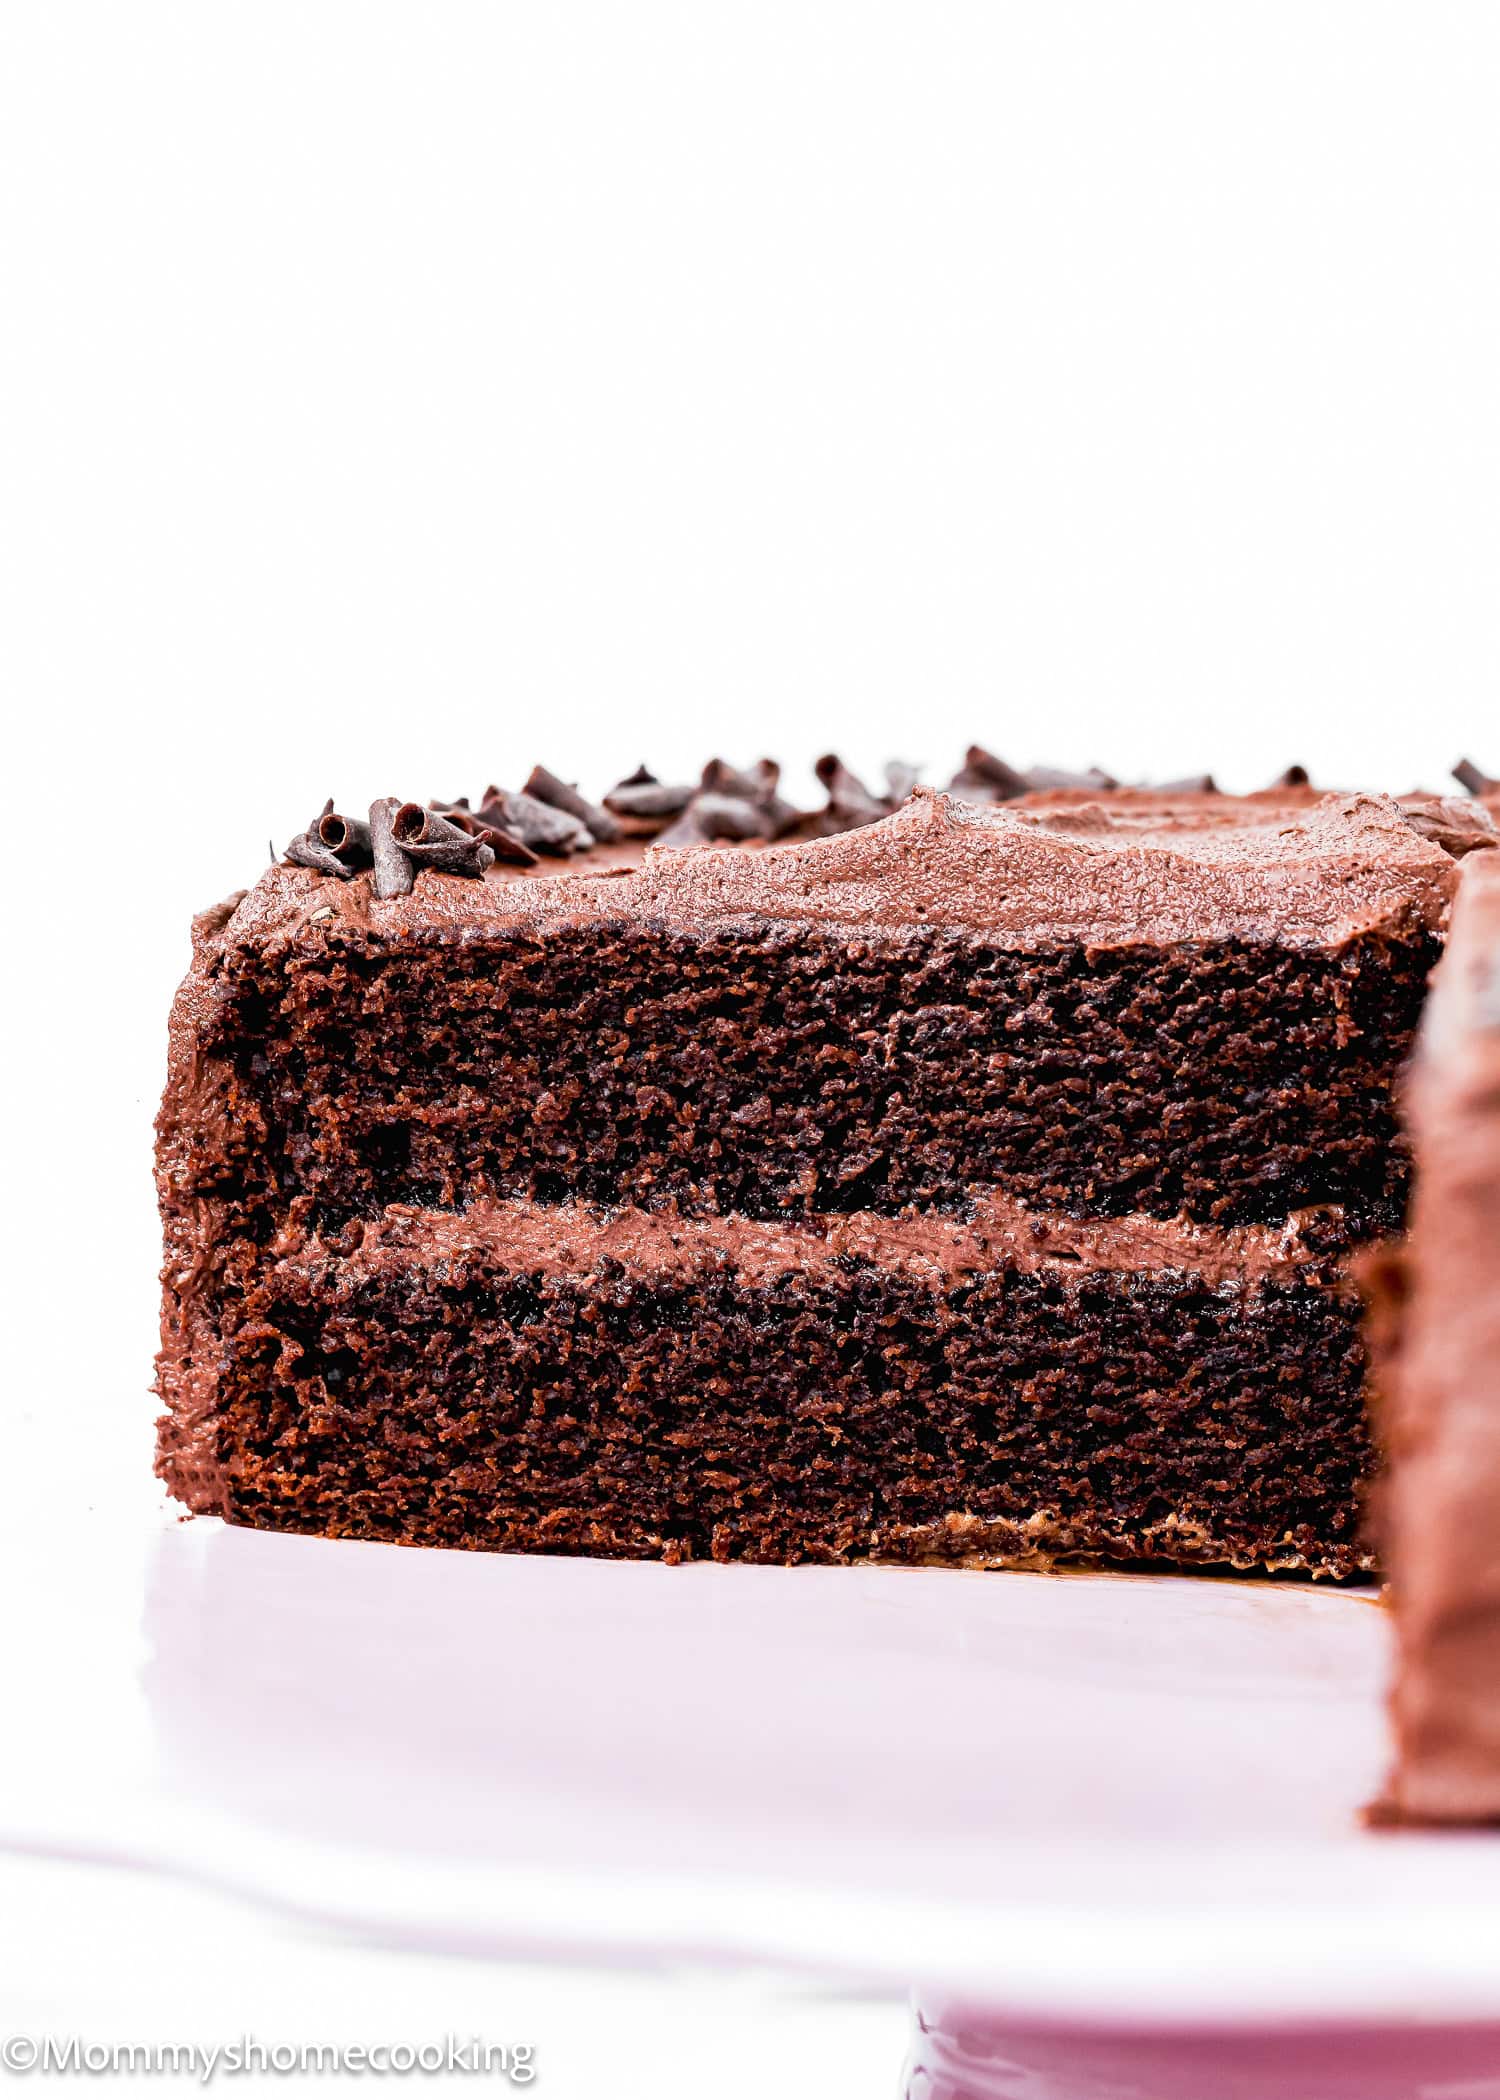
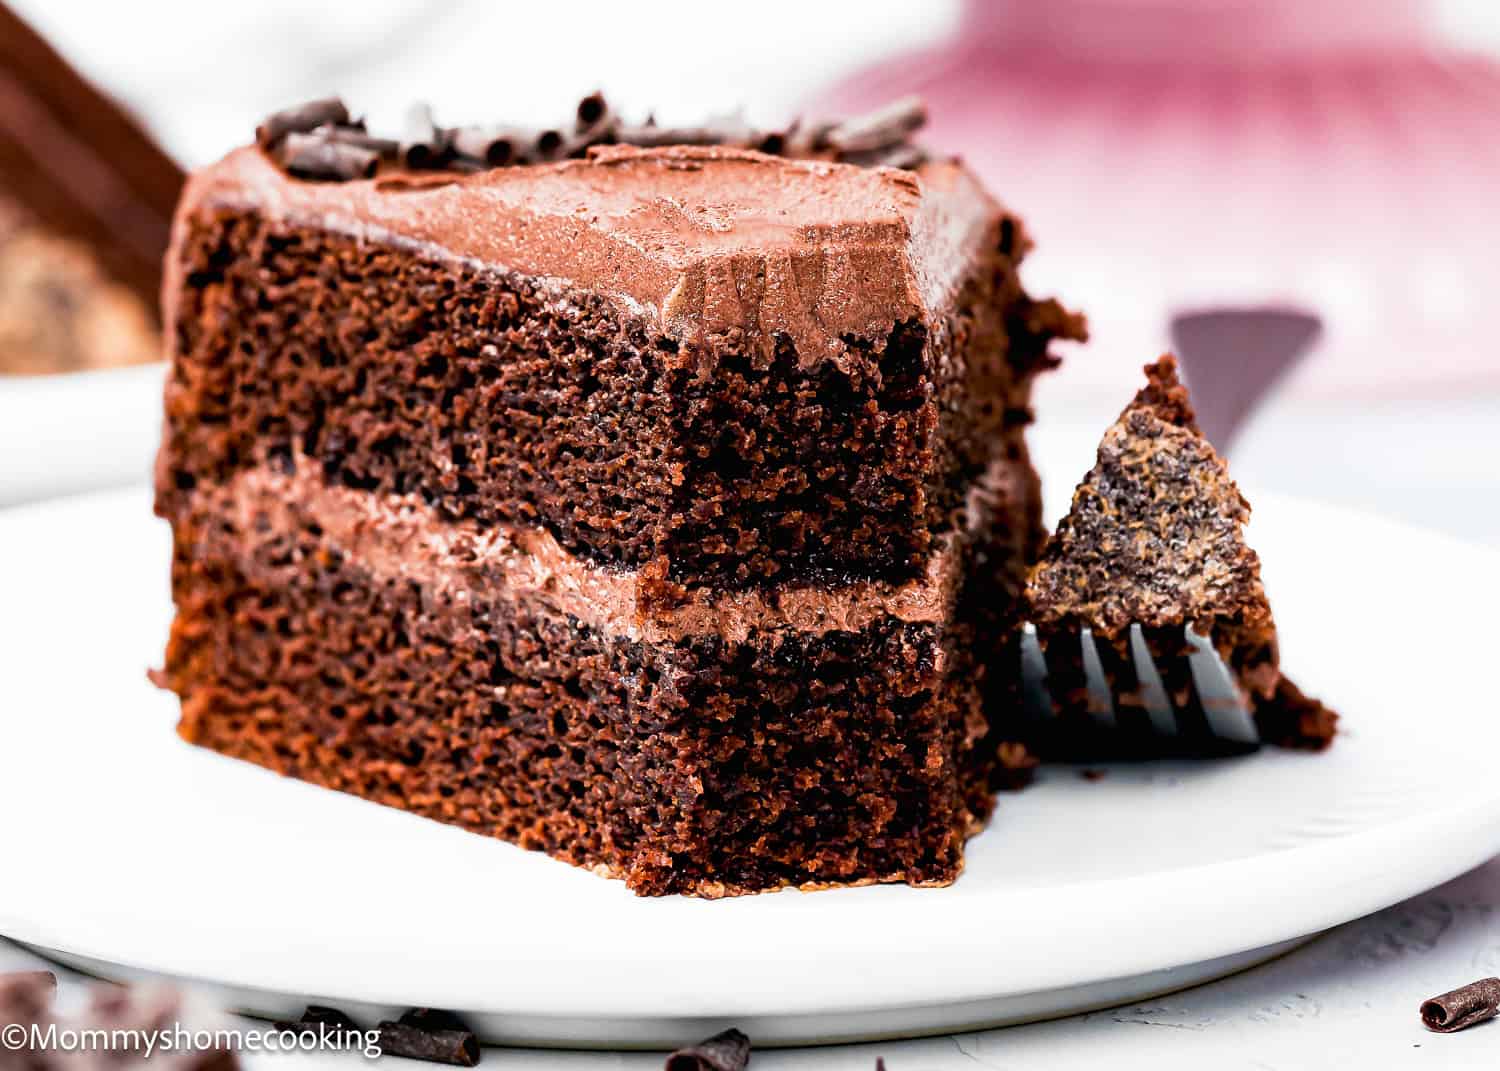
If cooled cakes are domed on top, use a large serrated knife to slice a thin layer off the tops to create a flat surface. This is called “leveling” the cakes. Tip: You can save the discard or crumble over the finished cake. Place one cake layer on your cake stand or serving plate. Evenly cover the top with frosting. Top with the second layer and spread the remaining frosting all over the top and sides.
Food Allergy Swaps
Gluten-Free: Use a gluten-free, all-purpose flour blend. Look for a gluten-free flour blend specifically formulated for baking, as it will have the right combination of flours and starches to mimic the texture of wheat flour. My favorite is Better Batter Original Blend.
Measure the ingredients correctly. I highly recommend using a kitchen scale. Room Temperature Ingredients: Ensure all ingredients are at room temperature for even mixing. Preheat the oven for at least 15 minutes before you get started to give it plenty of time to reach the ideal recipe temperature. Sift Dry Ingredients: This helps create a lighter cake. Don’t overmix the batter. Mix just until you’ve evenly distributed the ingredients throughout the batter. Don’t open the oven door until the cake(s) has set. Leave the oven closed until the minimum time is stated in the recipe. Know your oven! Every oven is different, so baking times always have to be taken with a grain of salt. Oven thermostats can be wildly off, and that will all affect baking time, so keep an eye on yours. The cake(s) are done when a toothpick inserted in the center comes out clean.
Nut-Free: Choose nut-free milk like oat or soy milk or oat milk.
Storing and Freezing Instructions
Unfrosted cake layers can be stored covered at room temperature for up to 2 days or frozen for up to a month. They should be defrosted at room temperature before frosting and serving. The frosted cake can be stored at room temperature for up to 1 day or in the refrigerator for up to 5 days. Frosted cake freezes well for up to 3 months. Thaw overnight in the refrigerator, then bring to room temperature or serve cold. Please note that the cakes will lose part of their fluffiness if refrigerated or frozen, but they will still taste yummy!
More Dairy-Free and Egg-Free Recipes You’ll Love!
Vegan Peanut Butter Banana Bread (Easy) Easy Vegan Raspberry Muffins (no eggs – no dairy) Super Easy Vegan Red Velvet Cupcakes (Fluffy) Simple Vegan Zucchini Muffins Eggless Brown Butter Banana Bundt Cake Easy Vegan Pastry Cream Eggless Easy Chocolate Swiss Roll Cake The Ultimate Easy Chocolate Cupcakes (Dairy-Free, Egg-Free, Vegan) Easy Fluffy Vanilla Cupcakes (Dairy-Free, Egg-Free, Vegan) Browse more recipes…
Recipe Card 📖