Oriana’s Thoughts On The Recipe
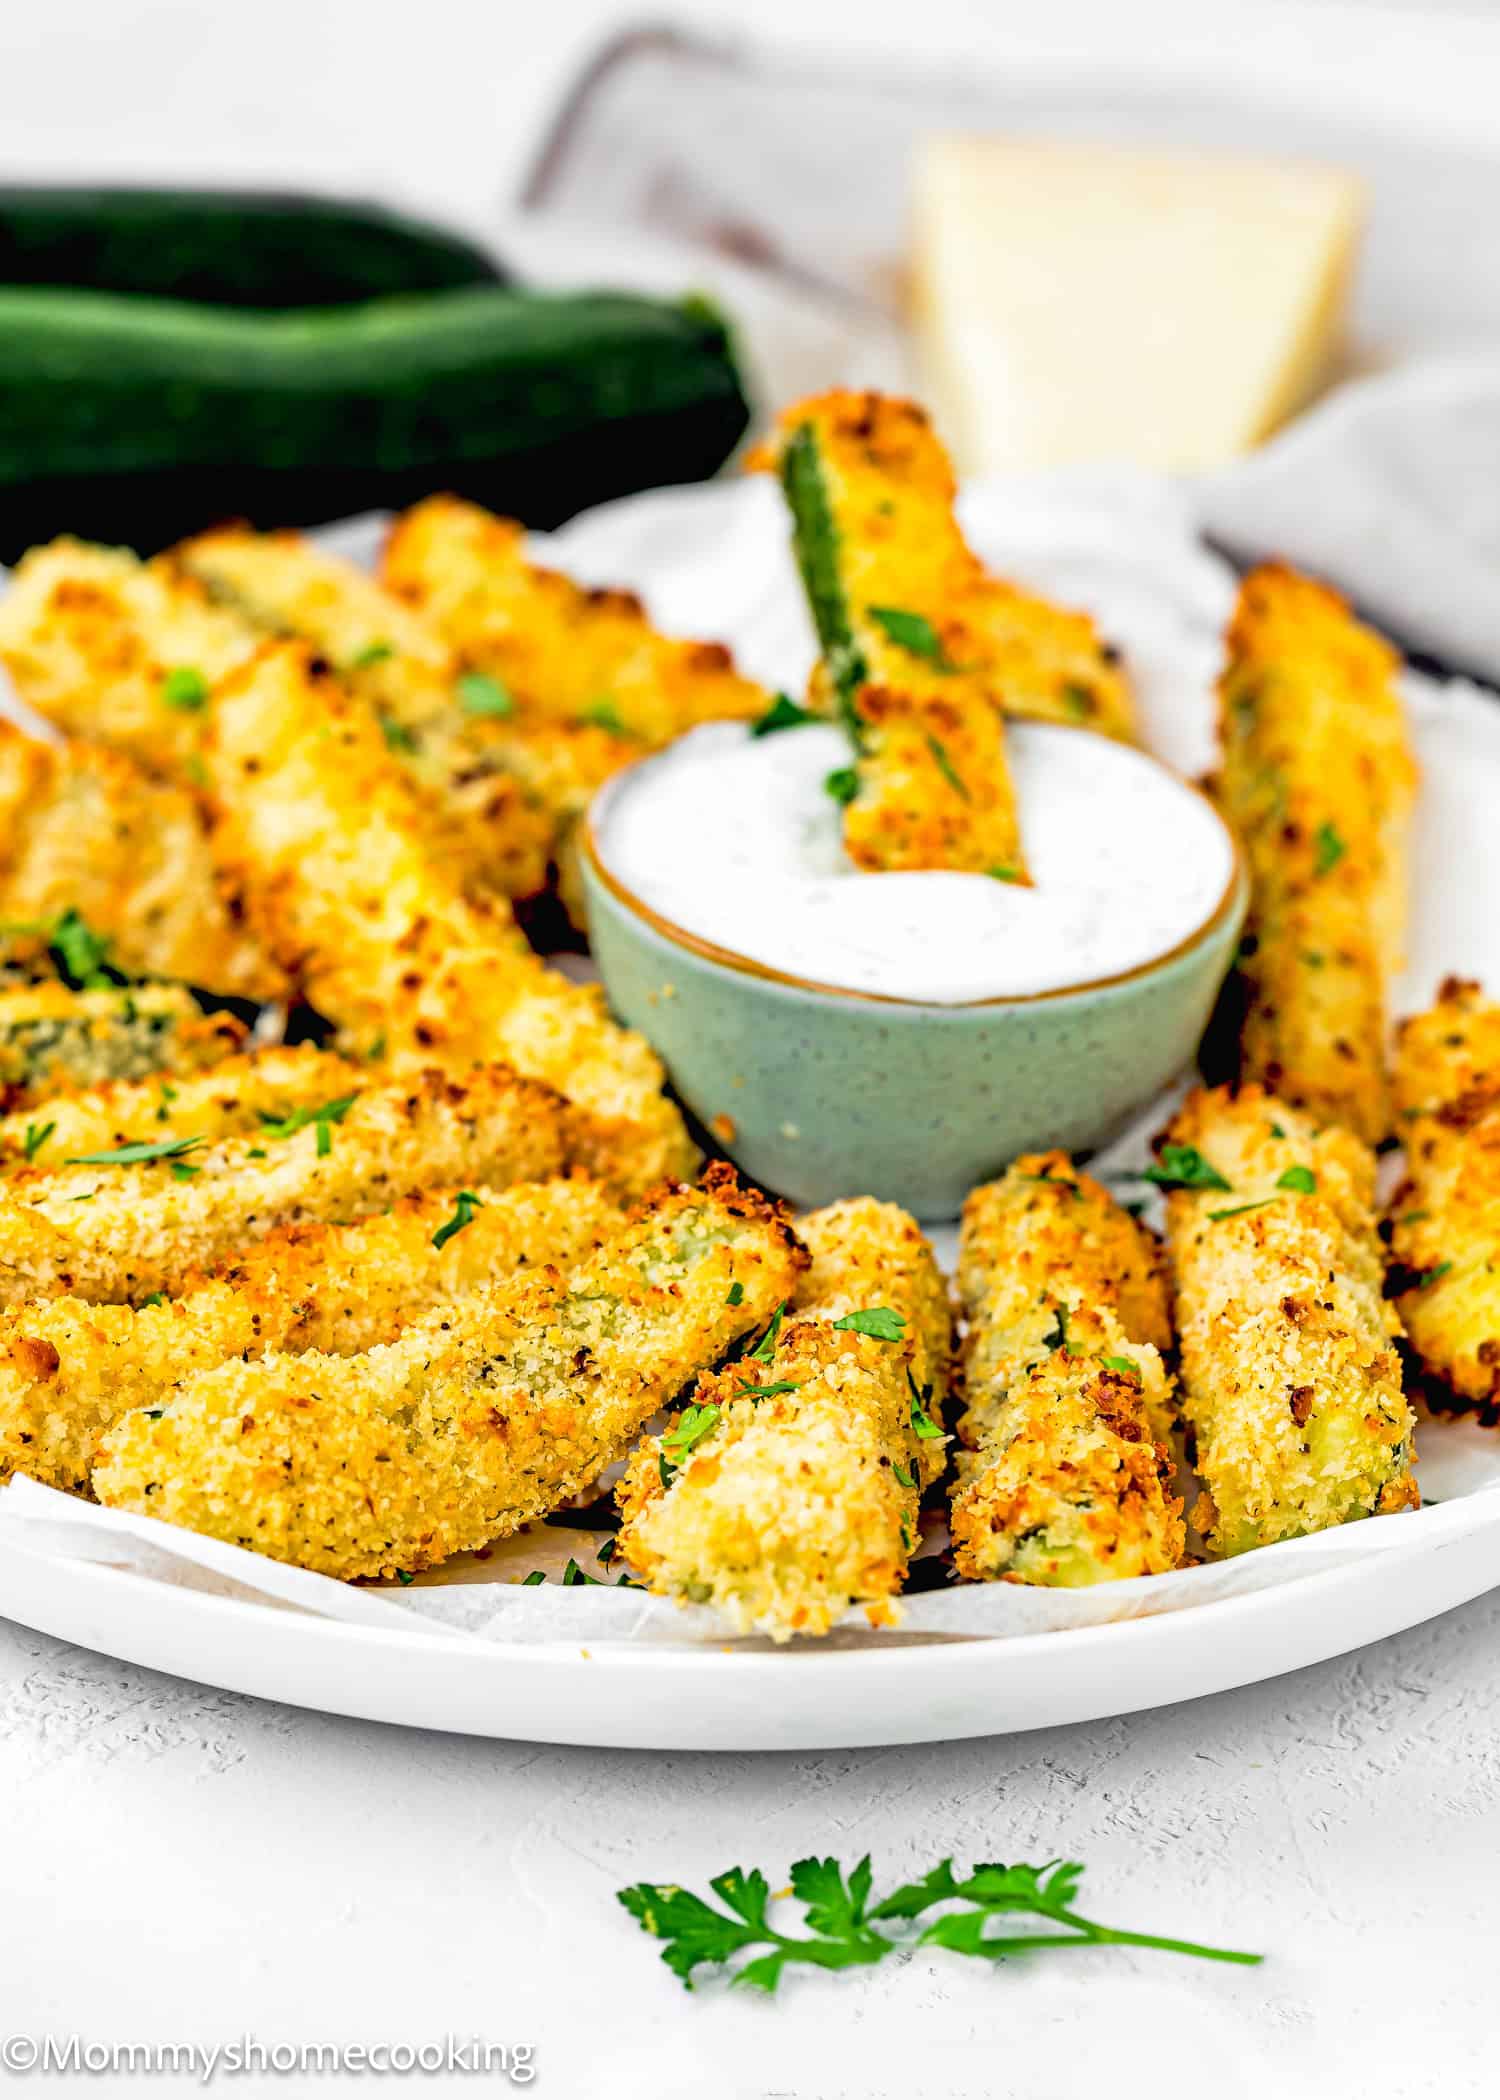
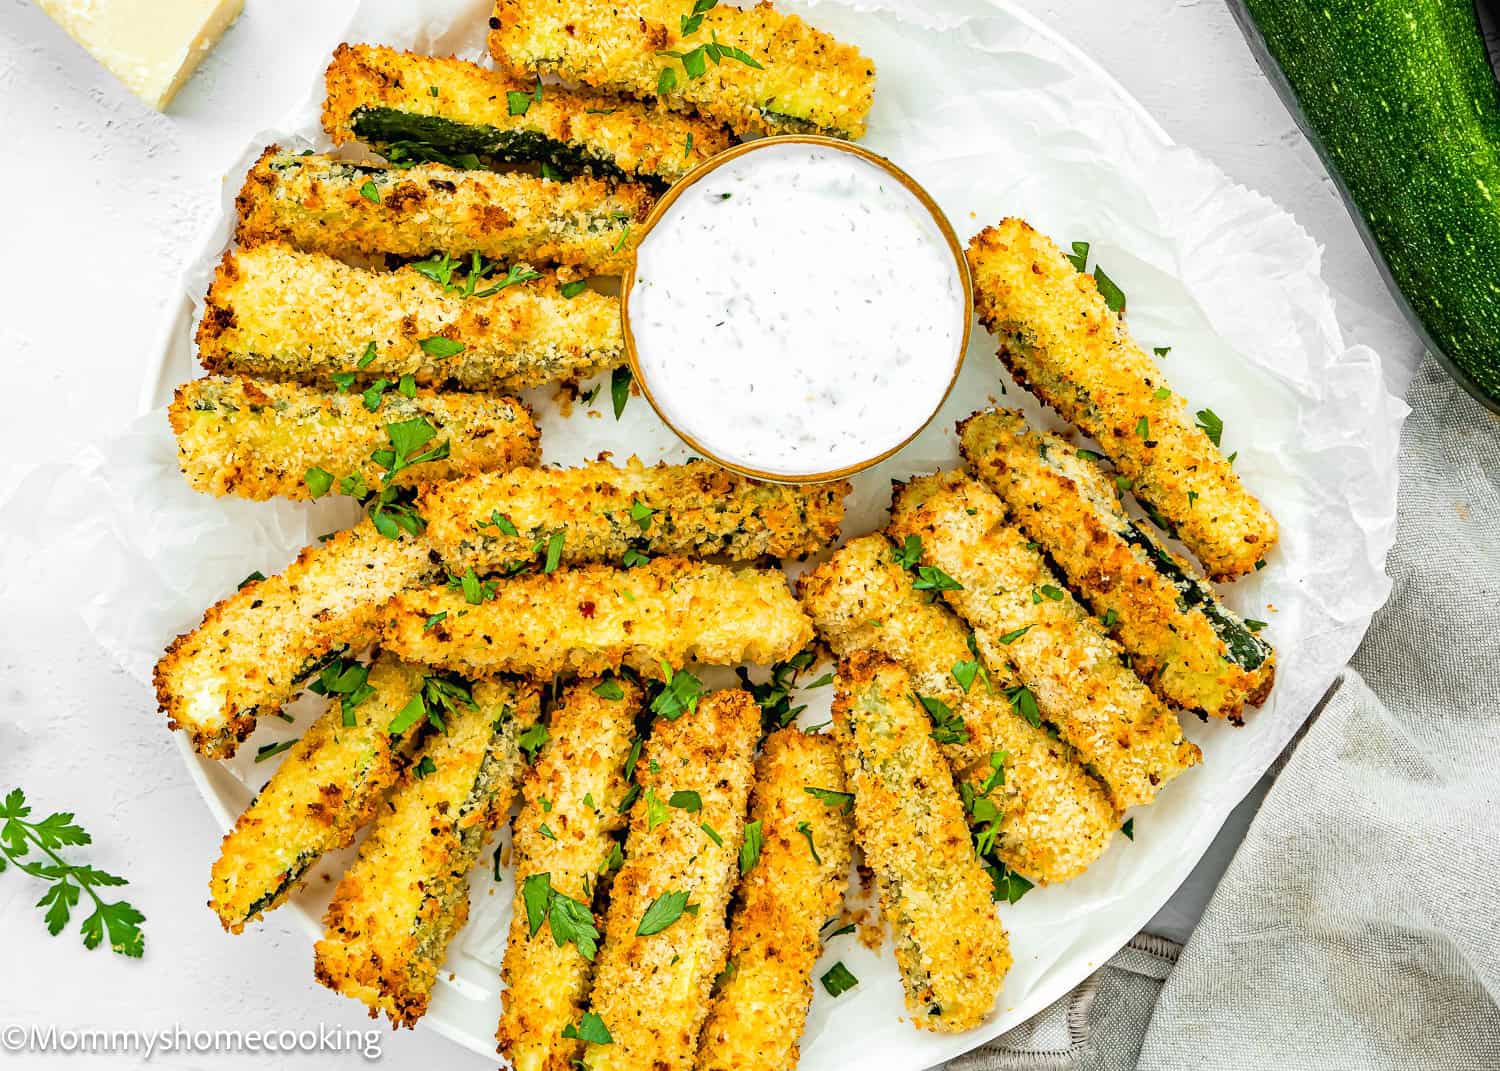
Oh, how I adore these Baked Eggless Zucchini Fries! If you’re always looking for creative ways to use that summer zucchini, this recipe is an absolute must-try. Not only are these fries super easy to make, but they’re also a fun way to enjoy a healthy snack or side dish. They’re completely egg-free, and you can easily adapt this recipe to be dairy-free, too! I love how these fries are cheesy and packed with flavor – they’re a hit with the whole family. These zucchini fries are delightfully crispy on the outside while remaining creamy and delicious on the inside. Whether you bake them in the oven or toss them in the air fryer, they always come out perfect. And don’t forget to pair them with your favorite dipping sauce – yum!
Ingredients You’ll Need, Substitutions & Notes
Please check the recipe card at the bottom of the post for exact quantities and detailed instructions (scroll down). Super Easy to Make: This recipe is straightforward and fuss-free. With just a few simple steps, you can have a delicious batch of zucchini fries ready to enjoy. Perfect for busy weeknights or lazy weekends. Perfect for Using Up Summer Zucchini: Got a garden full of zucchini? These fries are the perfect way to make use of them. They’re a tasty and inventive way to enjoy this versatile vegetable. Cheesy and Flavorful: Panko, Parmesan cheese, and Italian seasoning make these fries incredibly flavorful. Each bite is a delightful mix of cheesy goodness and savory spices. Crispy Outside, Creamy Inside: The texture is just right – crispy on the outside and wonderfully creamy on the inside. It’s a delightful contrast that keeps everyone coming back for more. Versatile Cooking Methods: You can choose to bake these fries in the oven or toss them in the air fryer. Both methods yield deliciously crispy results, so go with whatever is most convenient for you. Great with Any Sauce: These fries are delicious on their own, but they’re even better with a dipping sauce. You can’t go wrong, whether it’s ranch, marinara, or a spicy aioli.
Zucchinis: The star of the dish. Fresh, medium-sized zucchinis work best for this recipe. Panko: Adds a crunchy coating. Note: I strongly recommend using panko breadcrumbs for this recipe instead of regular breadcrumbs. Panko’s light texture and larger pieces create a wonderfully crispy coating for the zucchini fries. On the other hand, regular breadcrumbs are smaller and denser, which can result in a harder, less crispy shell. Parmesan Cheese: Adds a cheesy flavor. Note: Nutritional yeast can be used as a dairy-free alternative. Italian Seasoning: Brings a mix of herbs and spices to the fries. You can make your own mix or buy pre-made. Salt & Ground Black Pepper: Enhances the overall flavor. Yogurt: Acts as the binding agent. Note: Use dairy-free yogurt if needed. Milk: Helps the coating stick. Note: Any plant-based milk can be substituted. All-purpose Flour: Helps create a crispy coating. Fresh Parsley Leaves (optional): Adds a fresh garnish for serving. Olive Oil Spray: Ensures the fries get crispy without sticking.
Process Overview: Step-by-Step Photos
Please check the recipe card at the bottom of the post for exact quantities and detailed instructions (scroll down).
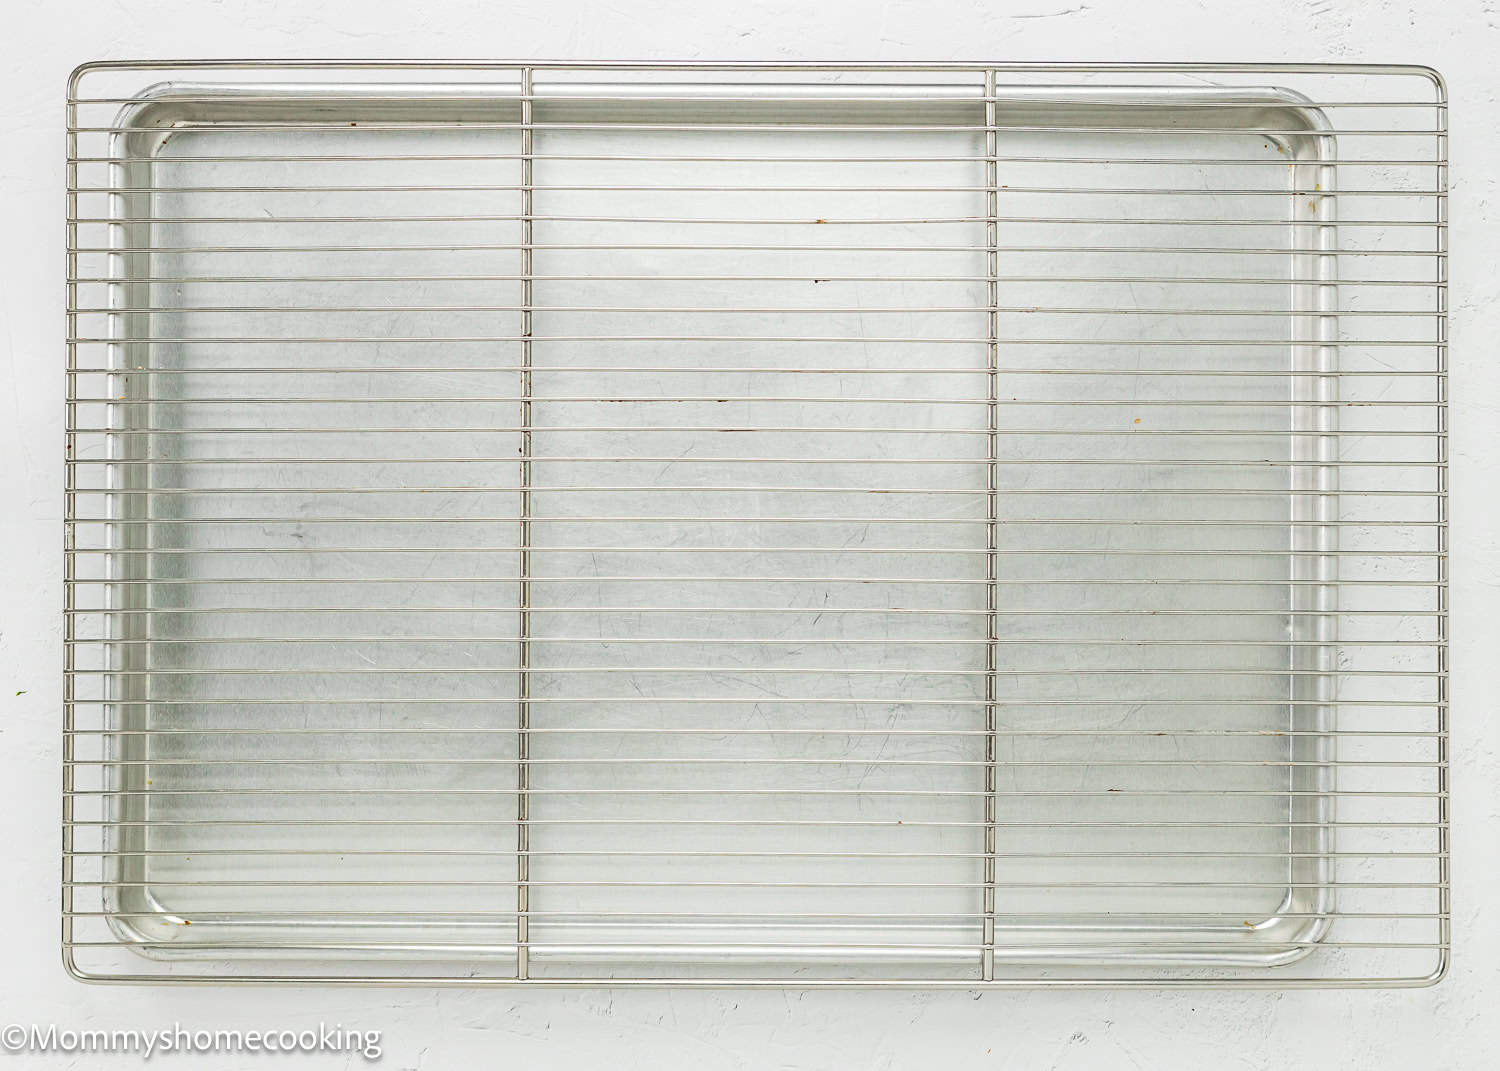
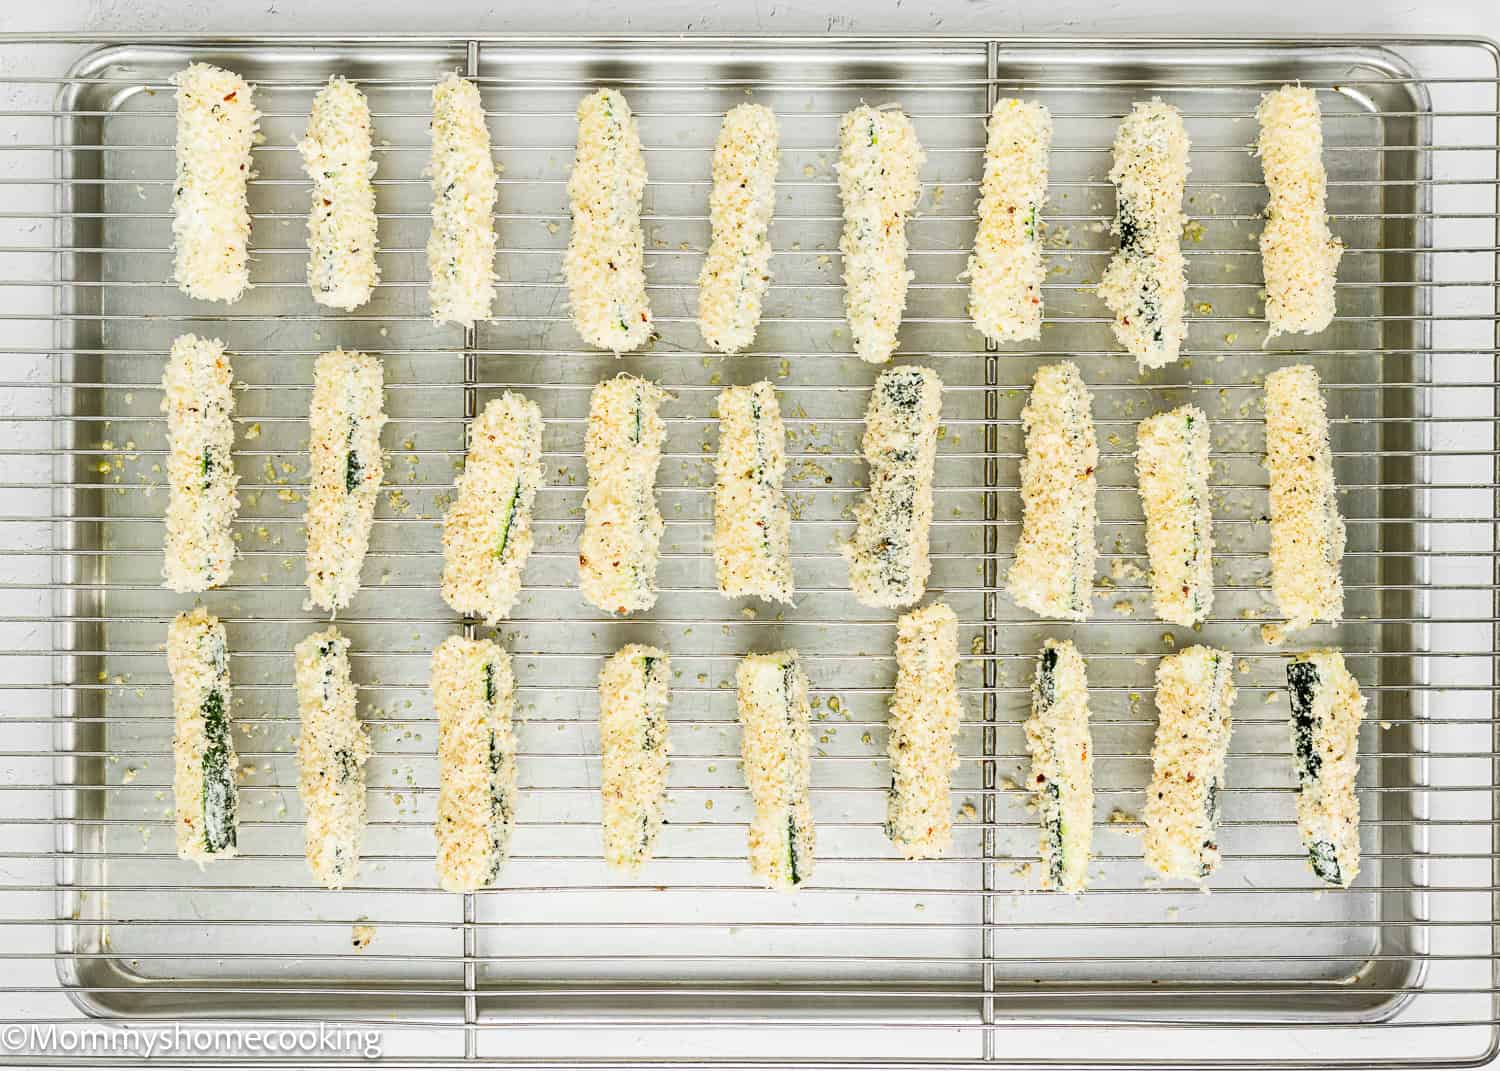
Step 1 – Prepare The Baking Sheet and Preheat The Oven
Preheat oven to 425º F (220º C). Coat a cooling rack with nonstick spray and place on a baking sheet; set aside.
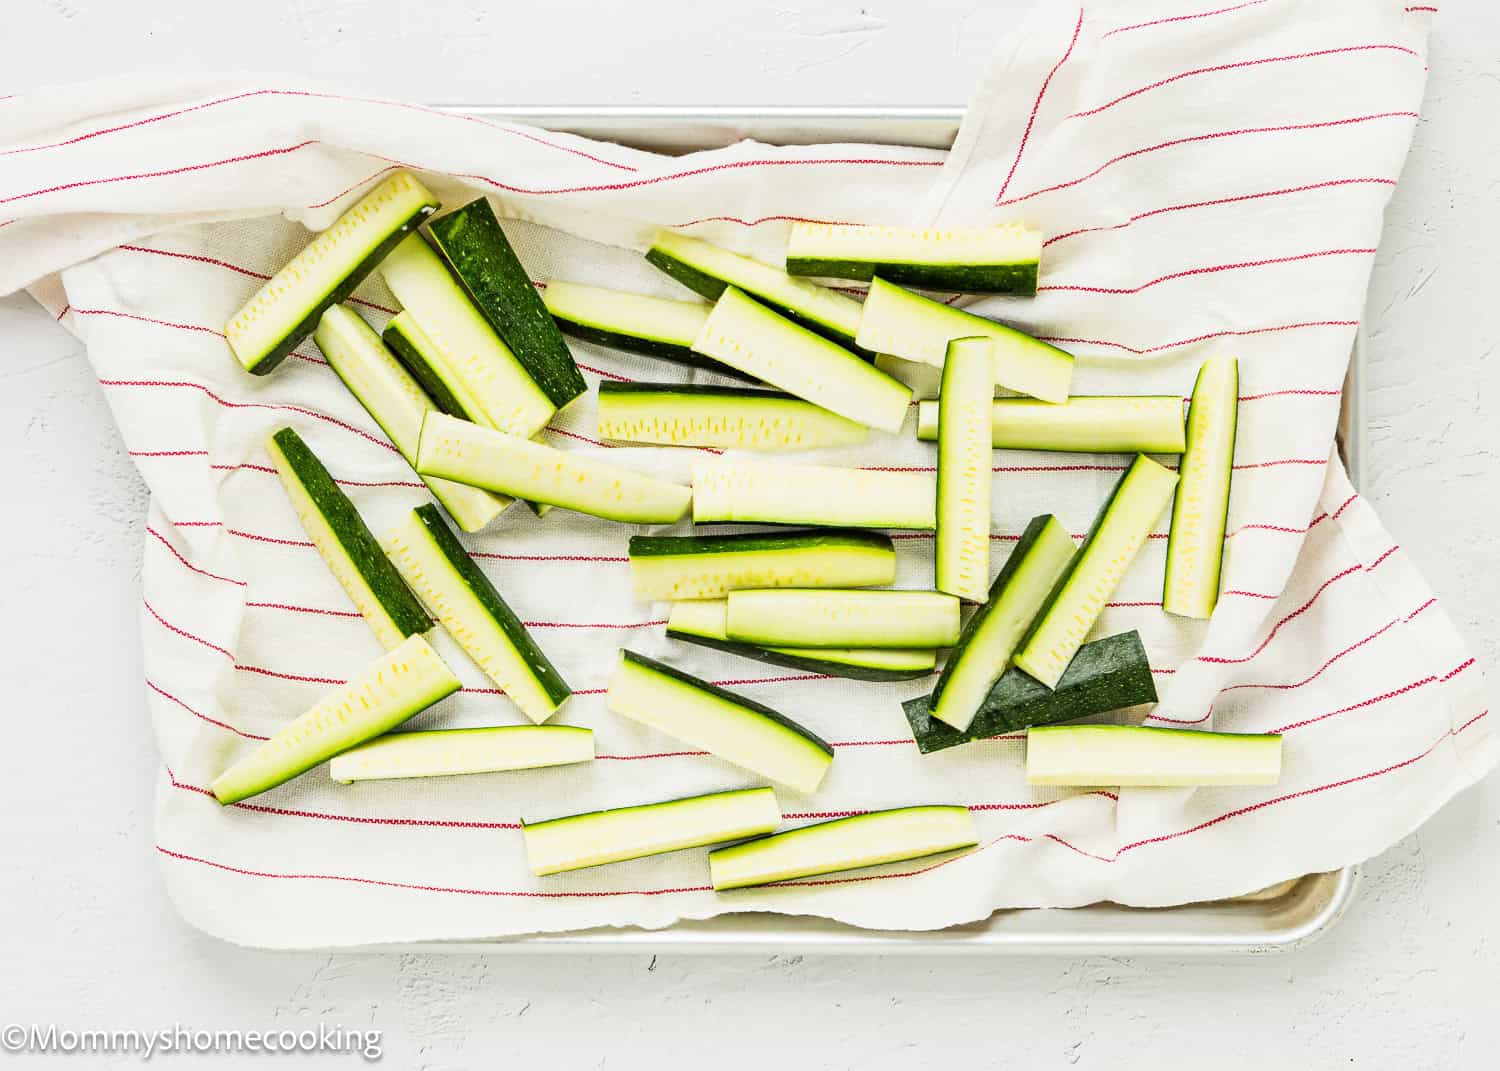
Step 2 – Pat Dry The Zucchini Sticks
Cut the ends of the zucchinis. Slice the zucchinis in half, then cut each half in half again lengthwise, then into quarters. You should have 16 sticks per zucchini. Spread the zucchini sticks onto paper towels or a dry kitchen towel. Lightly pat dry. Let rest on the towels while you prepare the coating.
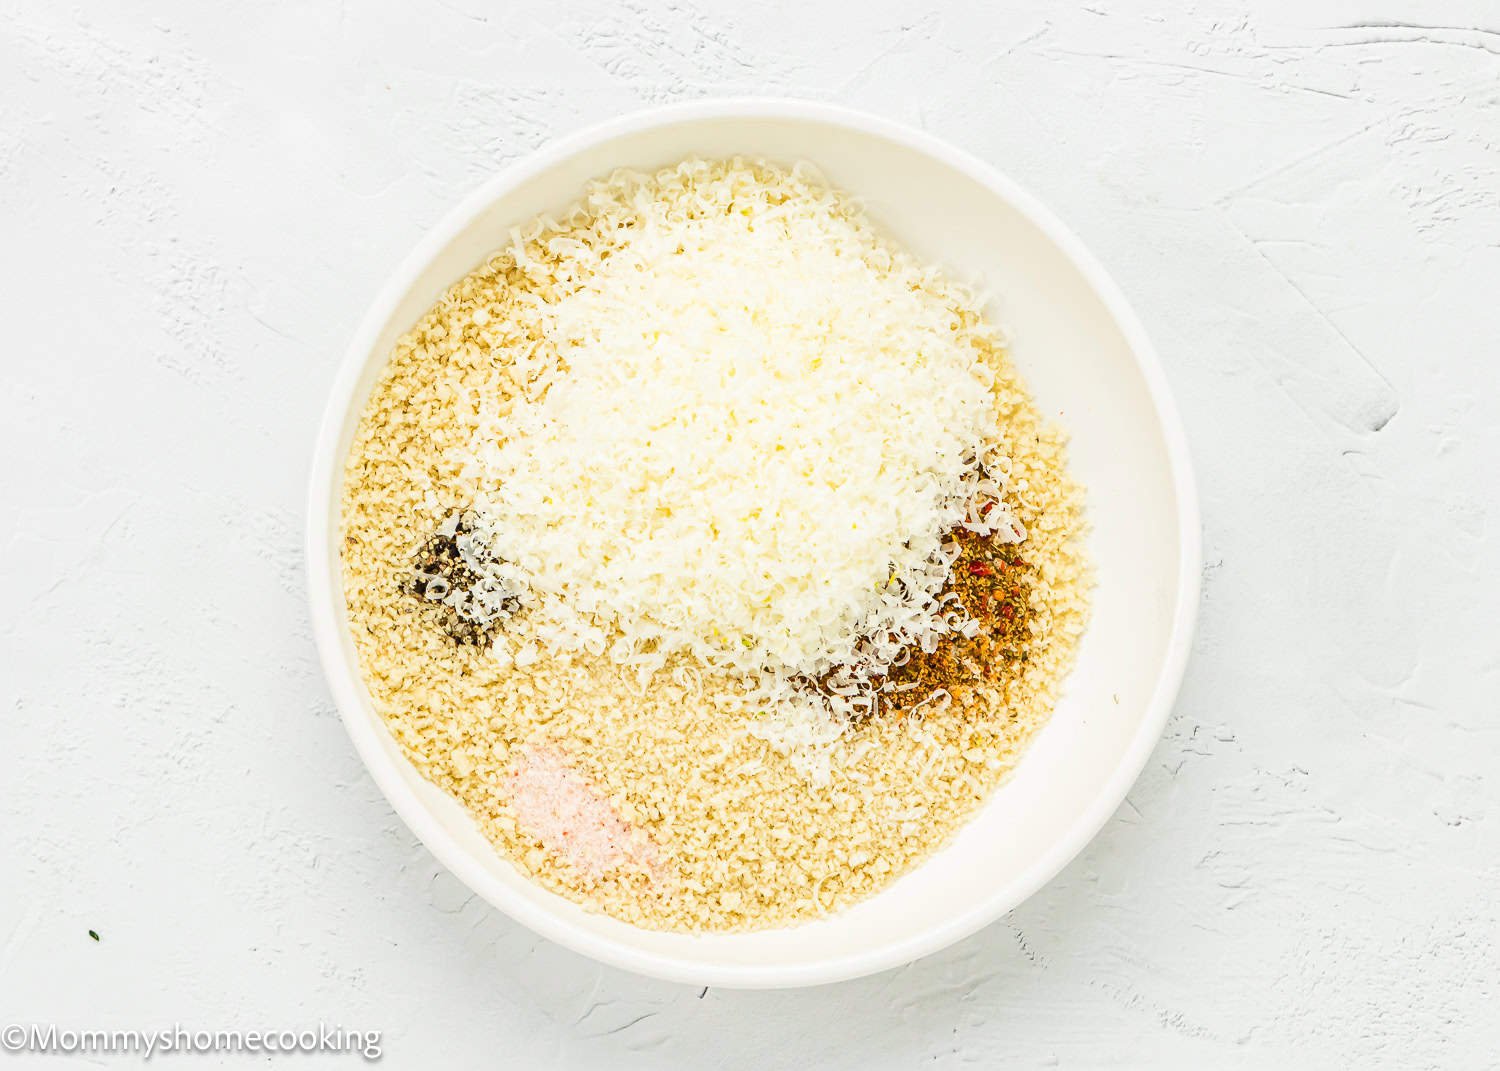
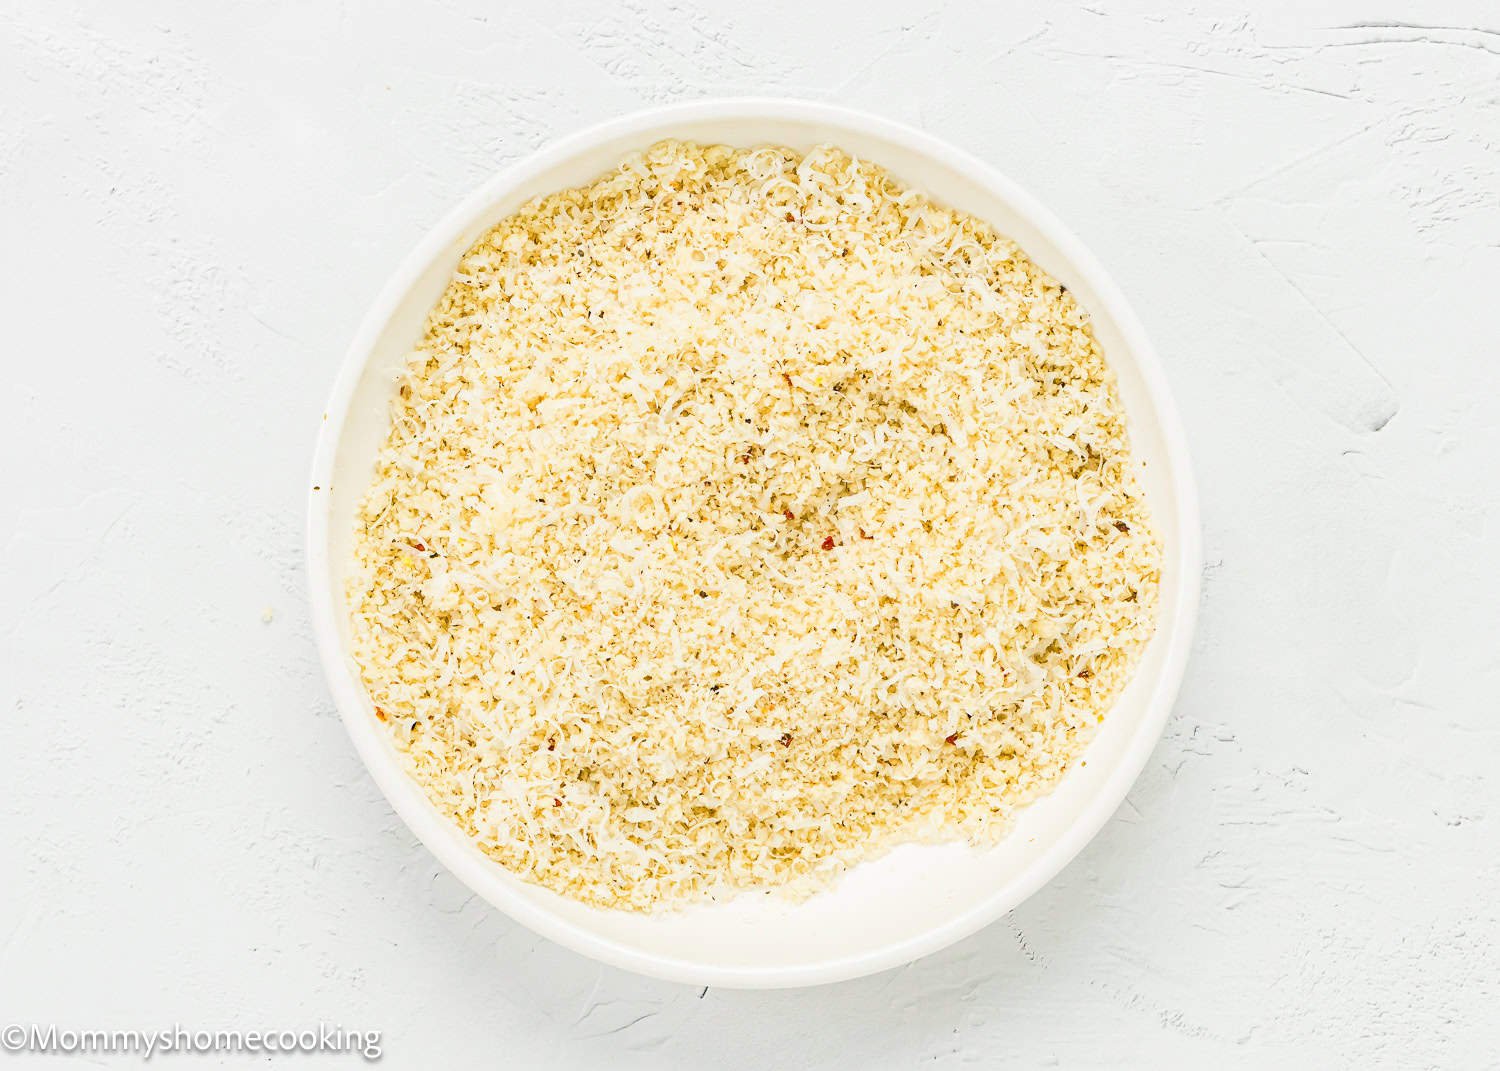
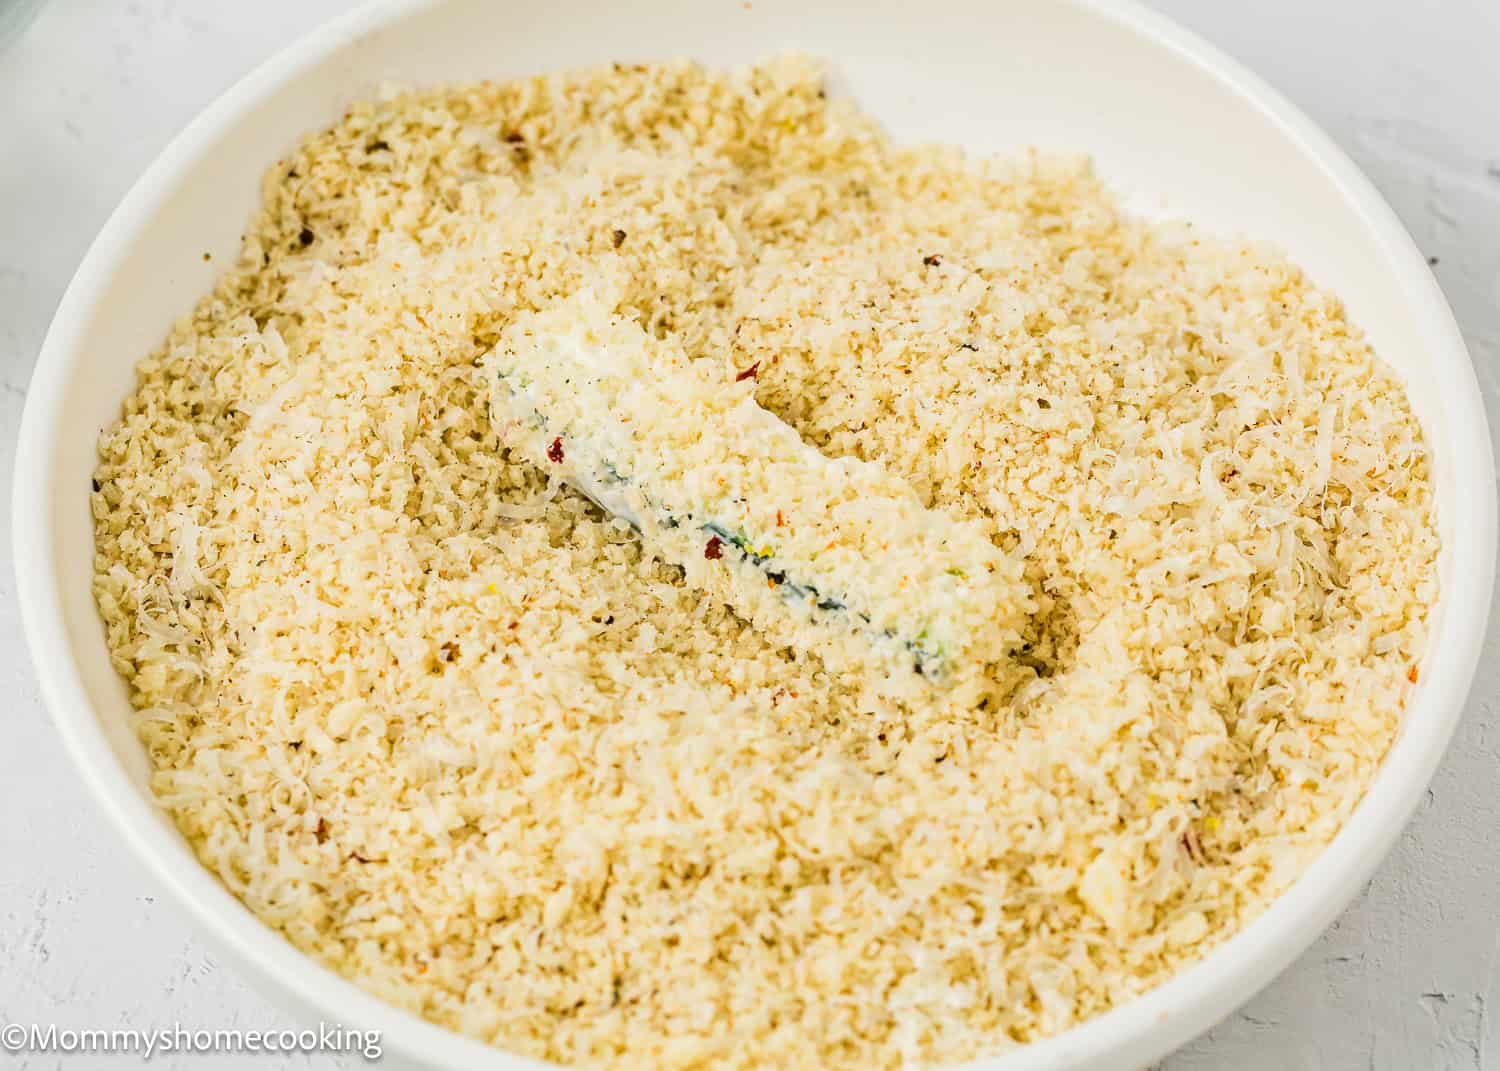
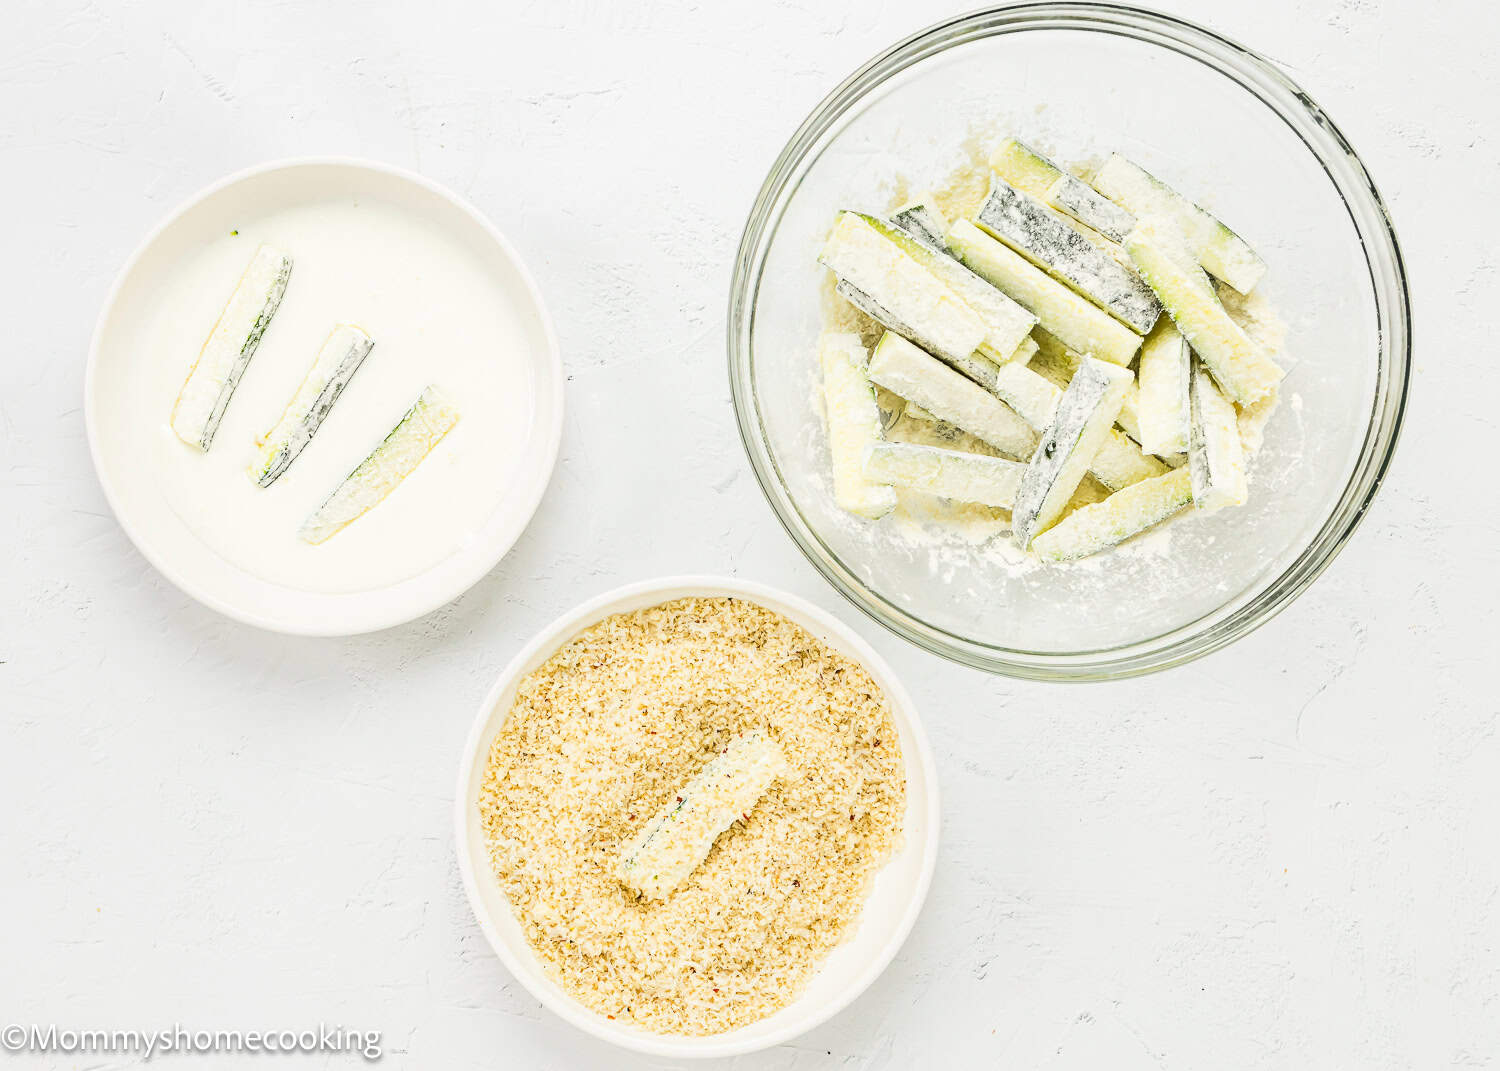
Step 3 – Combine The Panko Mixture
Combine Panko, Parmesan, Italian seasoning, salt, and pepper in a shallow plate or bowl. Set aside.
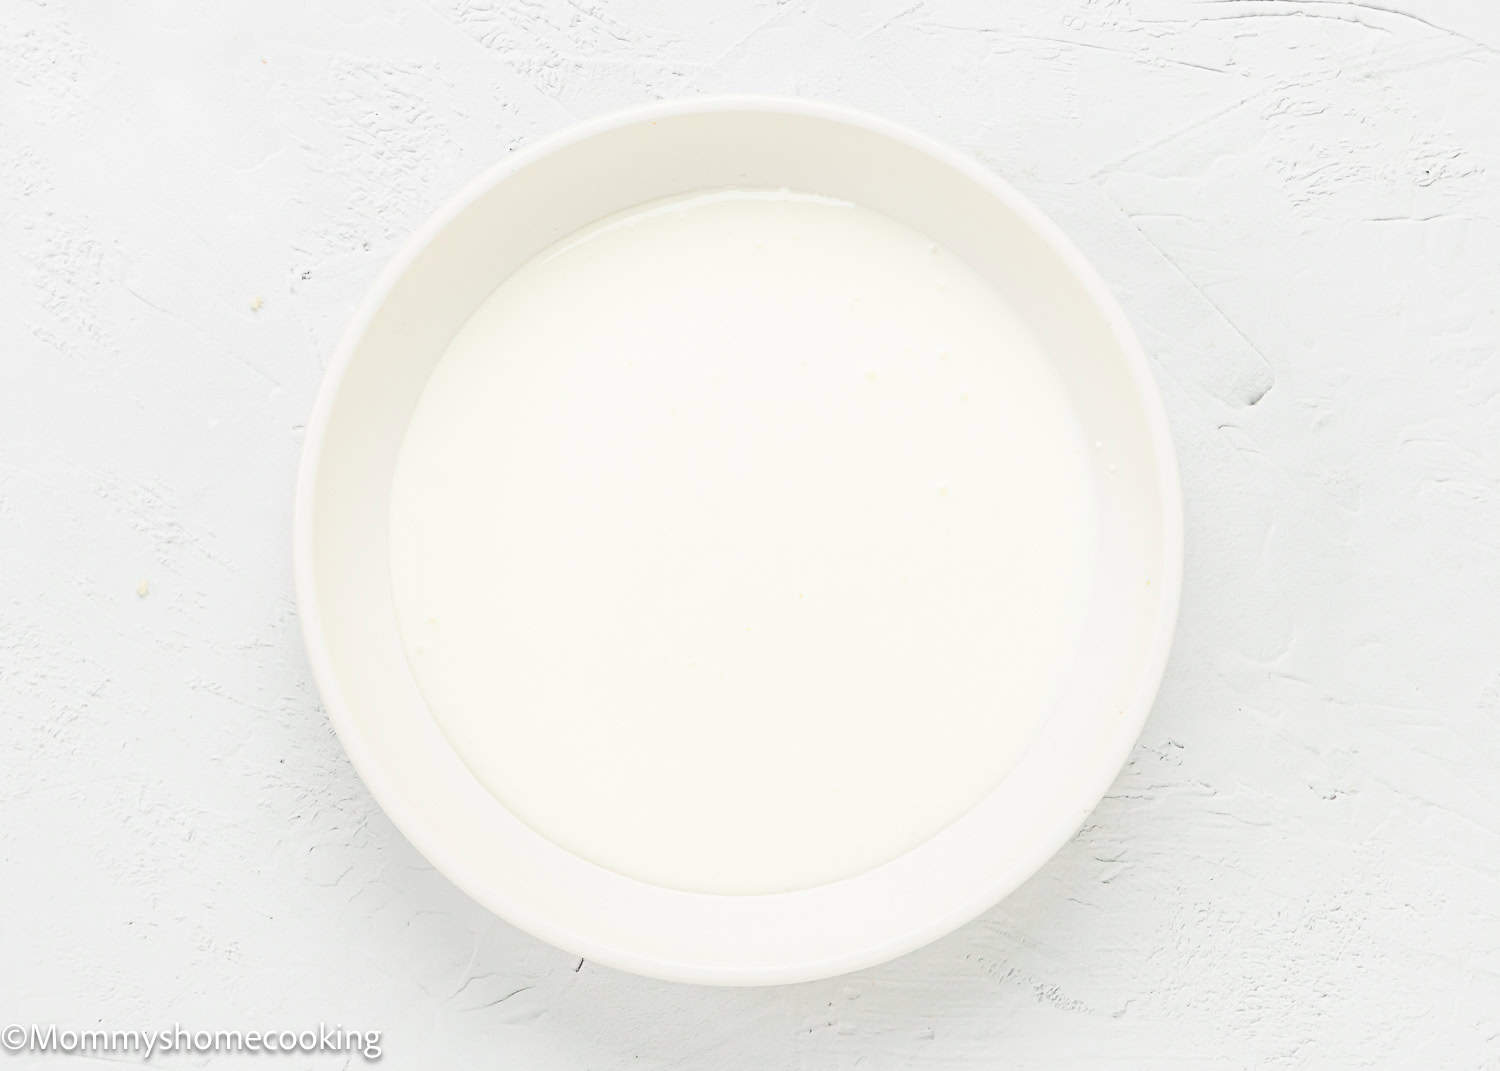
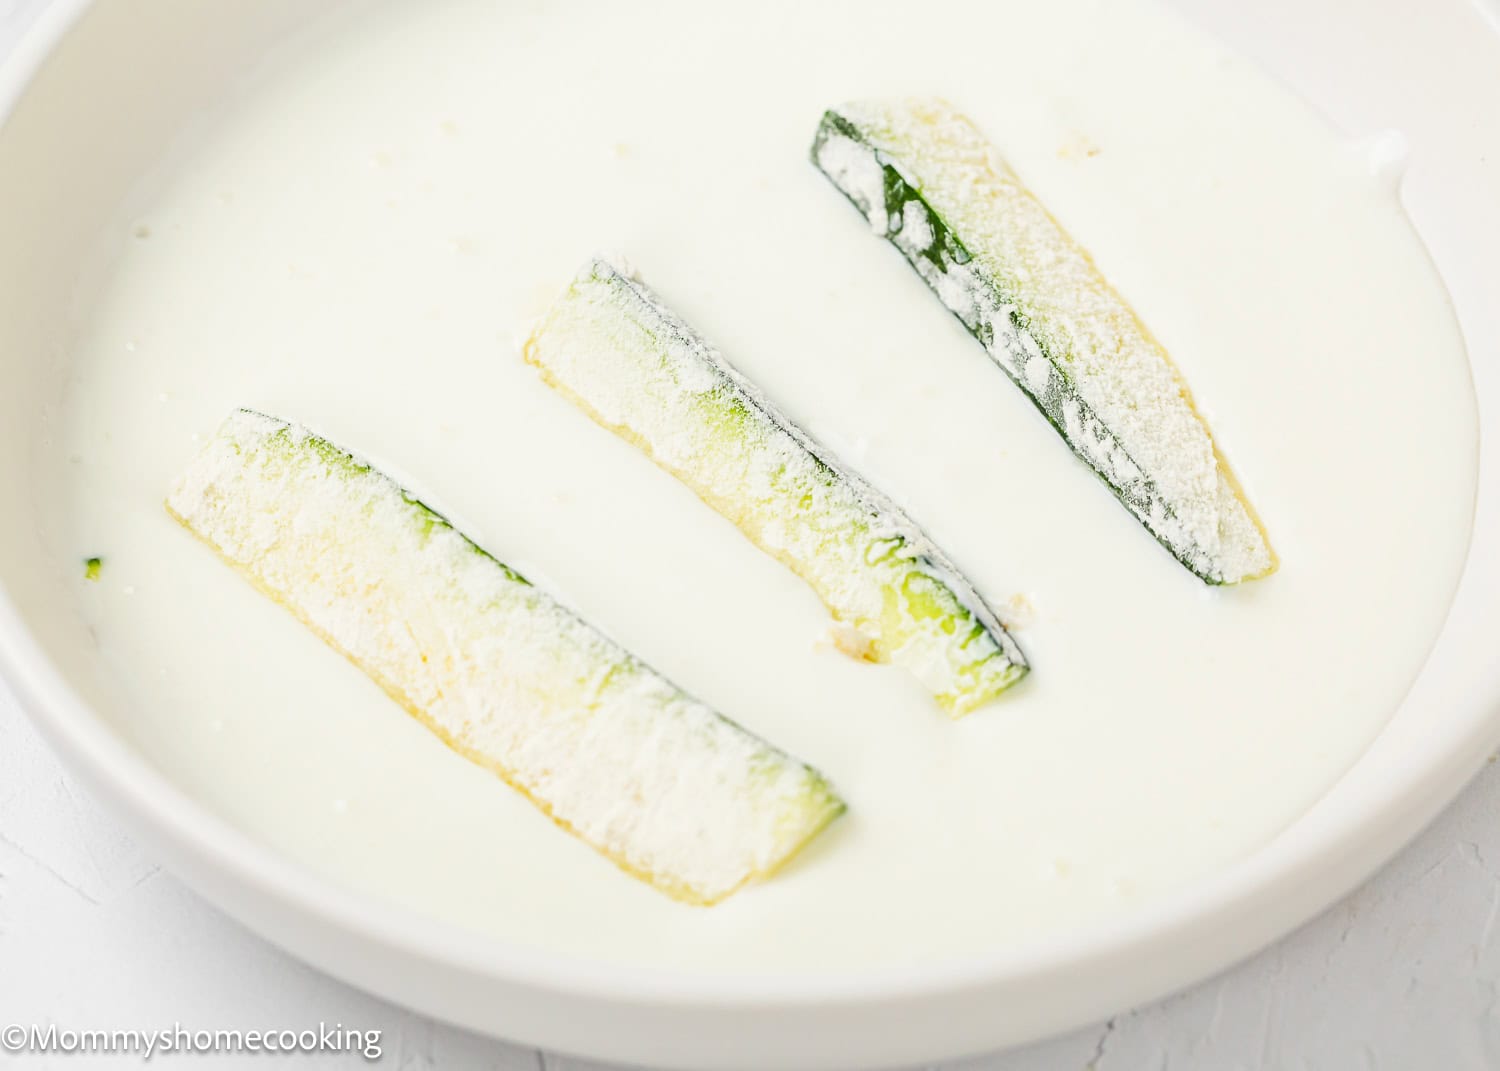
Step 4 – Combine Yogurt and Milk
Mix the yogurt and milk on a shallow plate.
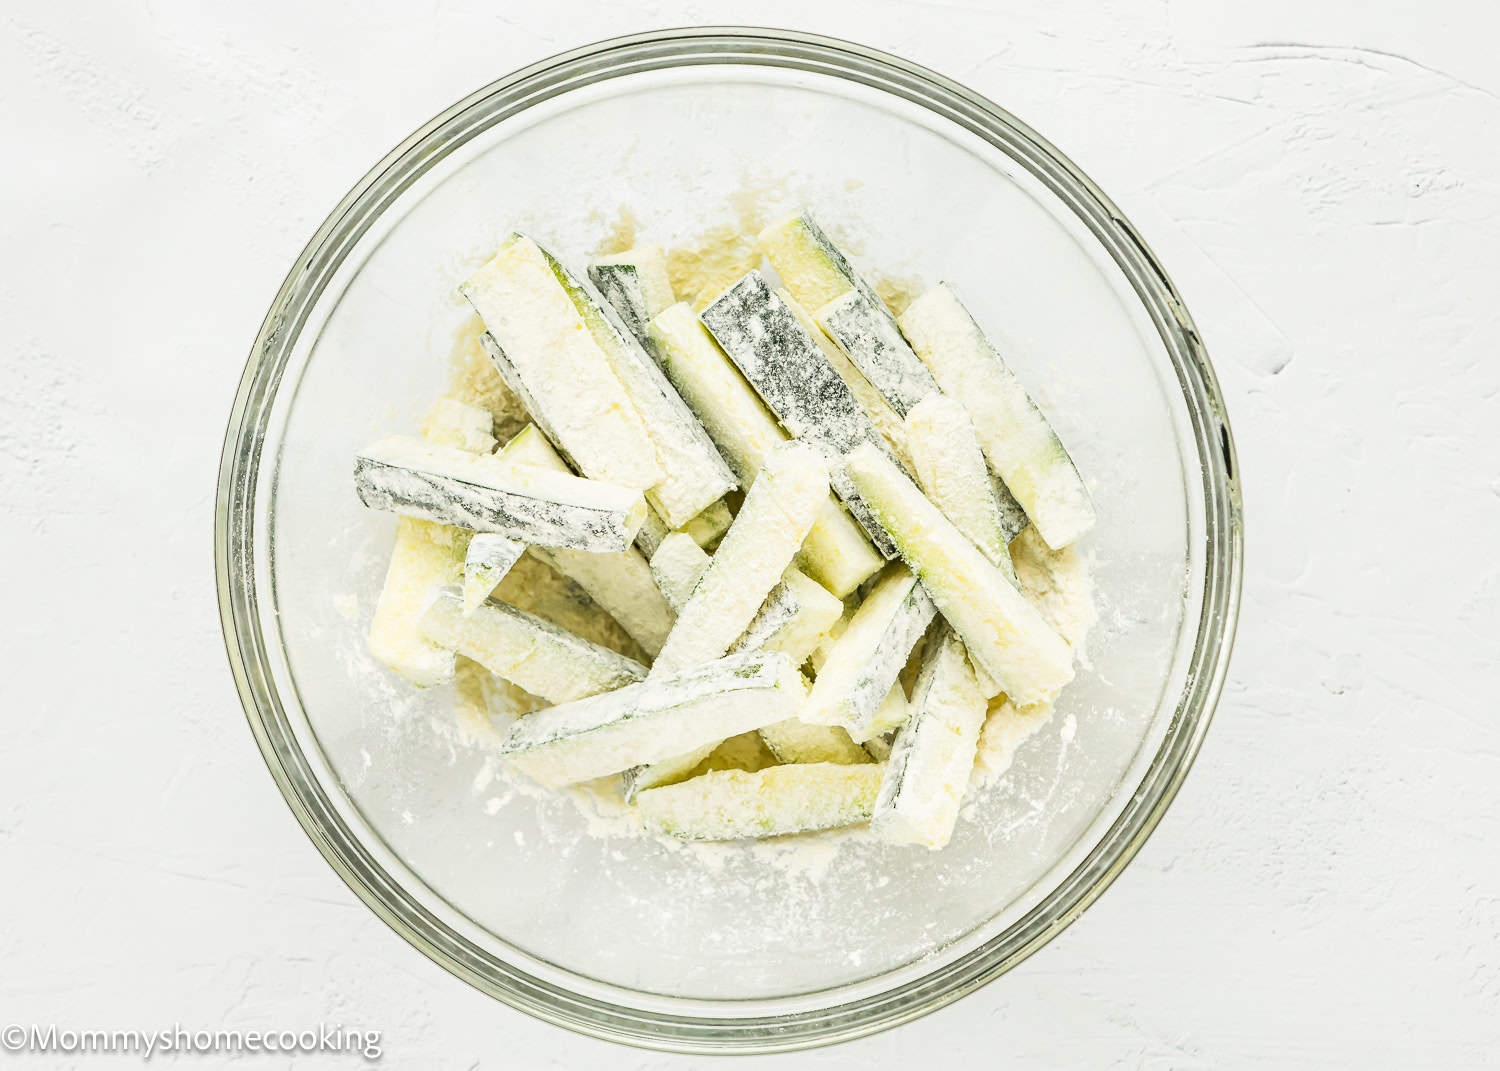
Step 5 – Toss The Zucchini Sticks With Flour
Place the zucchini sticks in a bowl and add the flour. Toss until well covered.
Step 6 – Dip and Dredge
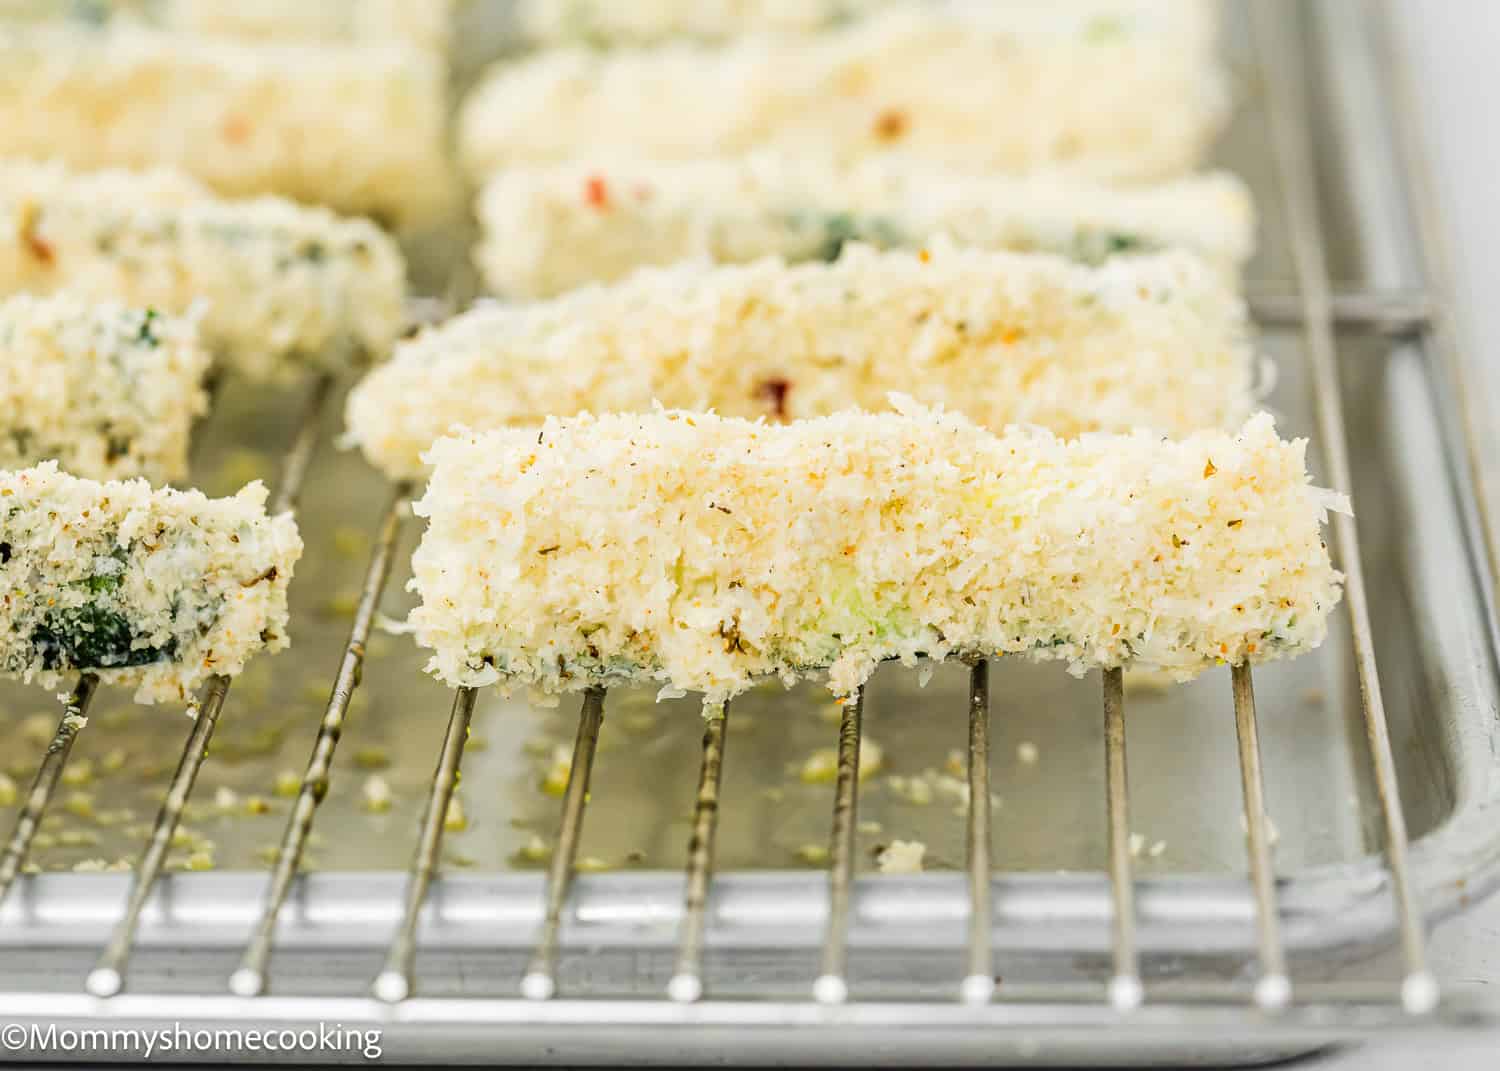
Working in batches, dip the sticks into the yogurt mixture (shake off any excess yogurt), then dredge in the Panko mixture, pressing it to coat. Arrange the zucchini on the baking sheet. Line up the sticks so they are near each other and all fit, but make sure they do not touch. Repeat with the remaining zucchini. Lightly but thoroughly coat the zucchini with the cooking spray.
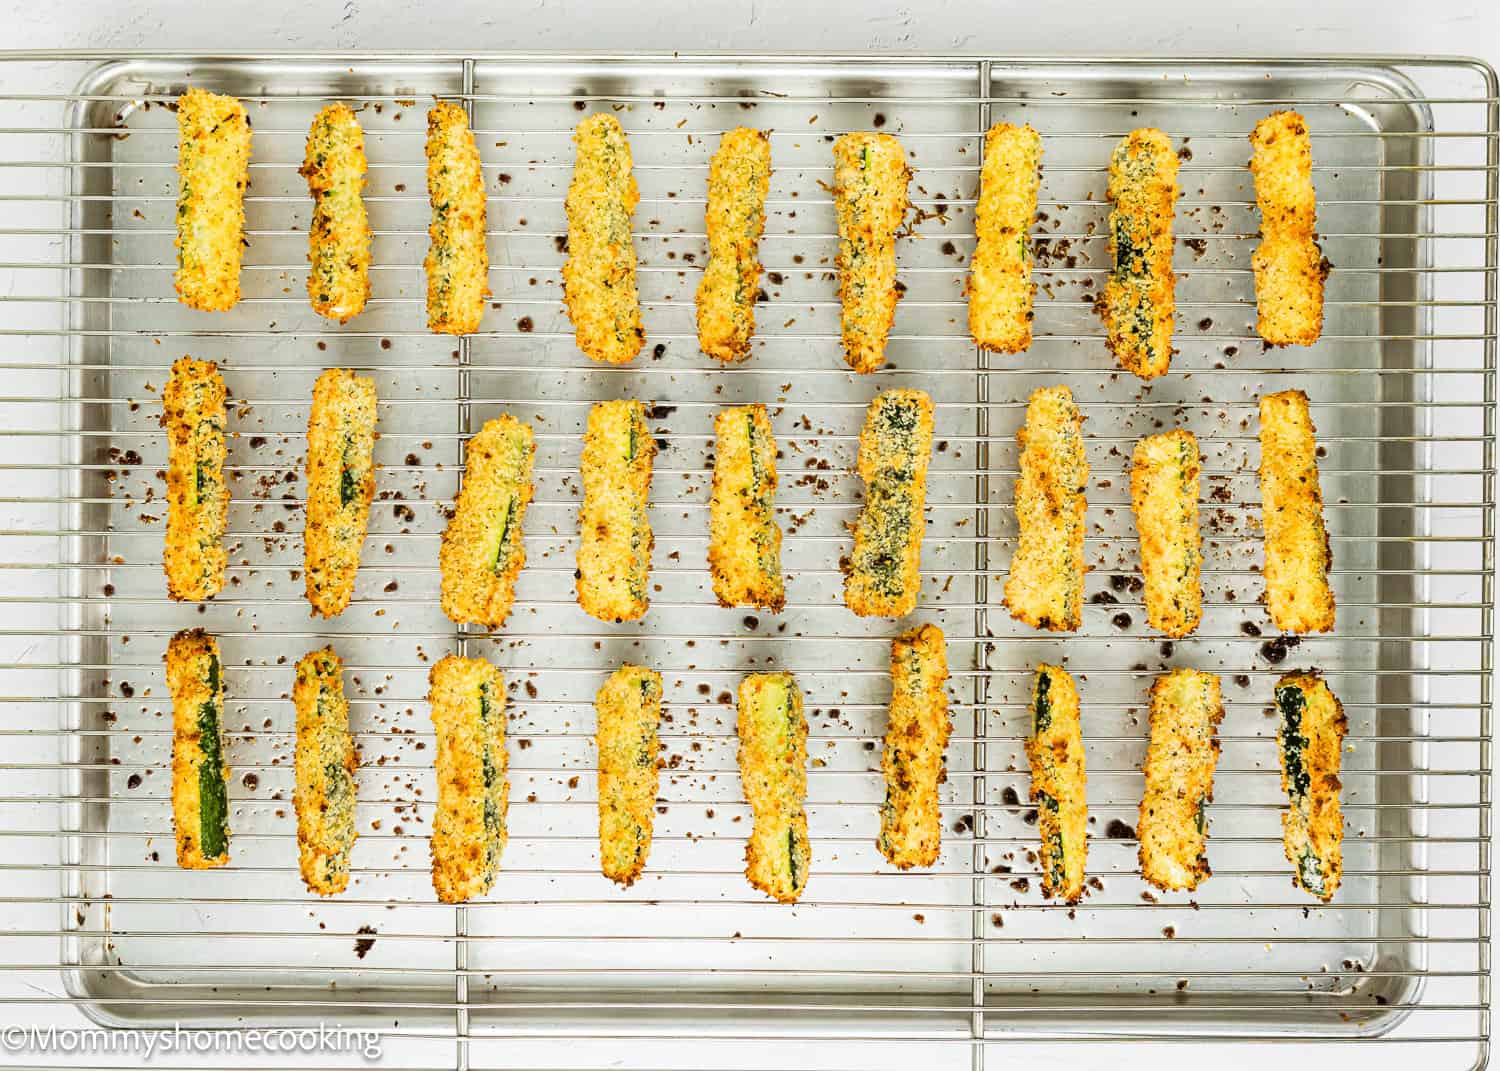
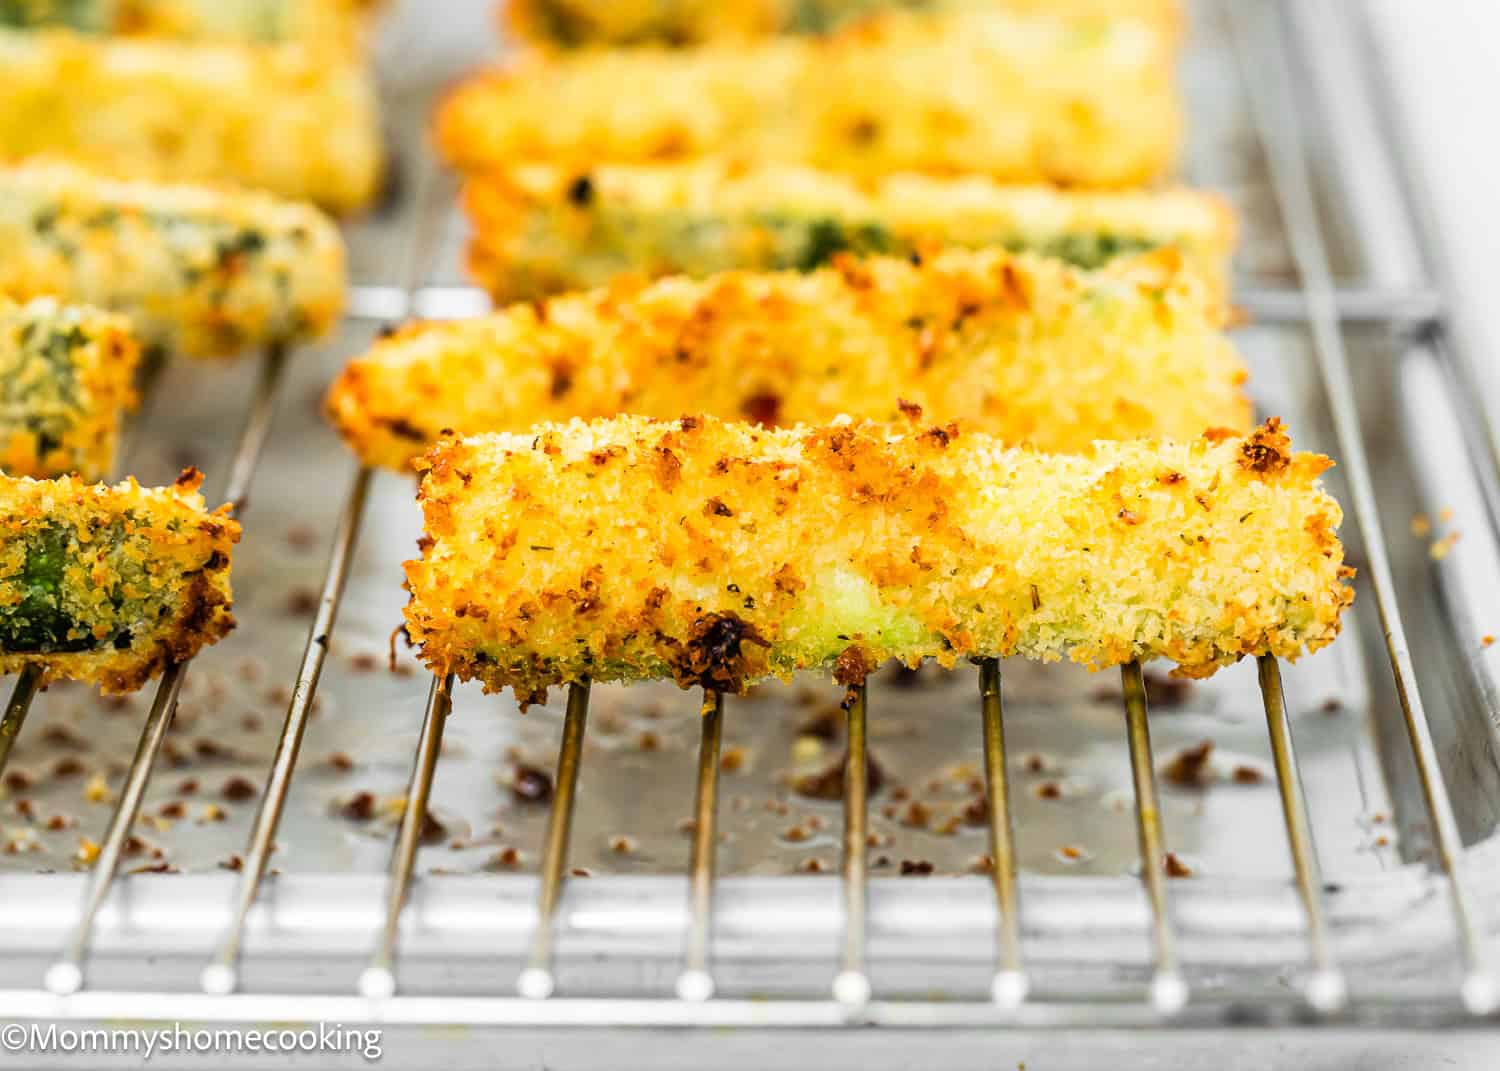
Step 7 – Bake
Place into the oven and bake for 15 – 20 minutes or until golden brown and crisp. Serve immediately.
Food Allergy Swaps
Dairy-Free: Use nutritional yeast instead of Parmesan cheese and plant-based yogurt and milk. Gluten-Free: Substitute all-purpose flour with a gluten-free flour blend and use gluten-free Panko.
Variations & Additions
Spicy Kick: Add a pinch of cayenne pepper or red pepper flakes to the coating mixture for a spicy version. Herby Twist: Mix in some fresh or dried herbs like basil or oregano for extra flavor. Extra Cheesy: Sprinkle additional Parmesan cheese on top before baking.
Serving Suggestions
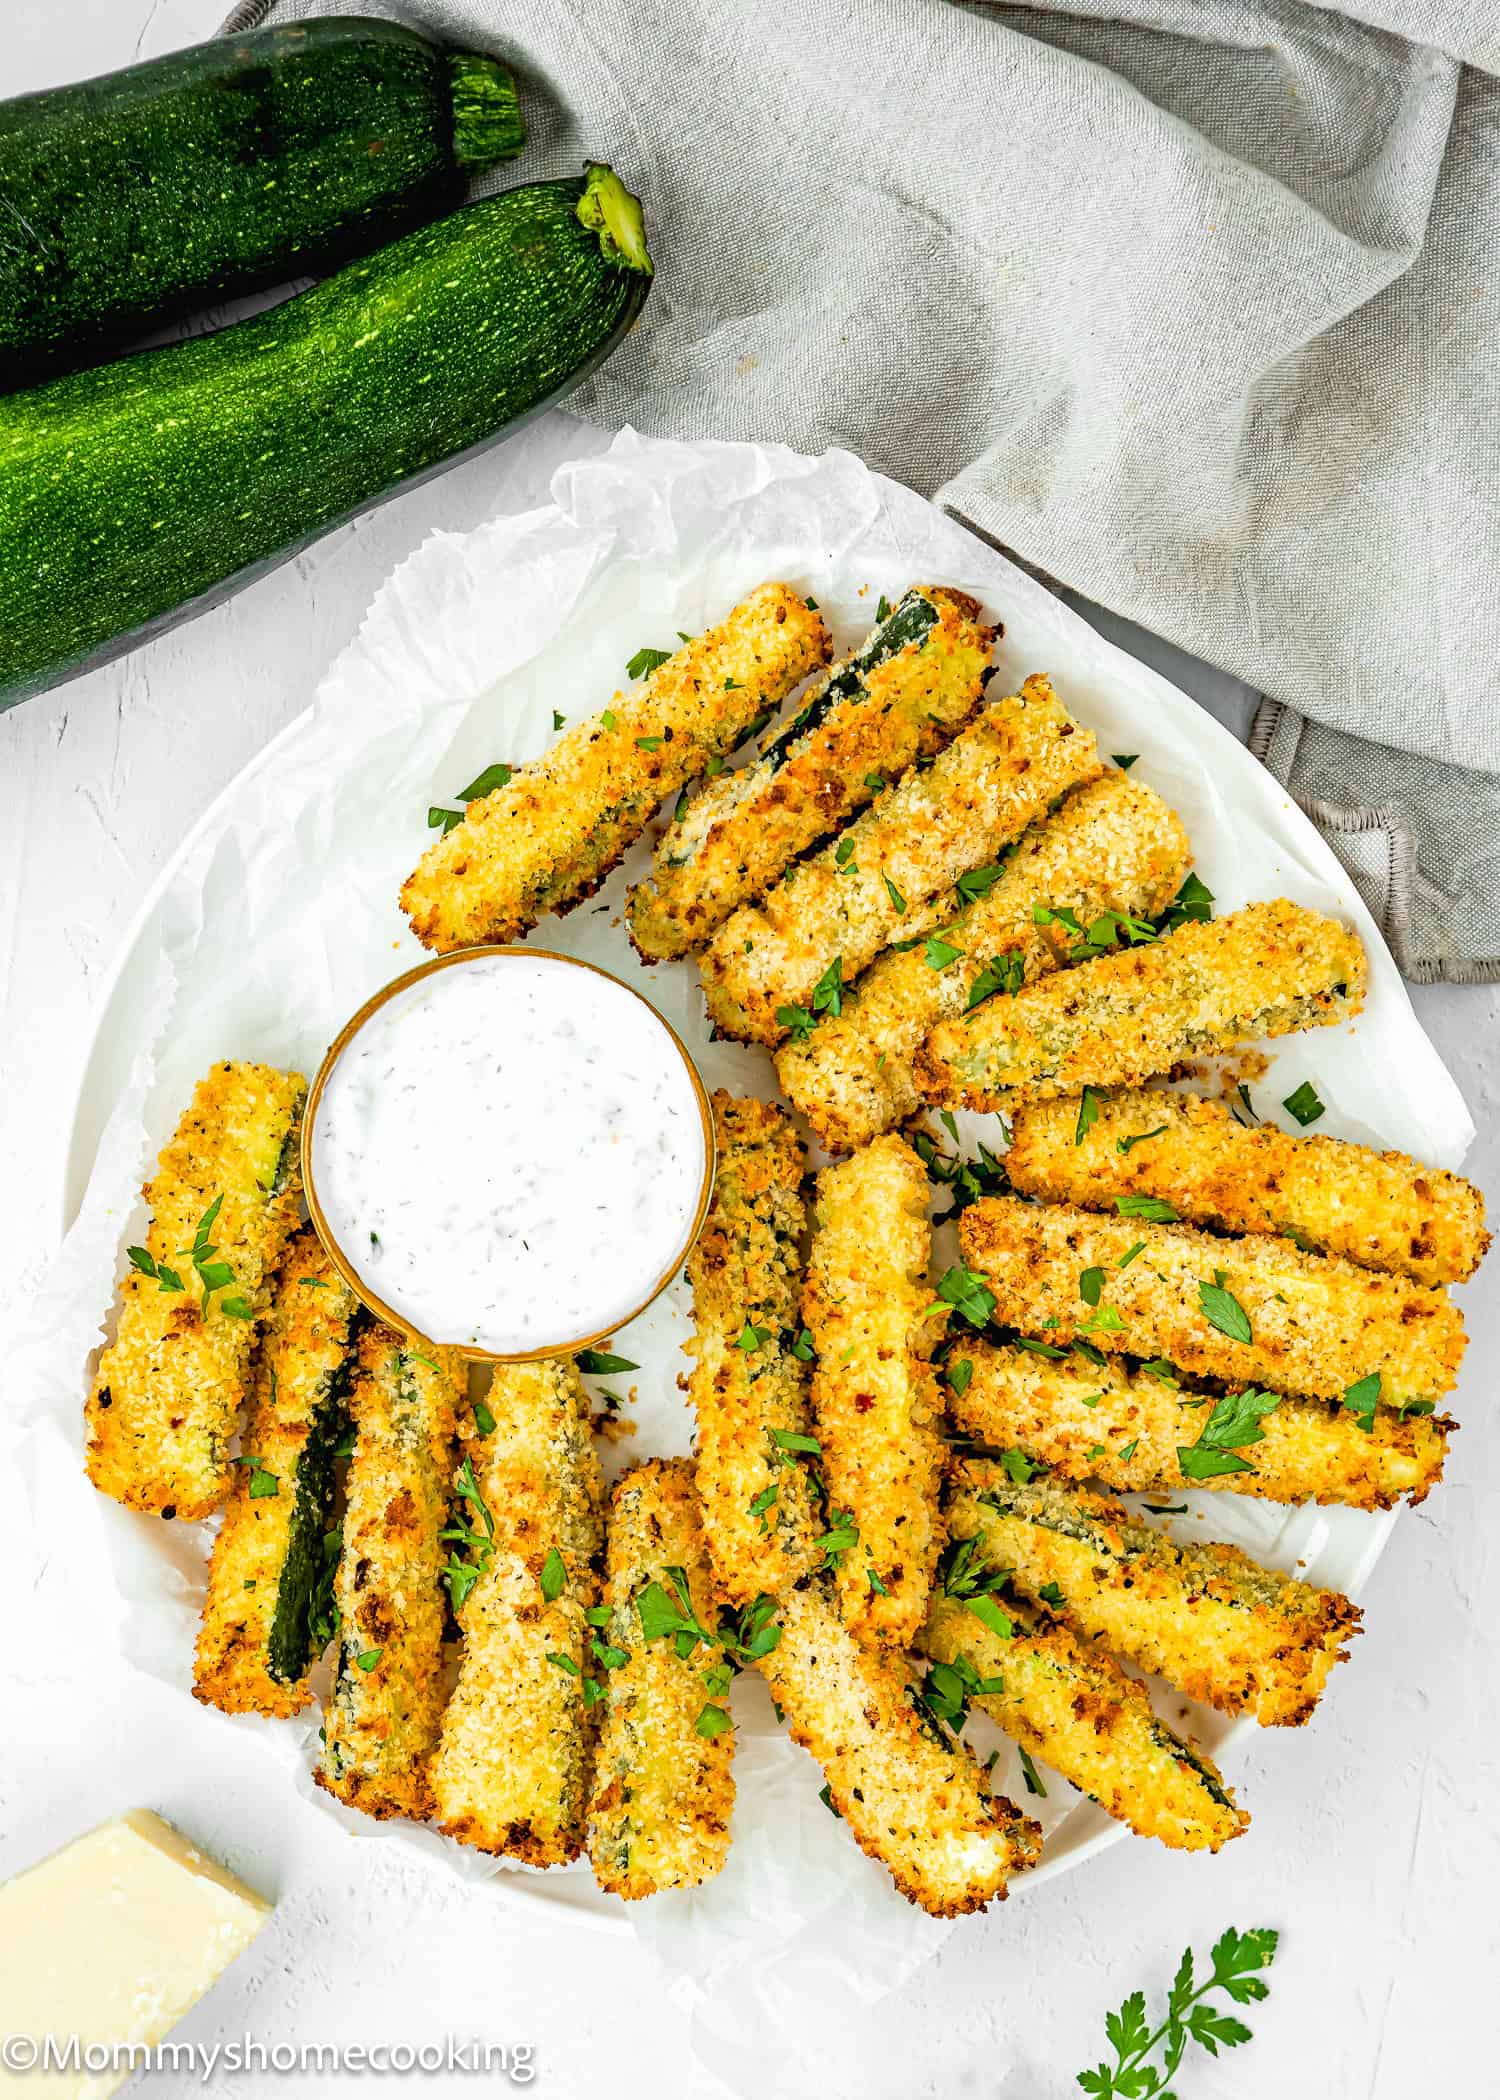
Serve these zucchini fries hot and crispy, garnished with fresh parsley if desired. They make a fantastic snack, appetizer, or side dish. Pair them with your favorite dipping sauces like ranch, yogurt, marinara, Avocado Sauce (Guasacaca), or a spicy aioli for added flavor.
Cut Evenly: Slice the zucchini into even sticks to ensure uniform cooking. Dry Well: Pat the zucchini sticks dry to remove excess moisture, which helps them get crispy. Preheat: Always preheat your oven or air fryer for the best results. Don’t overcrowd: Bake the fries in a single layer for the best results. If needed, use multiple baking sheets or racks to ensure they have enough space to crisp up properly. Kwon your oven: Every oven is different, so baking times should always be taken with a grain of salt. Oven thermostats can be wildly off, and that will all affect baking time, so keep an eye on yours. Eat immediately! Zucchinis are made up of 95% water, and they release that water quickly after being cooked. This means the longer they sit, the softer they get. For the best texture, enjoy these zucchini fries right away.
Storing and Freezing Instructions
Storing: Keep any leftovers in an airtight container in the refrigerator for up to 3 days. Freezing: To freeze, place the cooked fries on a baking sheet in a single layer and freeze until solid. Transfer to a freezer bag and store for up to 2 months. Reheat directly from frozen in the oven or air fryer. Reheat in a preheated (400º F – 200º C) oven or air fryer for a few minutes to retain crispiness.
More Summer Recipes You’ll Love!
3-Minute Instant Pot Corn on the Cob Easy Crispy Zucchini Fritters (Egg-Free) Easy Eggless Corn Fritters (Croquettes) Easy Watermelon Summer Salad Browse more recipes…
Recipe Card 📖