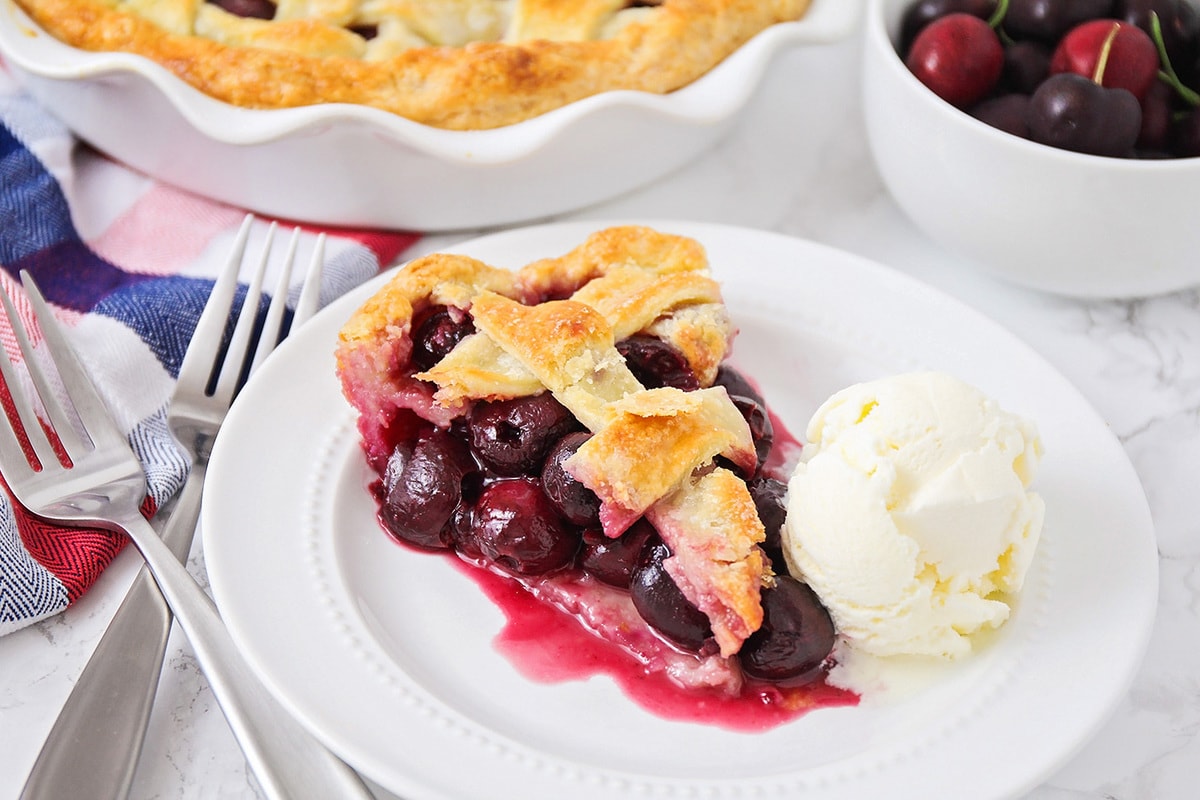
Fruit pies are a great treat any time of year, but I especially love them in the summer, when fruit is at its peak season. Whether it’s Strawberry Pie, Triple Berry Pie, or this cherry pie recipe, they really do make the perfect dessert!
the Best Homemade Cherry Pie!
I’ve always loved eating pie, but in the past, I’ve been intimidated by actually baking it. Berry pies are especially delicious: strawberry pie, blueberry pie, and this sweet + tart cherry pie recipe! A few years ago, I decided it was time to actually master this pie-baking thing, and to my surprise, making a good pie is actually much easier than I thought it would be. The elements of pie are actually pretty simple, and that’s why it’s important to start with good ingredients. Using the freshest, ripest, and sweetest fruit you can find will make a huge difference in the finished pie. This cherry pie is a classic. It’s one that requires a little effort (especially prepping the fresh cherries), but trust me – it is WELL worth it! I’ve included a lot of tips to ensure you get the best cherry pie filling and a delicious dessert! Just top it off with some Vanilla Ice Cream or Whipped Cream!
Prepping the Cherries
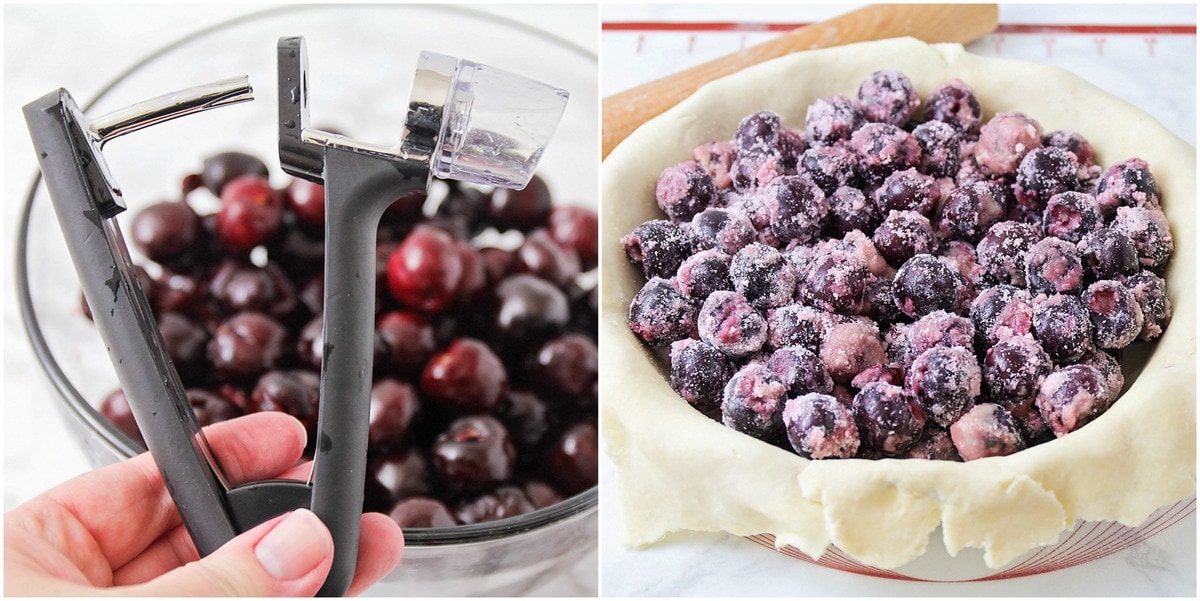
The most time-consuming part of making this best cherry pie recipe is pitting all of the cherries, but once you get into a groove, it goes pretty smoothly – and the flavor cannot be beat! Pitting. I have this Oxo Cherry Pitter to make things a little easier, but you can also push out the pits using a chopstick, or plastic straw instead. Be prepared to have purple-stained fingers and hands from all the cherry juice! Sweet or tart cherries. If you start with very sweet cherries and then mix in sugar, you may end up with a too-sweet dessert. The opposite is also true. Pie cherries are typically more tart than regular cherries. To accommodate the sour cherries, you’ll need to use more sugar. To help make sure the balance of flavor is there consider the following:
For tart cherries add 1-2 more tablespoons of sugar. For sweet cherries add 1 teaspoon of lemon juice.
Cherry juice reduction: If you are worried about runny pie filling, especially if you used frozen cherries, you can make a cherry juice reduction before adding it to the pie. This will further ensure that the filling sets nicely.
Toss the cherries as instructed in step 1 and then let them sit while you roll out the pie dough and line the pie plate. While the cherries sit the sugars start pulling out the liquid and you may notice a few tablespoons of juice at the bottom of the bowl. Use a slotted spoon to place the cherries in the pie dough and then pour the cherry juice into a small saucepan. Heat the juice over low heat for 3-4 minutes until it has reduced and thickened a bit. Allow it to cool before pouring it over the cherries in the pie plate. Add the pie dough topping and bake.
how to make Cherry Pie
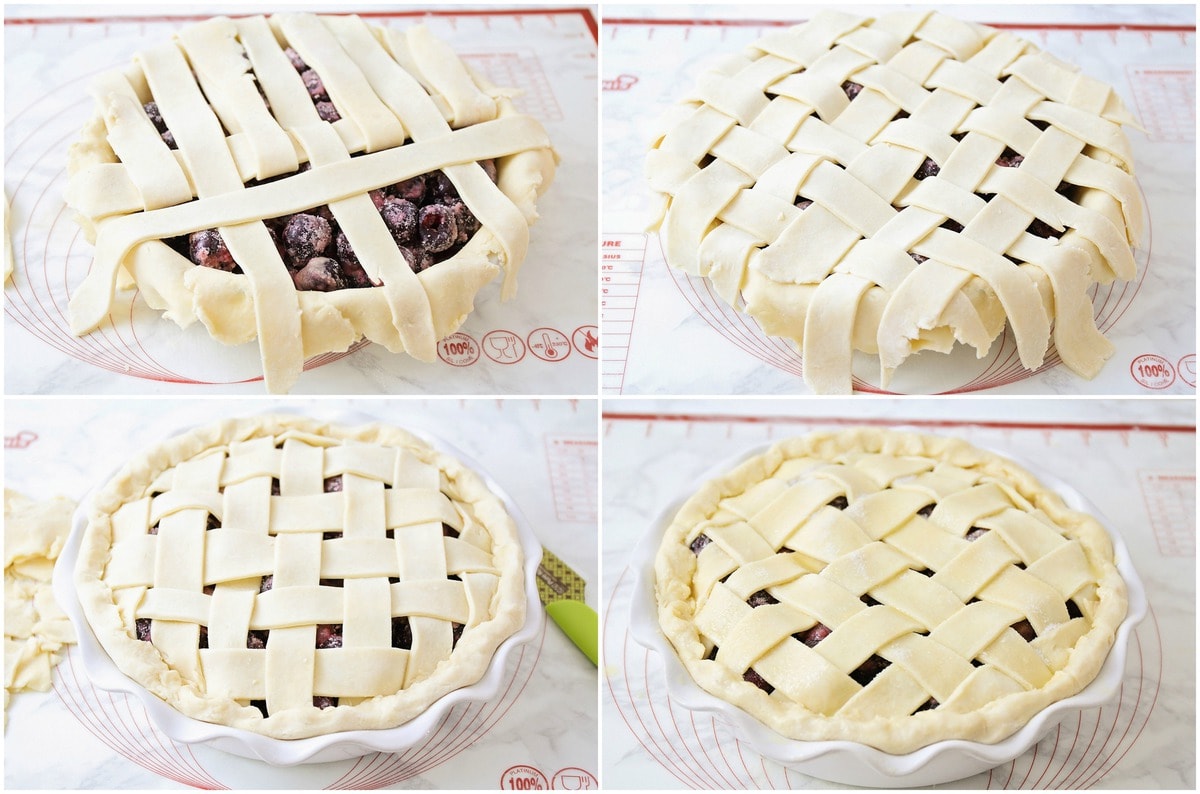
This easy cherry pie is simple and tasty, start with the luscious filling! PREP. Preheat the oven to 400°F. CHERRY FILLING. In a medium bowl, mix together the cherries, cornstarch, sugar, vanilla, and salt, until the cherries are coated with the cornstarch mixture. CRUST. As far as the crust goes, I like to use this excellent homemade Pie Crust recipe for a flavorful, flaky crust. But if you’re running short on time, and don’t have time to make pie crust from scratch, a refrigerated pie crust is a good substitute. Press the bottom crust into your pie dish, then add your cherry filling. See lattice topping instructions below.
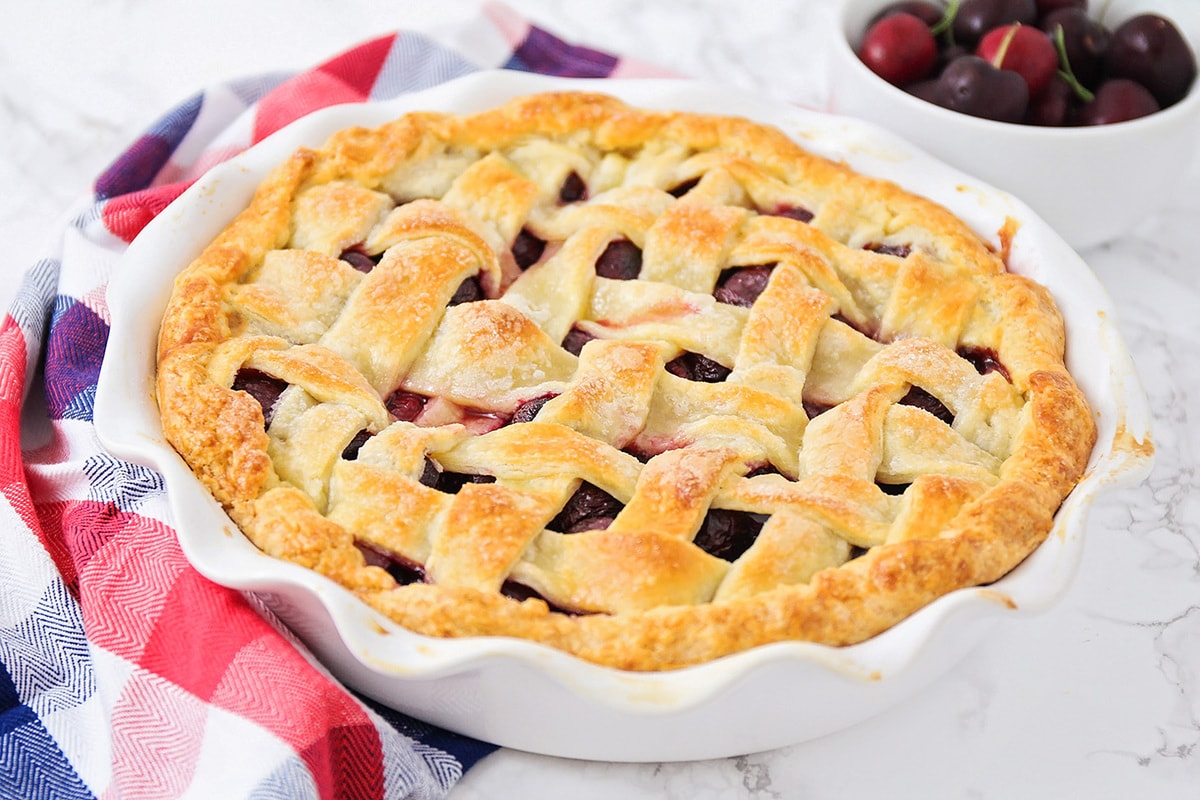
Lattice Crust Tutorial
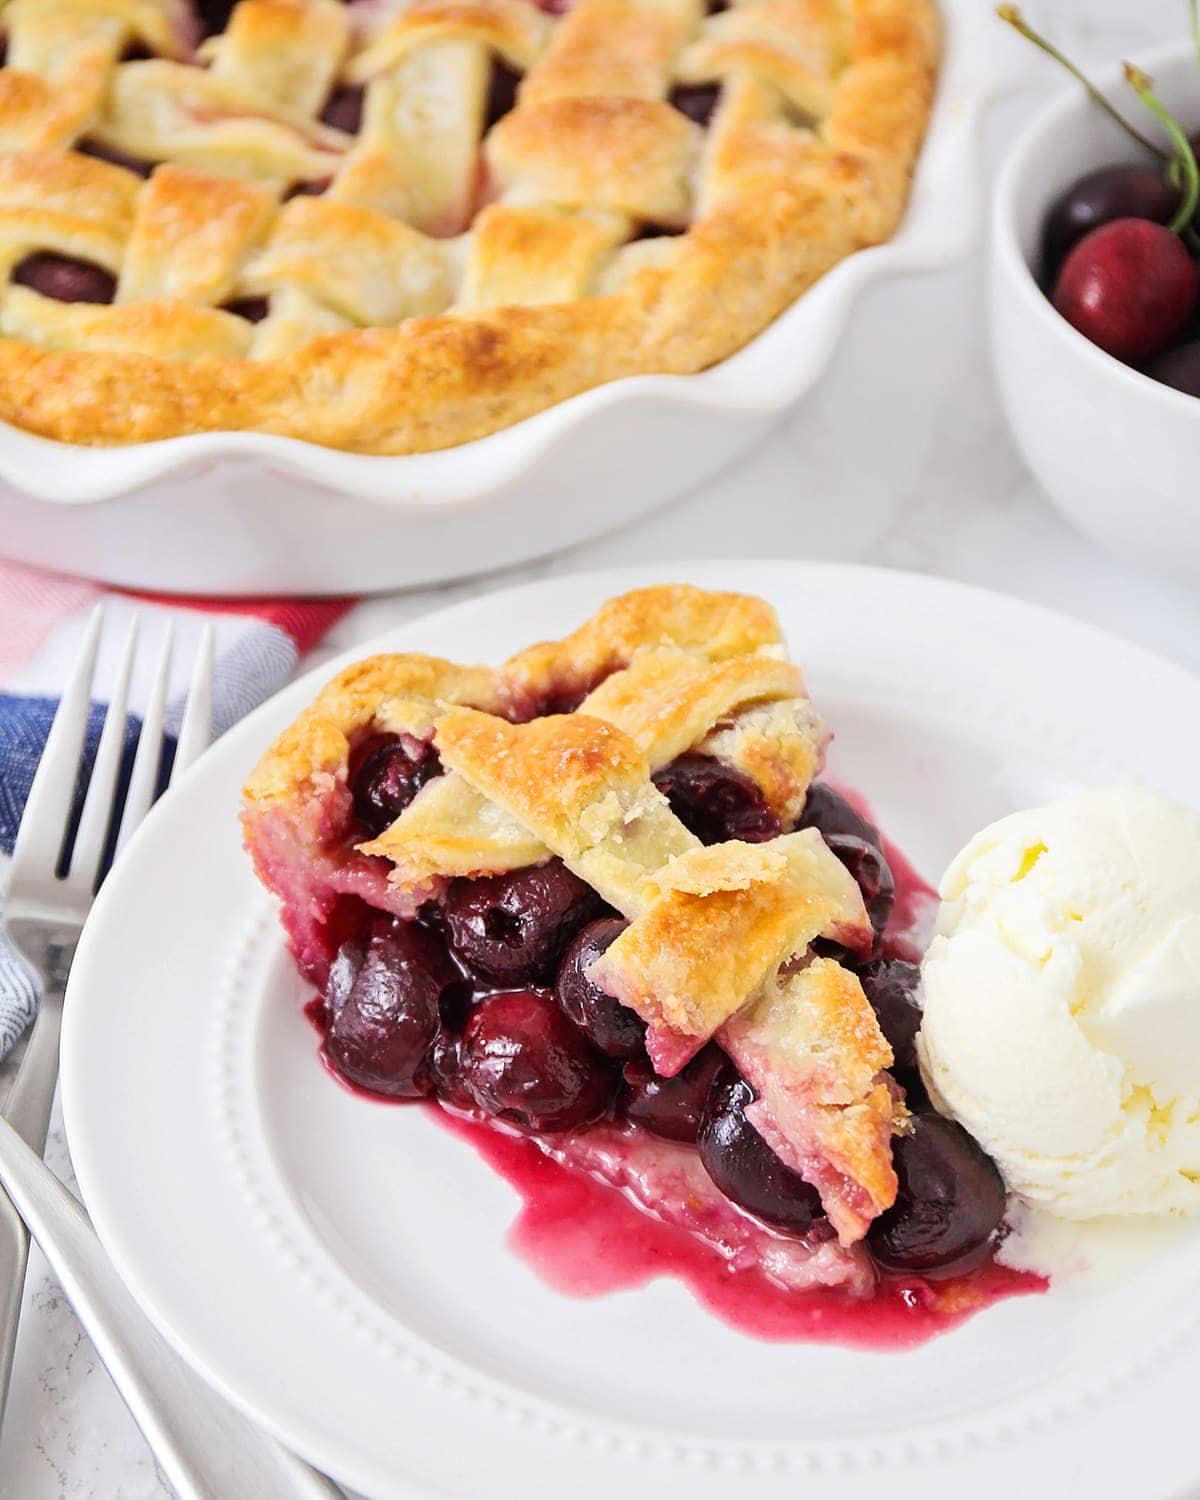
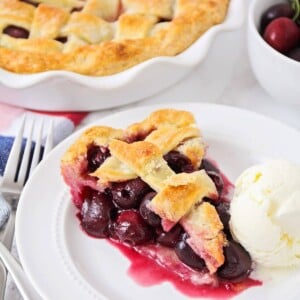
I love to use a lattice crust for fruit pies, so the pretty fruit filling can show through the top crust. If you haven’t made a lattice before, it’s actually much easier than you might think. Here is the process: EGG WASH. In a small bowl, whisk together the egg yolk and water. Brush the egg wash over the top of the pie, and sprinkle with additional sugar, if desired. BAKE + COOL. Bake 55-60 minutes, or until the filling is bubbling hard and the pie crust is golden brown. Let cool to nearly room temperature before slicing and serving. SERVE. This homemade cherry pie is absolutely delicious with whipped Cream or a scoop of vanilla ice cream on the side.
Recipe tips
Make a perfectly flaky crust for your fresh cherry pie with these simple tips! Crust.
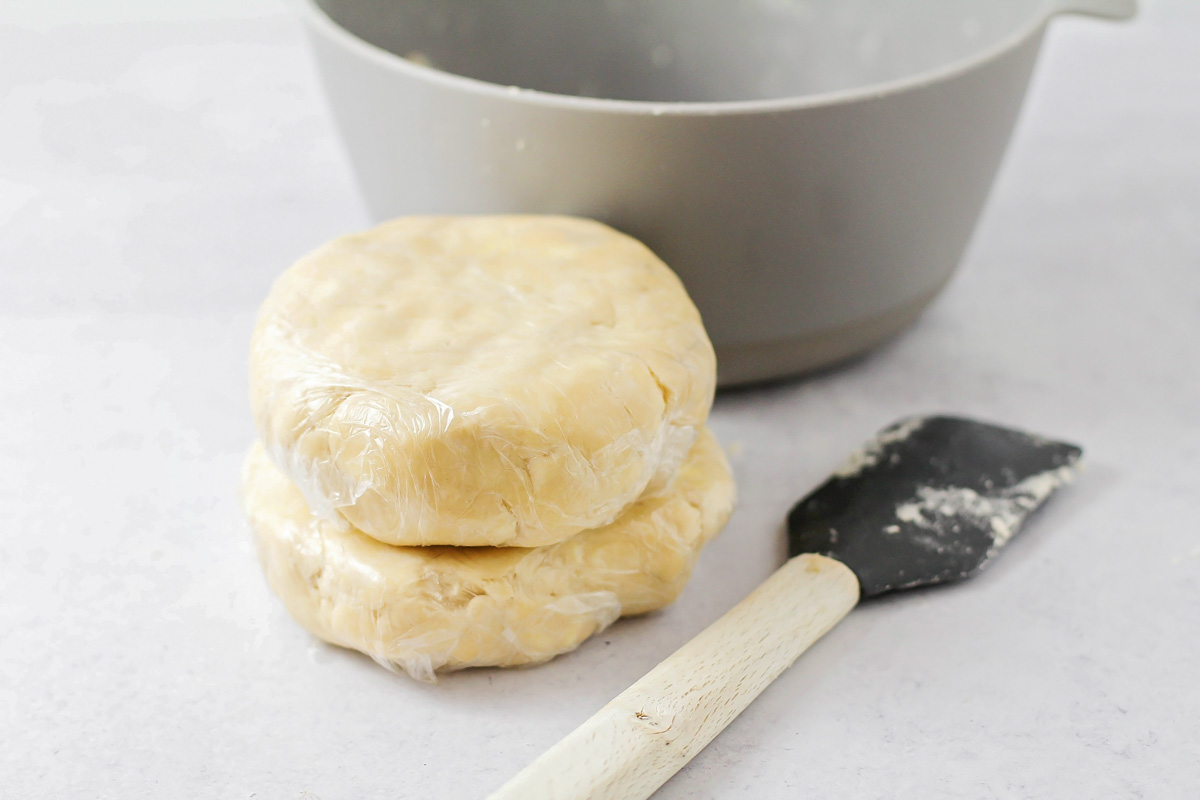
Be careful to not overwork your pie dough. Overworking will activate the gluten even more, leading to a hard dense crust. Use a pie shield, or make your own with foil. This will help when the crust is ready, but the pie is still cooking. I love how pretty a lattice pie crust looks, but you can also use a solid top crust. Just be sure that you cut 4-5 venting slits on top. Baking the pie on the lower rack can help ensure the bottom crust bakes and doesn’t come out doughy.
Cold ingredients. Use chilled butter and ice-cold water when making the pie crust. Some people even chill their flour! Chill the pie for 30 minutes, or longer, before putting it in the preheated oven. Easy clean-up. Bake the pie on top of a baking sheet. This will catch any of the juices that may bubble over, and save you from a smoky, messy oven. Pie pan. I like using glass or ceramic 9-inch pie plates, but you can use a metal pie pan if you choose. A deep dish pie pan would also work. Either way, grease the plate before you add the crust. This helps in lifting the slices out more easily once it’s been baked. Let it cool! Be patient and let the pie cool. This allows time for the juices to thicken as it cools.
Storing info
STORE in the pantry at room temperature, covered, for 1-2 days. Store in the fridge, loosely covered with foil, for 4-5 days. FREEZE. Once the pie has cooled, wrap tightly with plastic wrap, and again with aluminum foil. Store in the freezer for 4-6 months. FREEZE an unbaked pie. Wrap with plastic wrap, then again with foil. Freeze for up to 3 months. When you are ready to bake – do not thaw. Place the pie directly into an oven preheated to 425°F and bake for 15 minutes. Reduce the heat and bake according to recipe directions.
For More Cherry Recipes, Try:
Cherry Dump Cake Cheesecake Cupcakes Cherry Danish Cherry Almond Cupcake