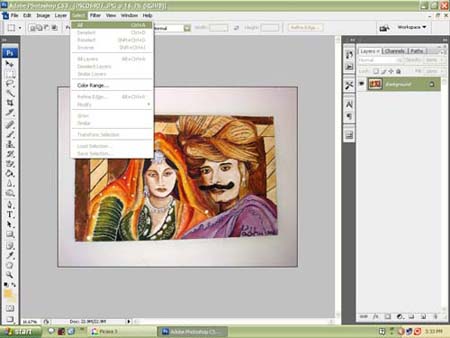
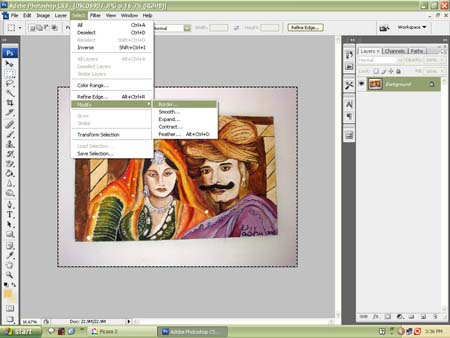
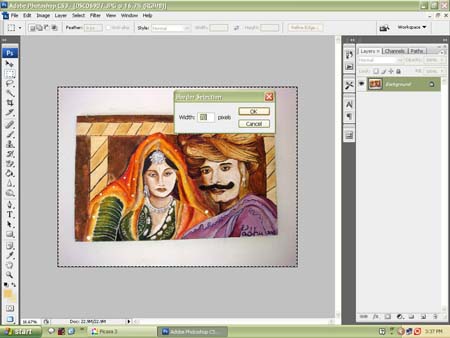
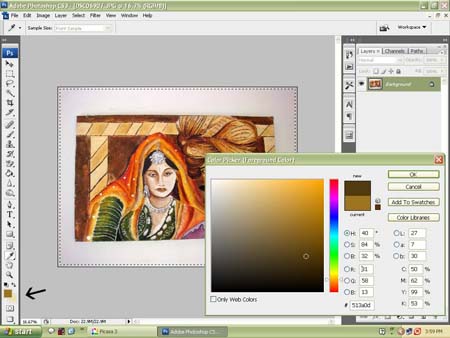
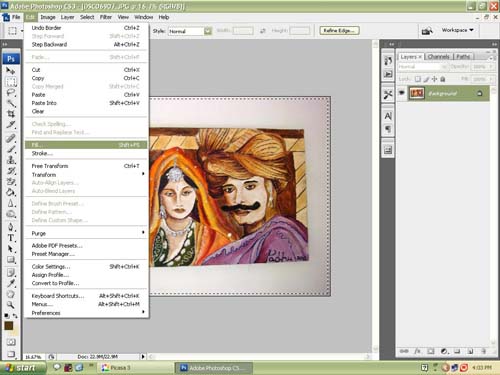
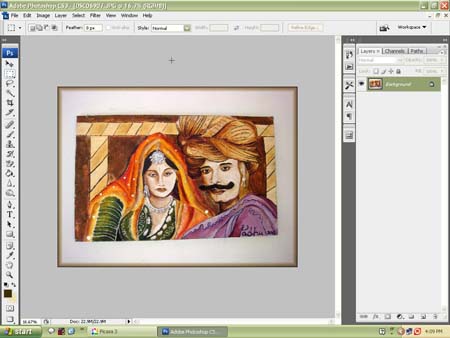
Let us see how to add border to a photo. I am using Abode photoshop CS3 First step is to open the photo you want to add border. For this go to file in the menu bar and click open and choose the photo you want to add border. I have opened the photo I wanted to add border. Then go to Select in the menu bar and choose All from the drop down menu. See pic below You will see dotted lines around the picture. Then go to select in the menu bar again and choose modify – from that choose border. See pic below A small border selection box will appear asking you for width .Type 70 and click OK. Then choose the colour you want for your border from foreground colour. I have put an arrow mark there in the picture to indicate where it is. I choose dark brown .Click OK Now Go to Edit in the menu bar and choose Fill -See pic below You will get a Fill box. Choose foreground color, for blending mode choose hard light and opacity 50%. Click OK. Then go to select in the menu bar and choose Deselect.The dotted lines will go off and you will have a border for your photo. Now your picture has a border. Sound easy isn’t it . This post explains adding a simple border to your picture. You can try and experiment with different borders. Do you like this post? Do give me your feedback. Meet you all again with an interesting post, till then it is bye from Padhu of padhuskitchen. Read More