Egg & Nut Free Tart Crust Recipe Highlights
This is my favorite Eggless Sweet Tart Crust (Pastry Crust) recipe. It goes well with any sweet filling of your choice. It’s buttery and flaky but not so crumbly that it makes it difficult to cut or eat with a fork, just as good as a tart crust should be. The dough is extremely easy to make and to work with! Plus, it tastes so good that it is hard not to eat it by itself. Most of the traditional recipes call for ground almonds, but for obvious reasons (nut allergy), I did not use almonds in this recipe. But if, by chance, you do not have nuts restrictions, you can add some (read the baking tips section) for an extra layer of flavor. In short, it’s a master recipe that will serve you well for all your eggless tart making.
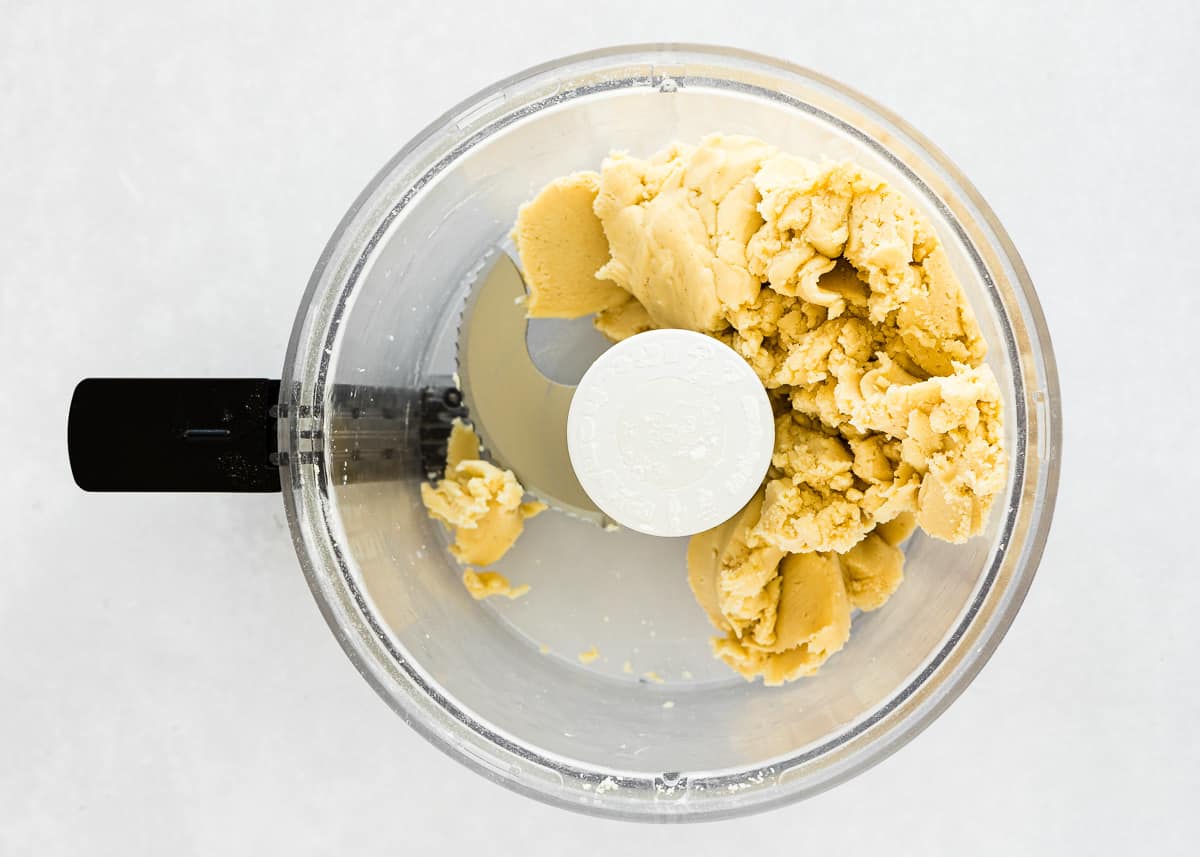
3 – Add the Wet Ingredients
With the motor running, add the evaporated milk, cream, and vanilla, and process/mix/stir until the dough comes together into a ball and pulls away cleanly from the sides of the bowl.
Ingredients Notes & Substitutions
Flour: Standard all-purpose flour works best here; skip the cake flour, bread flour, and wheat flour. Confectioners’ sugar: Also known as powdered sugar. Salt: I prefer kosher or sea salt. If you only have table salt handy, I recommend reducing the amount to half Butter: I prefer to use unsalted butter, but if you only have salted butter handy, you can use it. In this case, skip the salt called in the recipe. Evaporated milk: You don’t have evaporated milk? No problem!! Check out my post about How to Make Evaporated Milk at home Heavy cream: Make sure it’s cold and has at least 35% of fat content. Vanilla extract: For optimal flavor, reach for pure vanilla instead of imitation. Even better, try homemade vanilla extract!
Step By Step Recipe Photo Tutorial
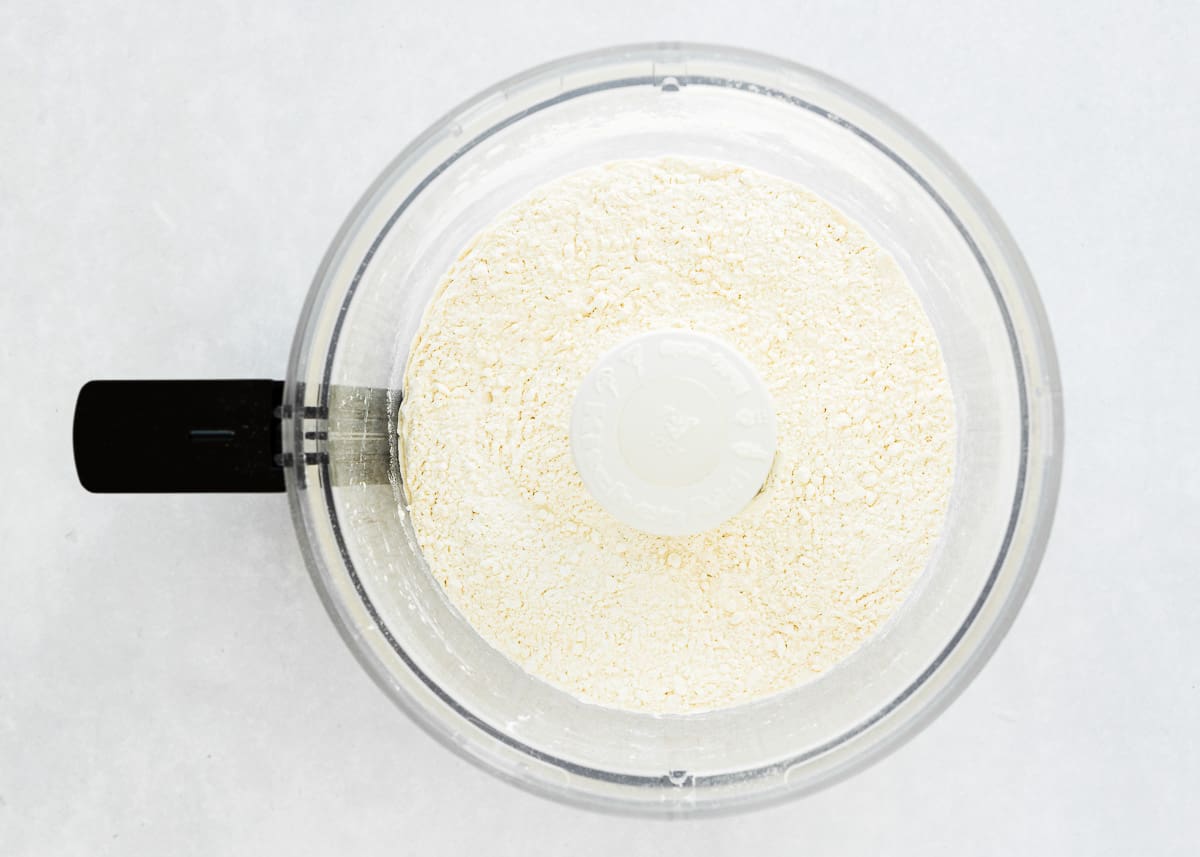
1 – Mix Dry Ingredients
Place the flour, sugar, and salt in the bowl of a food processor, stand mixer, or in a medium mixing bowl; pulse to combine.
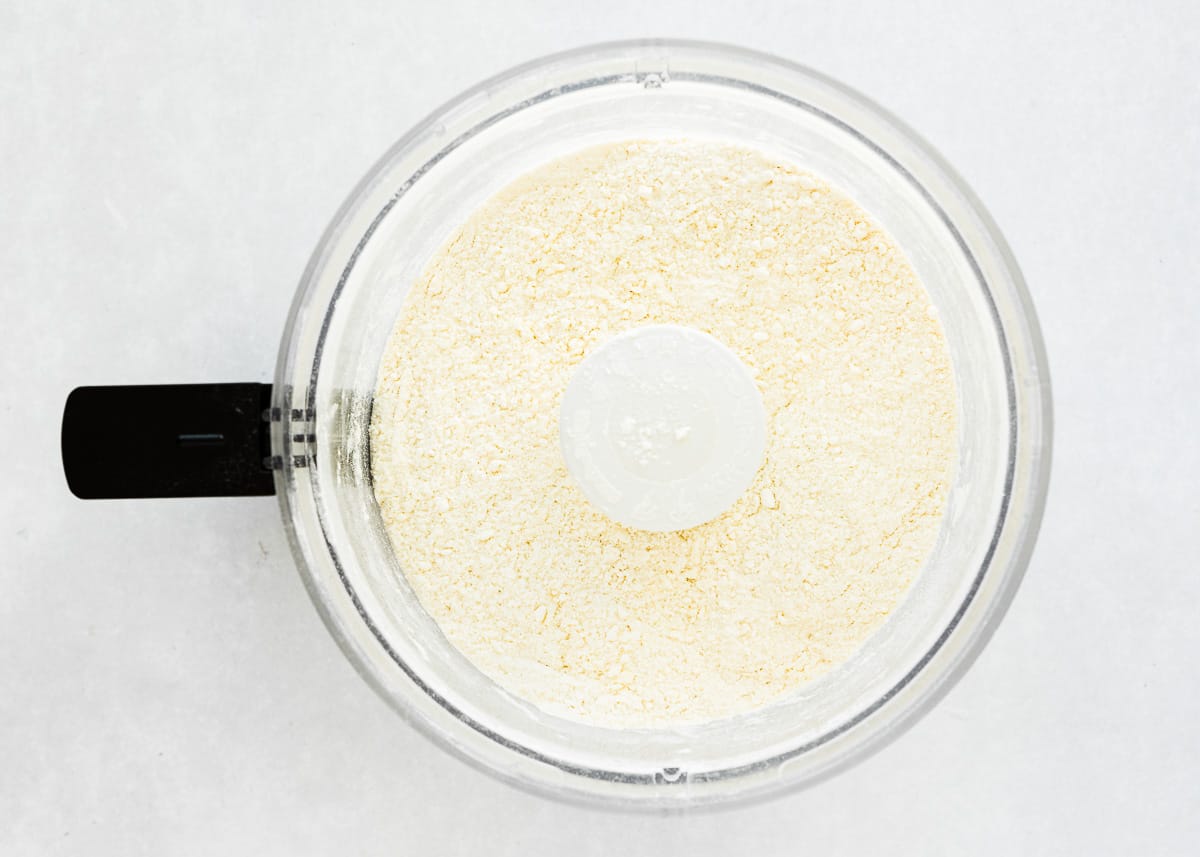
2 – Add Butter
Add the chopped butter and process in short bursts until the mixture resembles coarse meal or fine breadcrumbs.
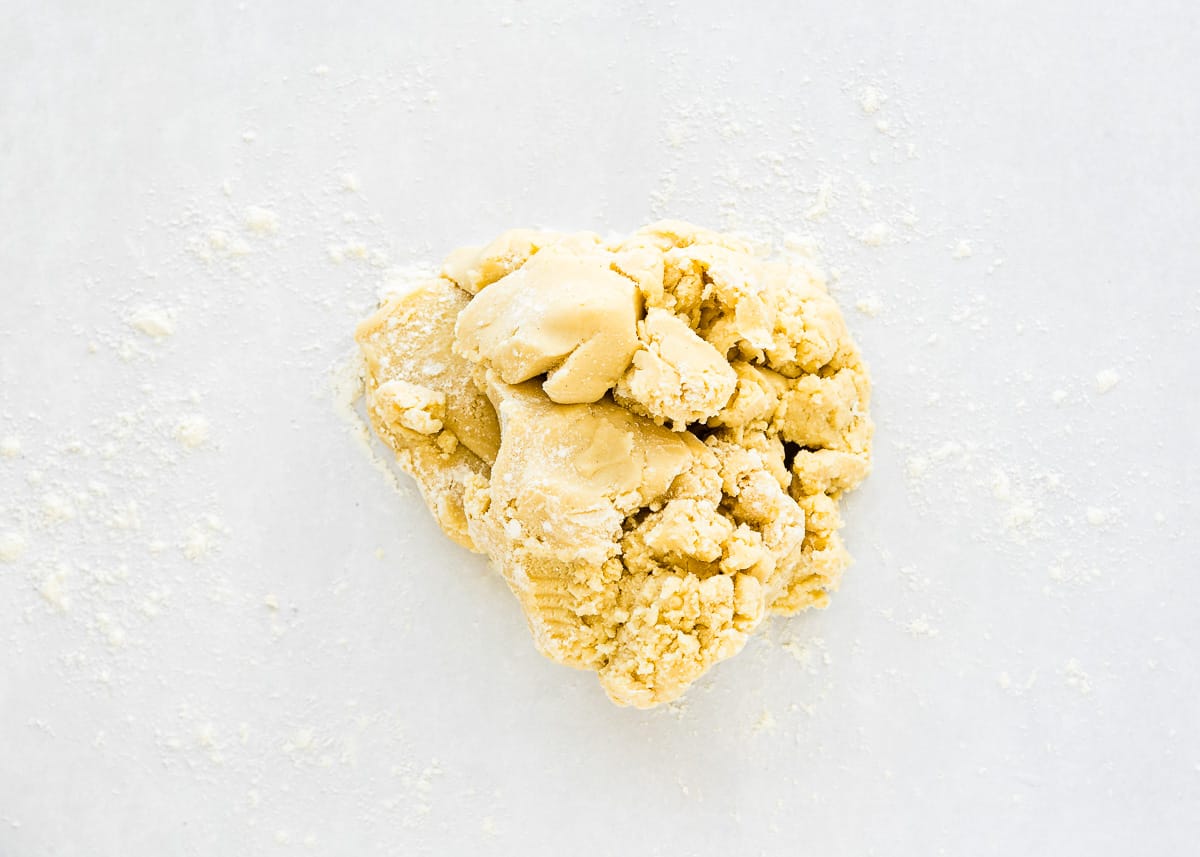
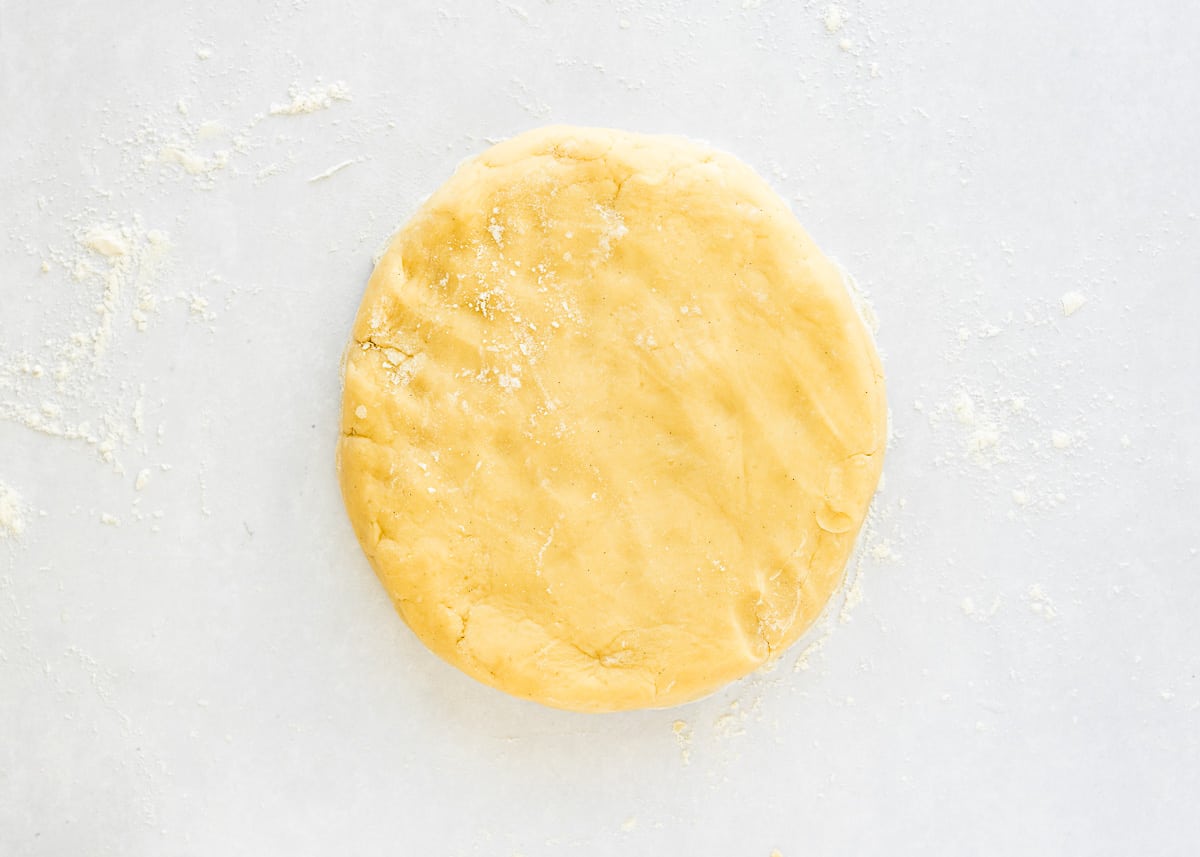
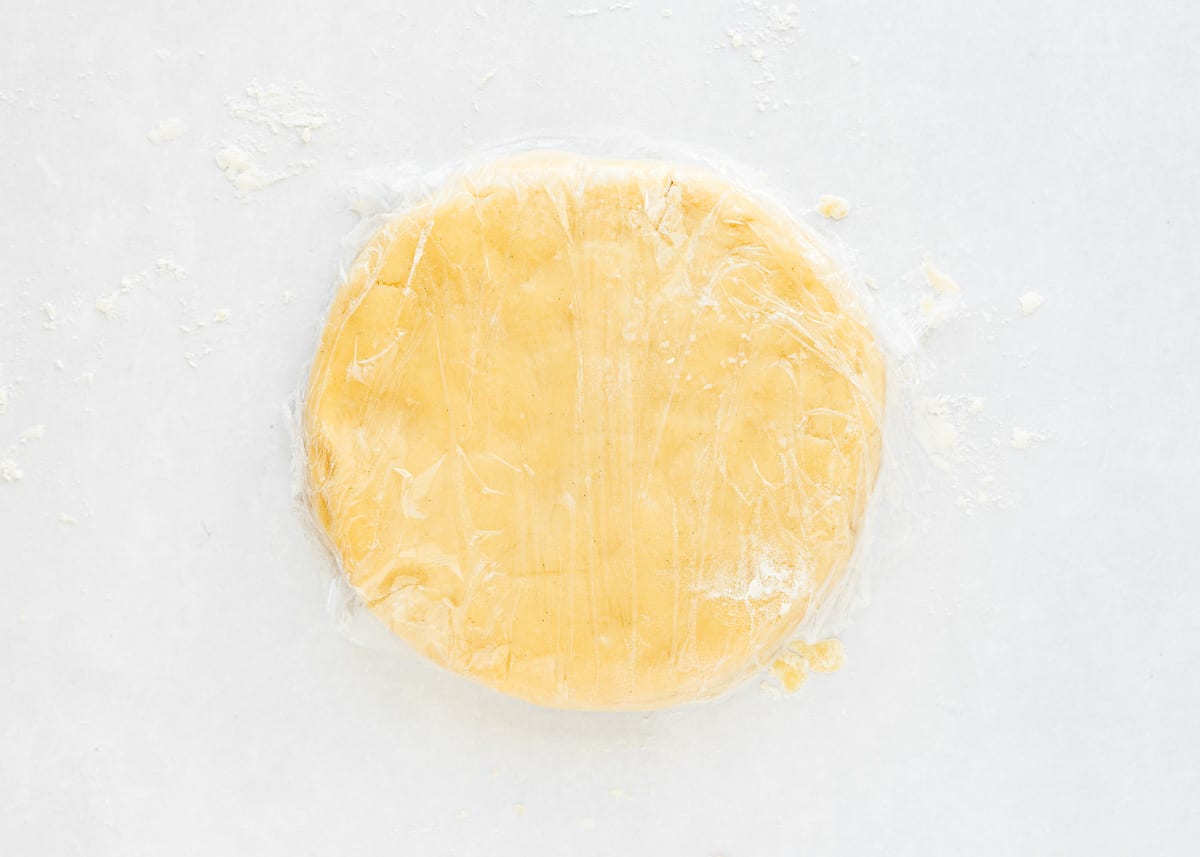
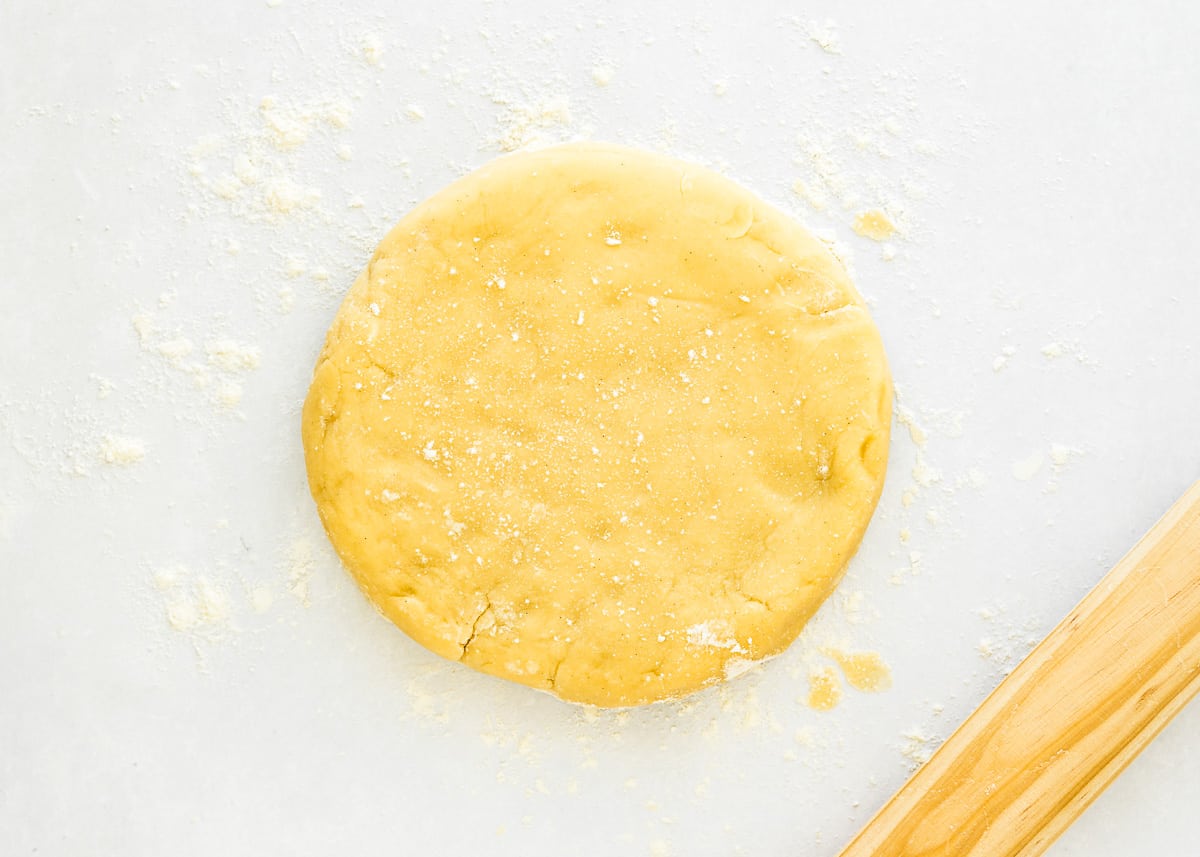
4 – Refrigerate
Turn dough onto a lightly floured surface. Bring the dough together and flatten it into a dish shape. Cover in plastic wrap and refrigerate for 1 hour.
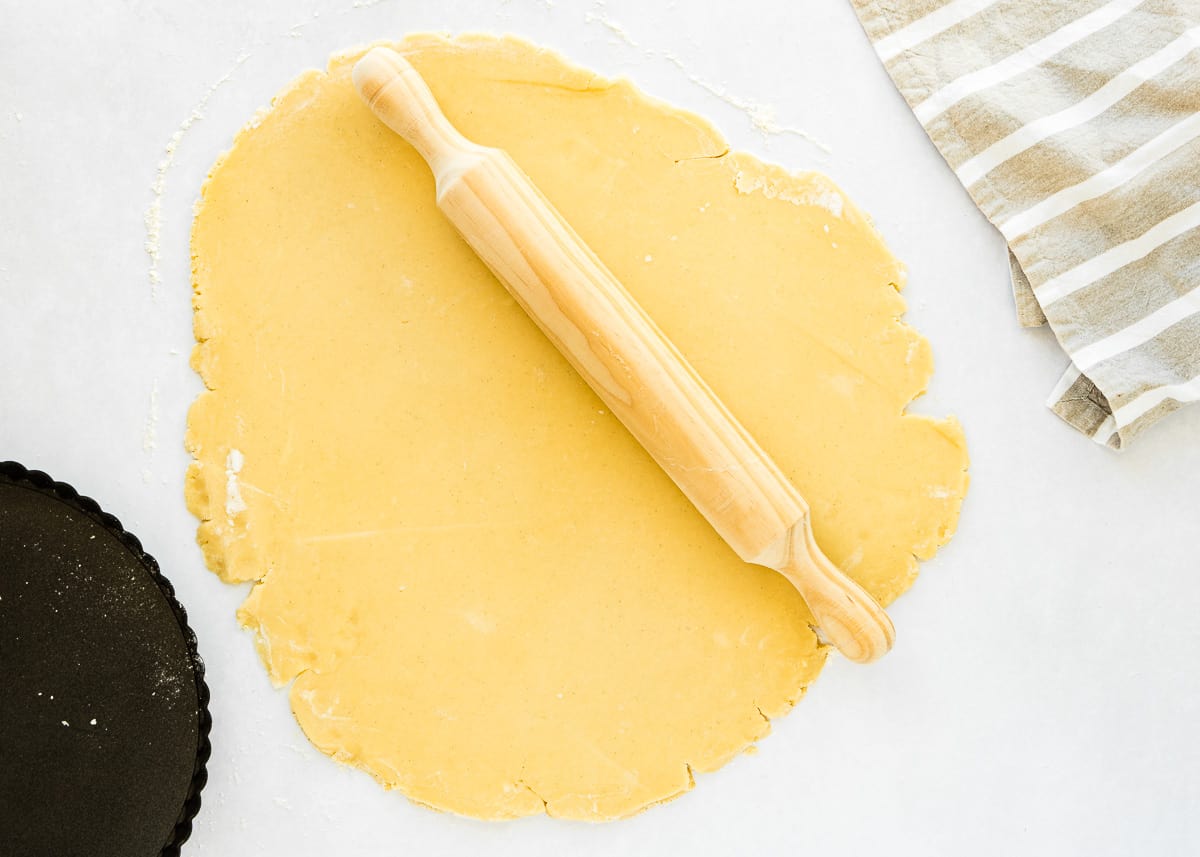
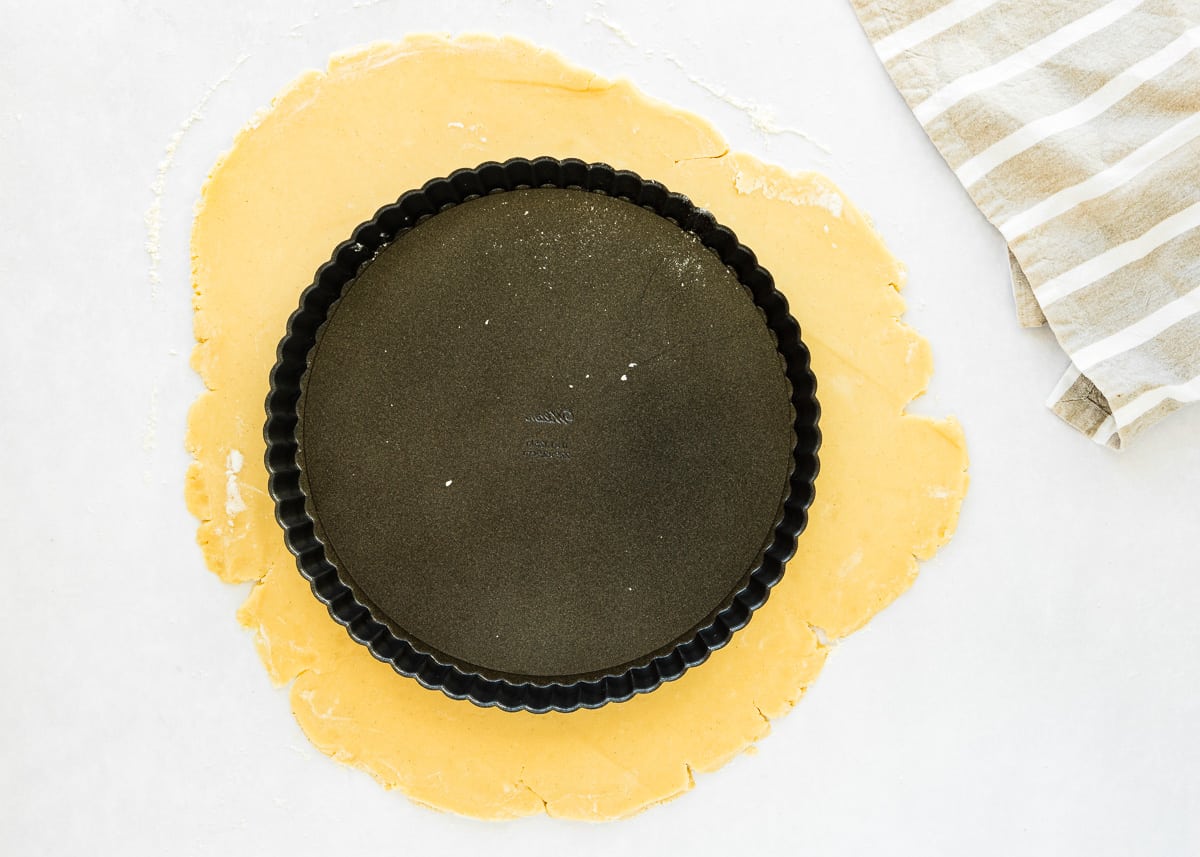
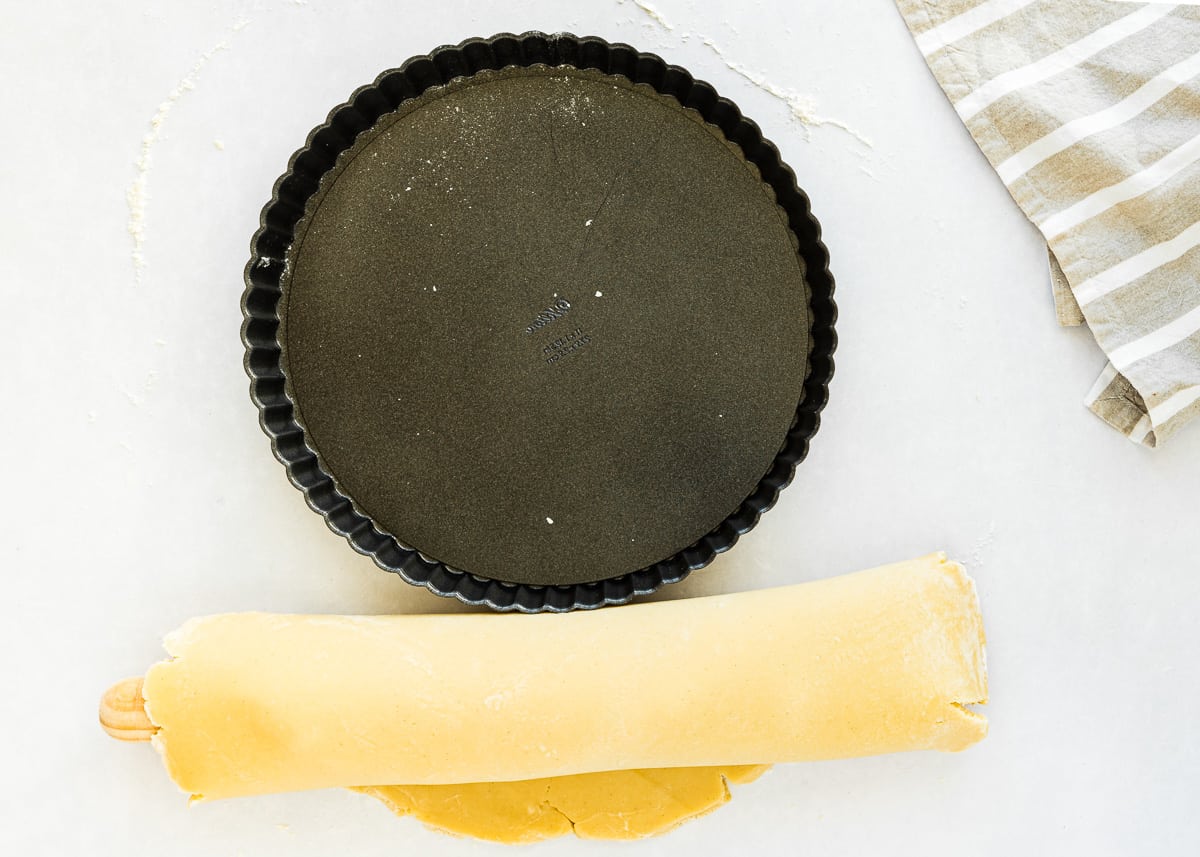
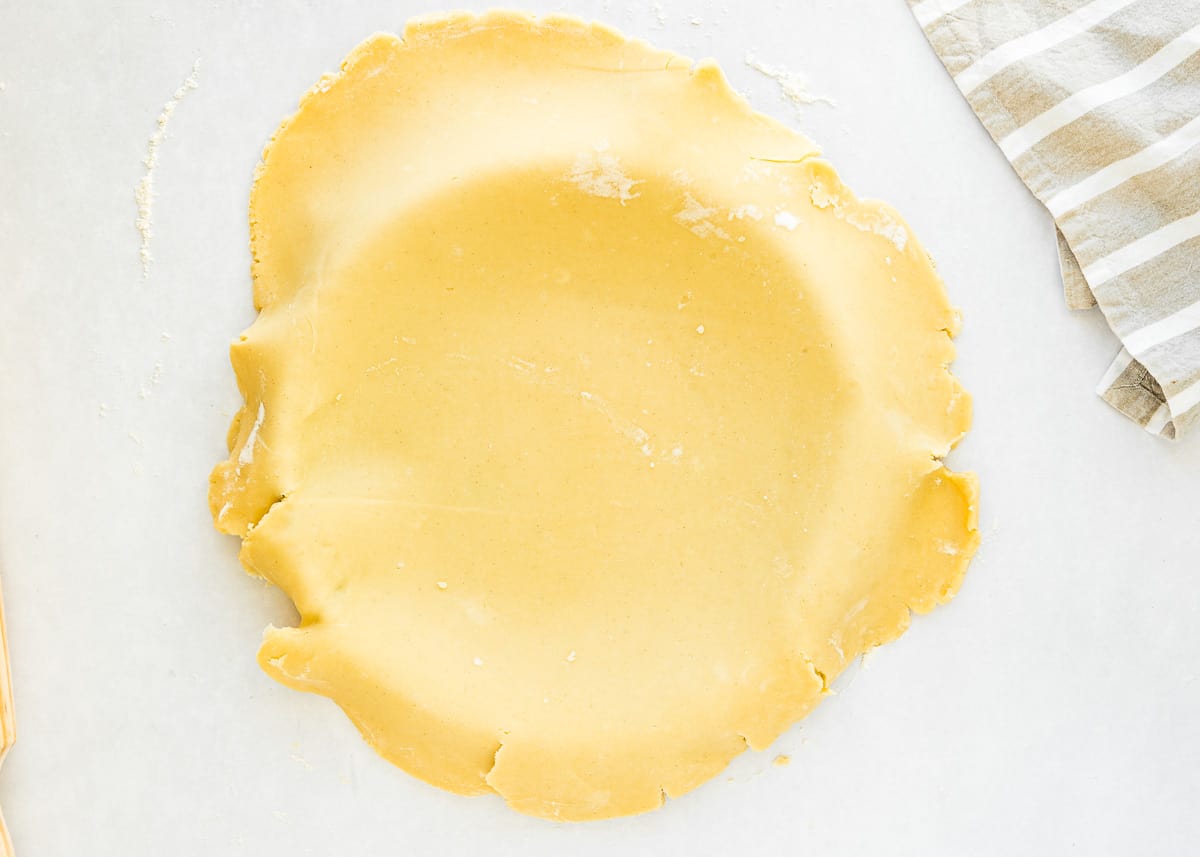
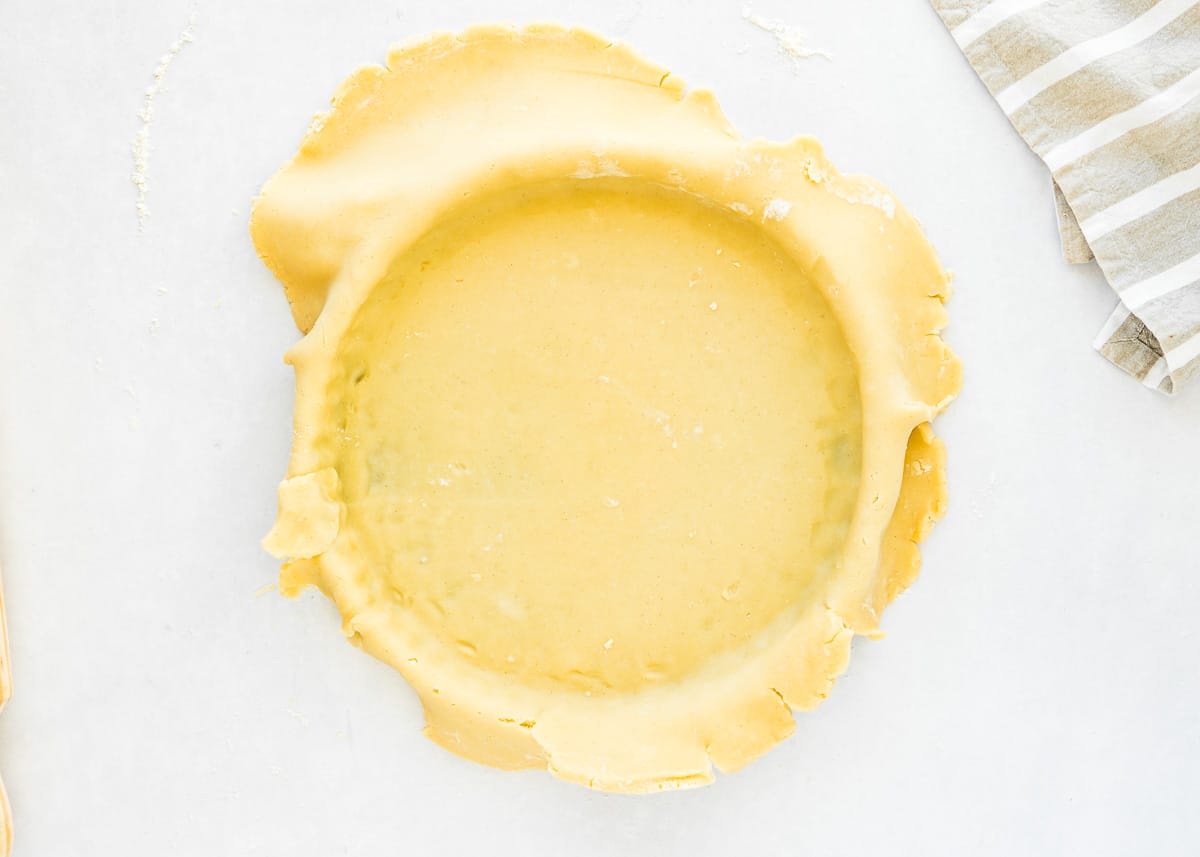
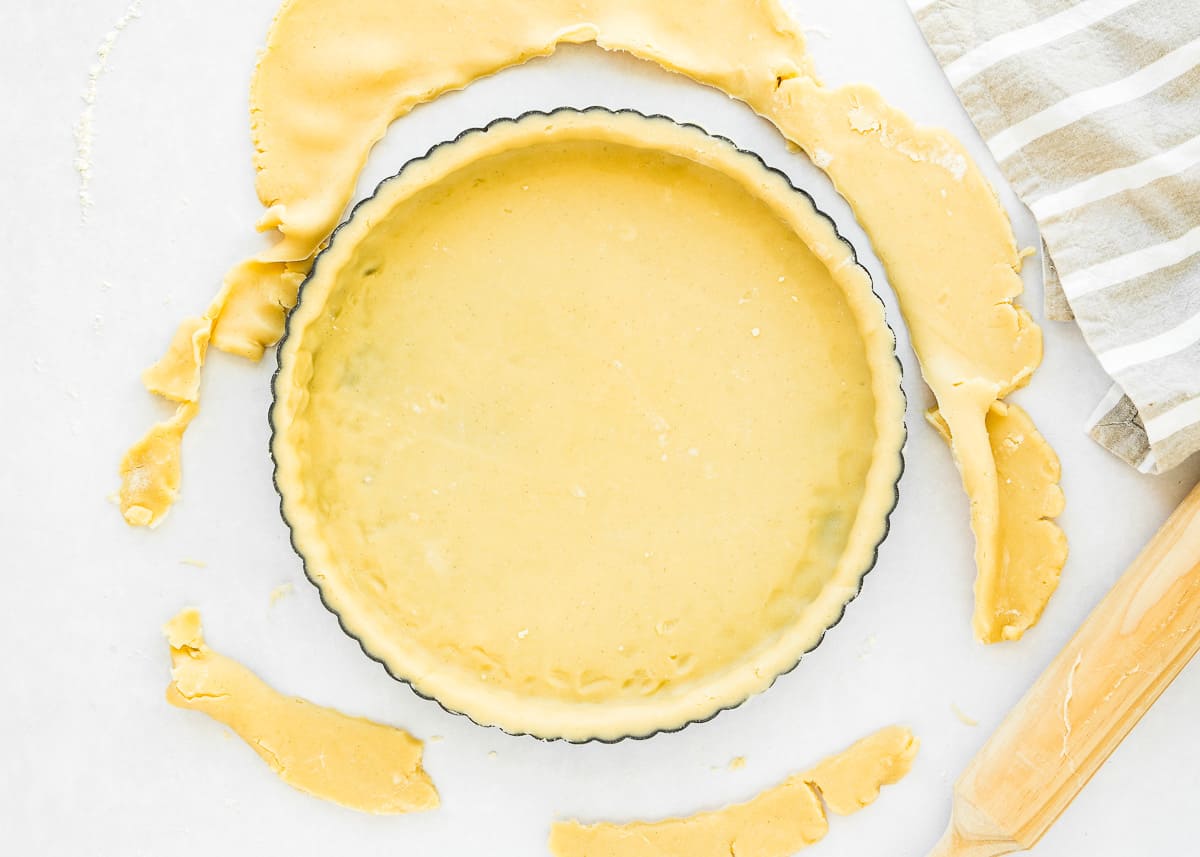
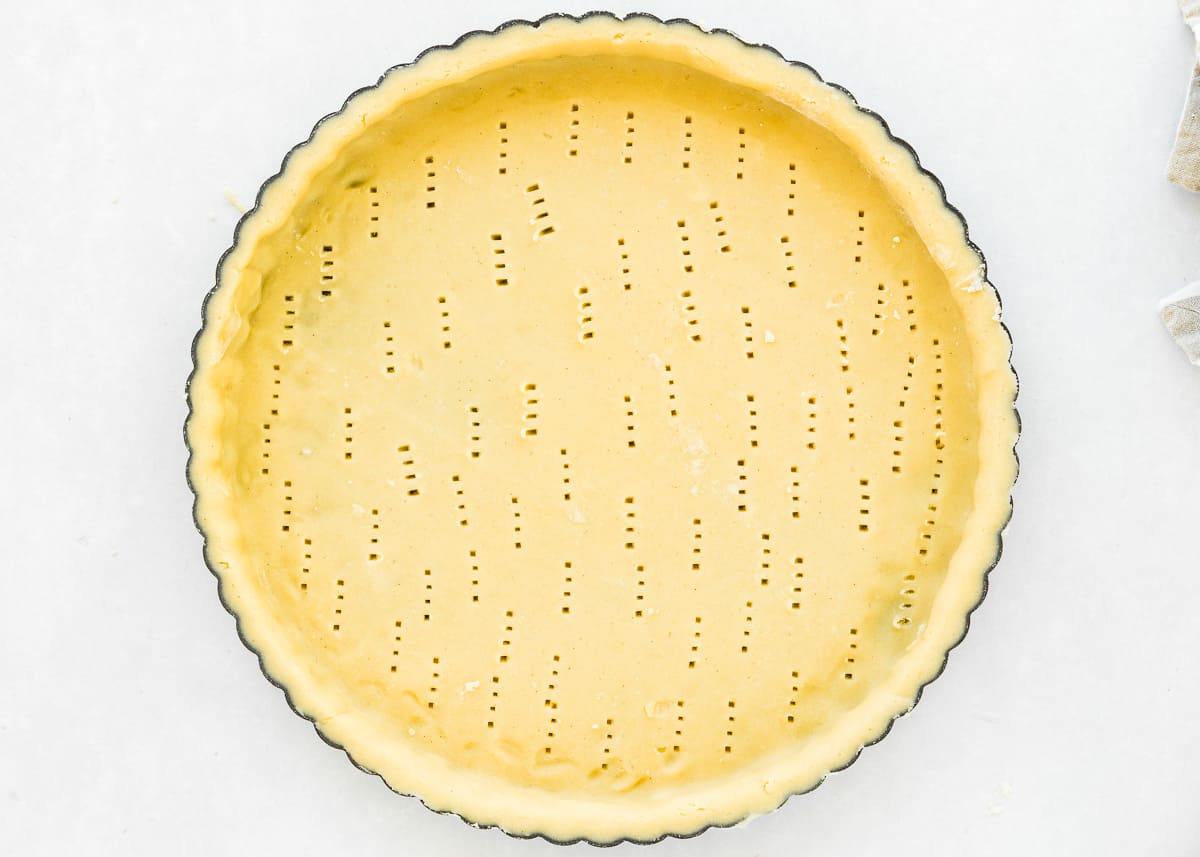
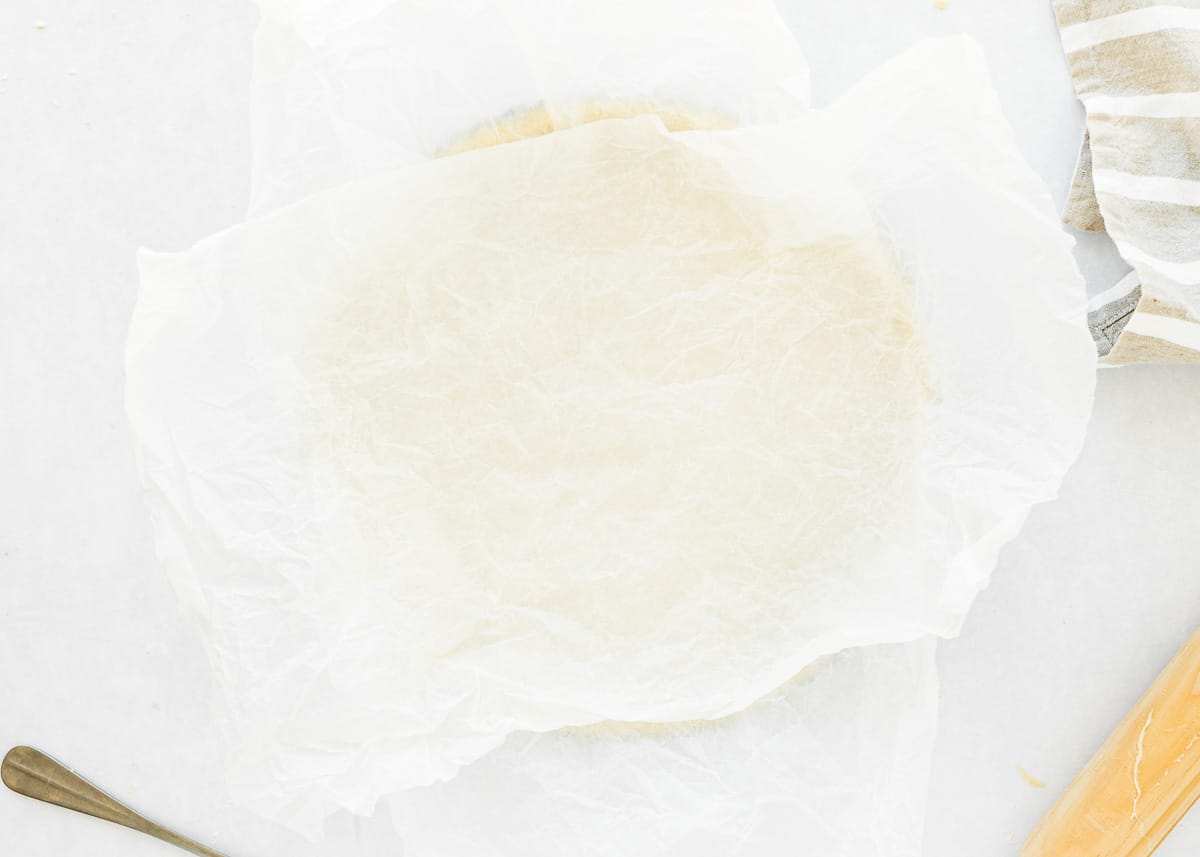
5 – Roll the Dough Out
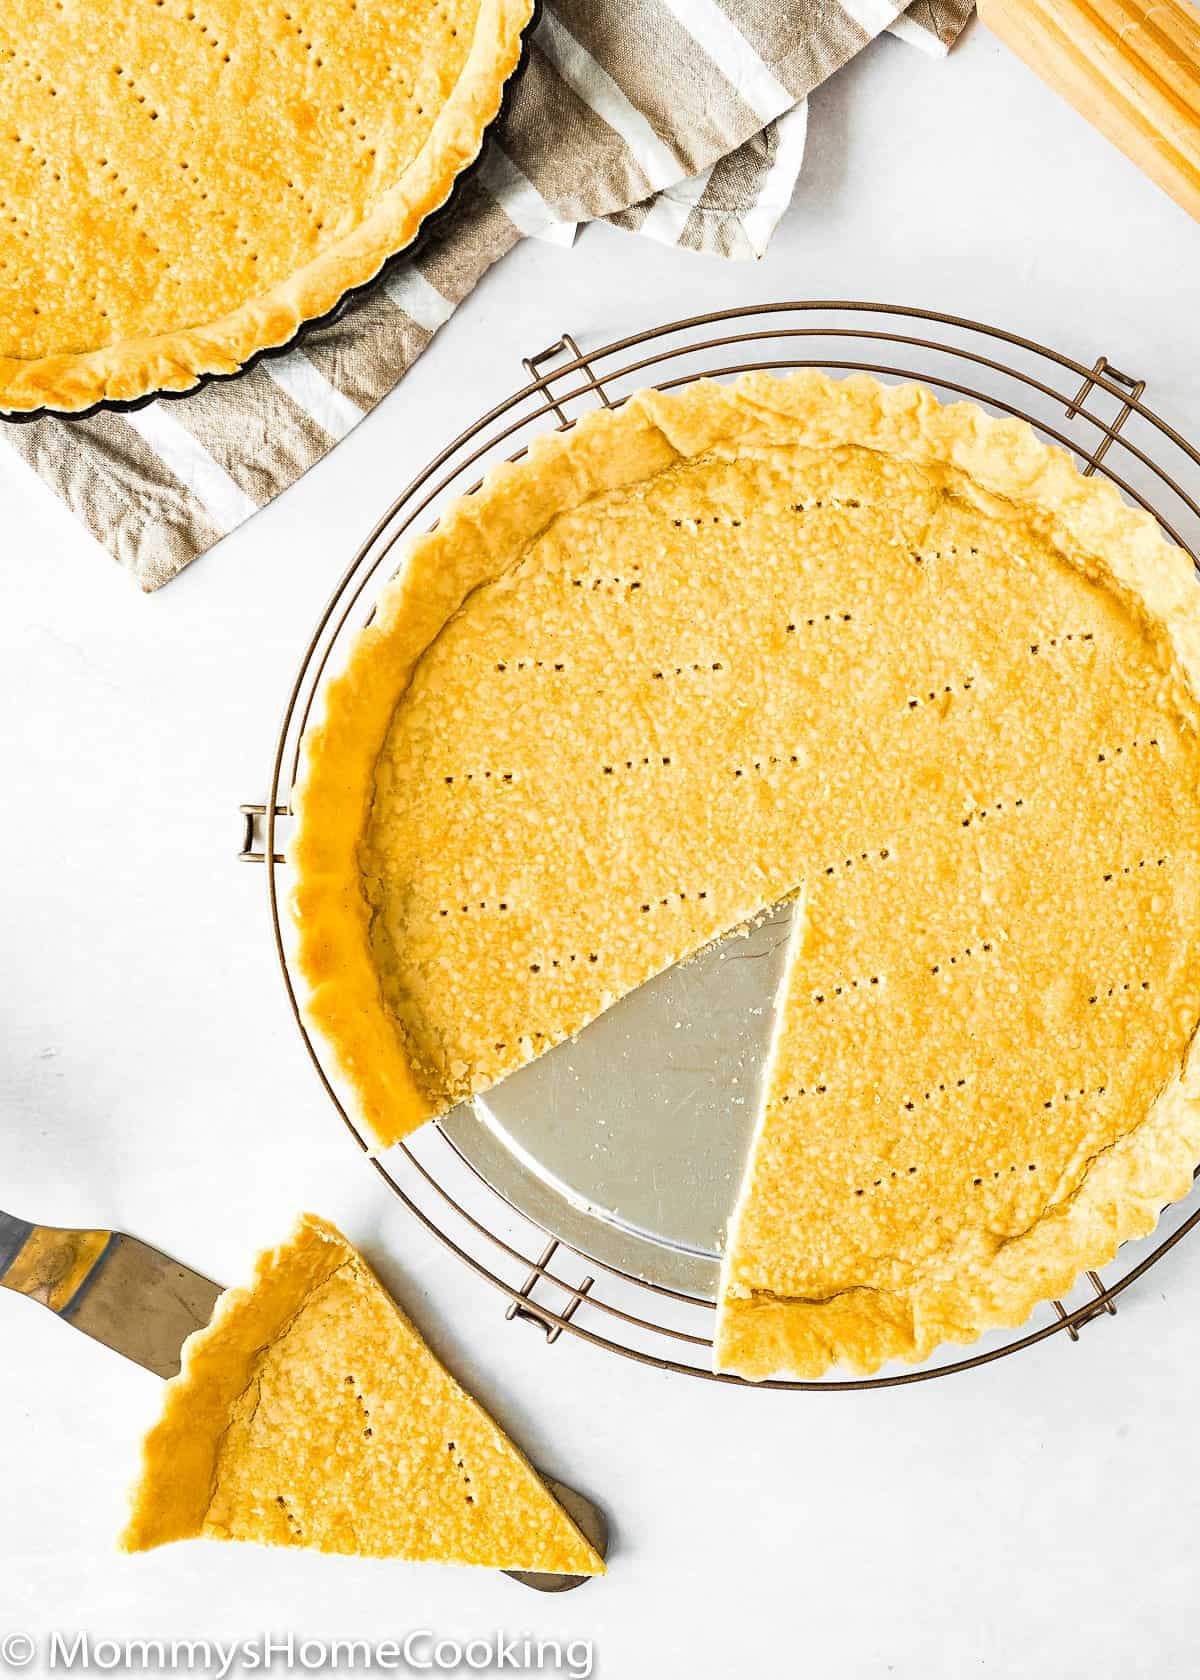
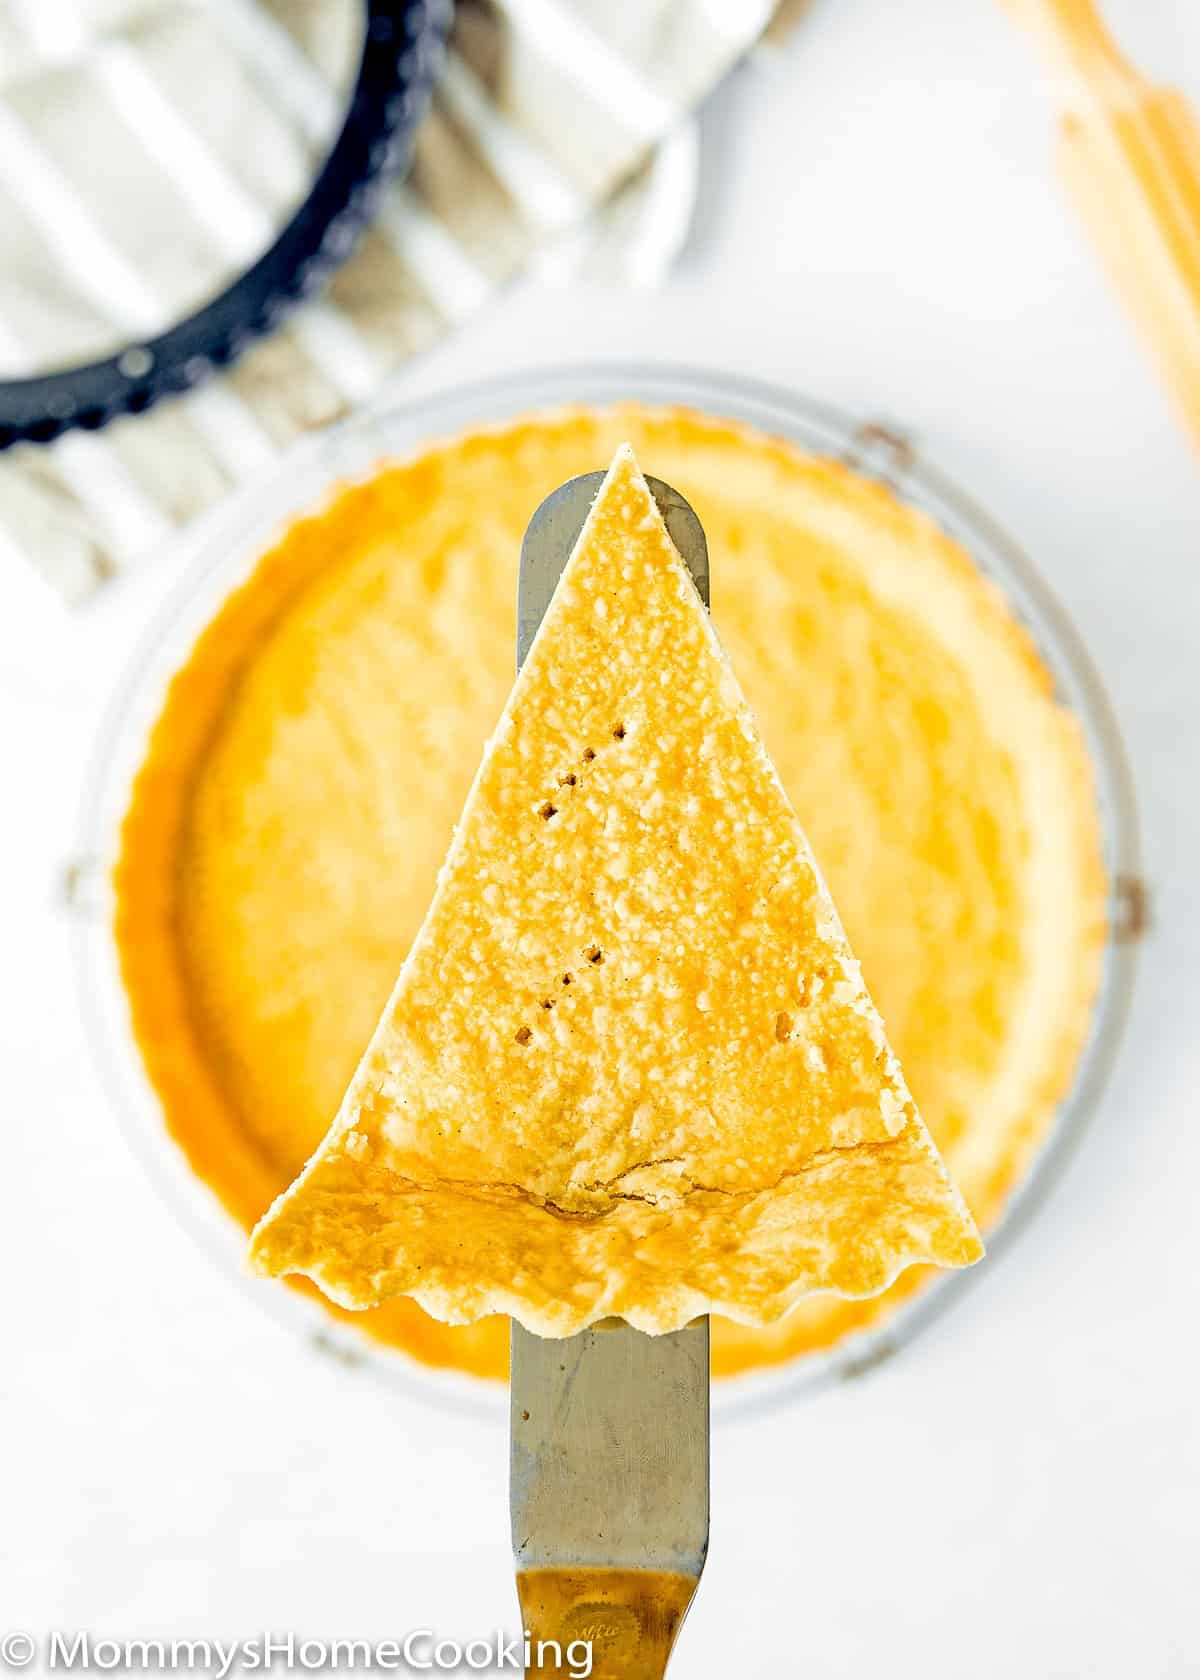
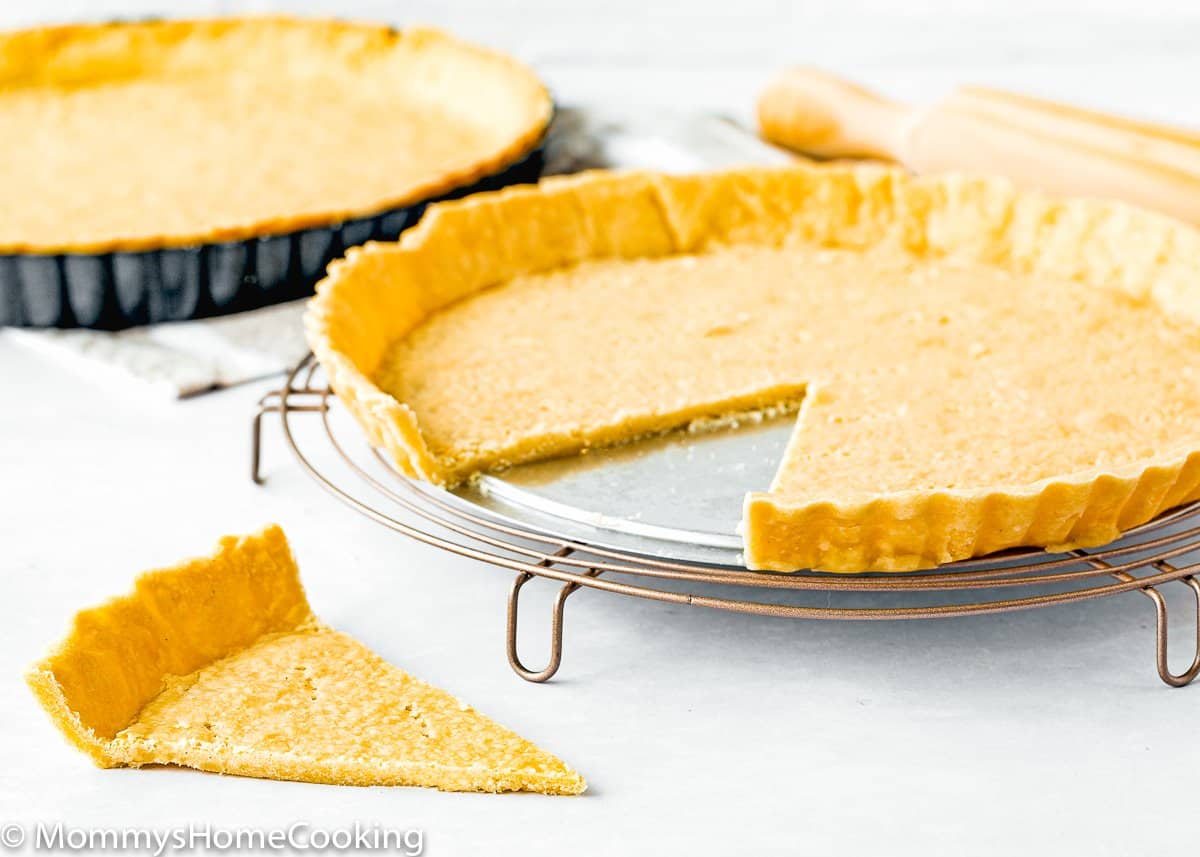
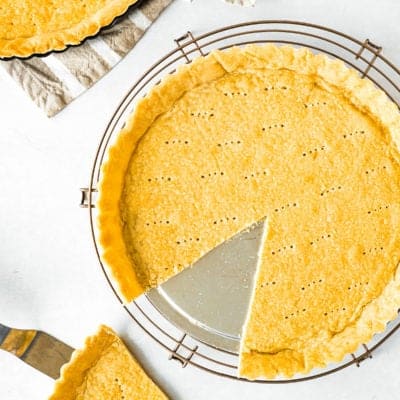
On a lightly floured surface, roll the dough out to 1/8-in (3 mm). Press the dough gently into the tart pan(s). Trim the edges and prick the base with a fork. Refrigerate for 30 minutes.
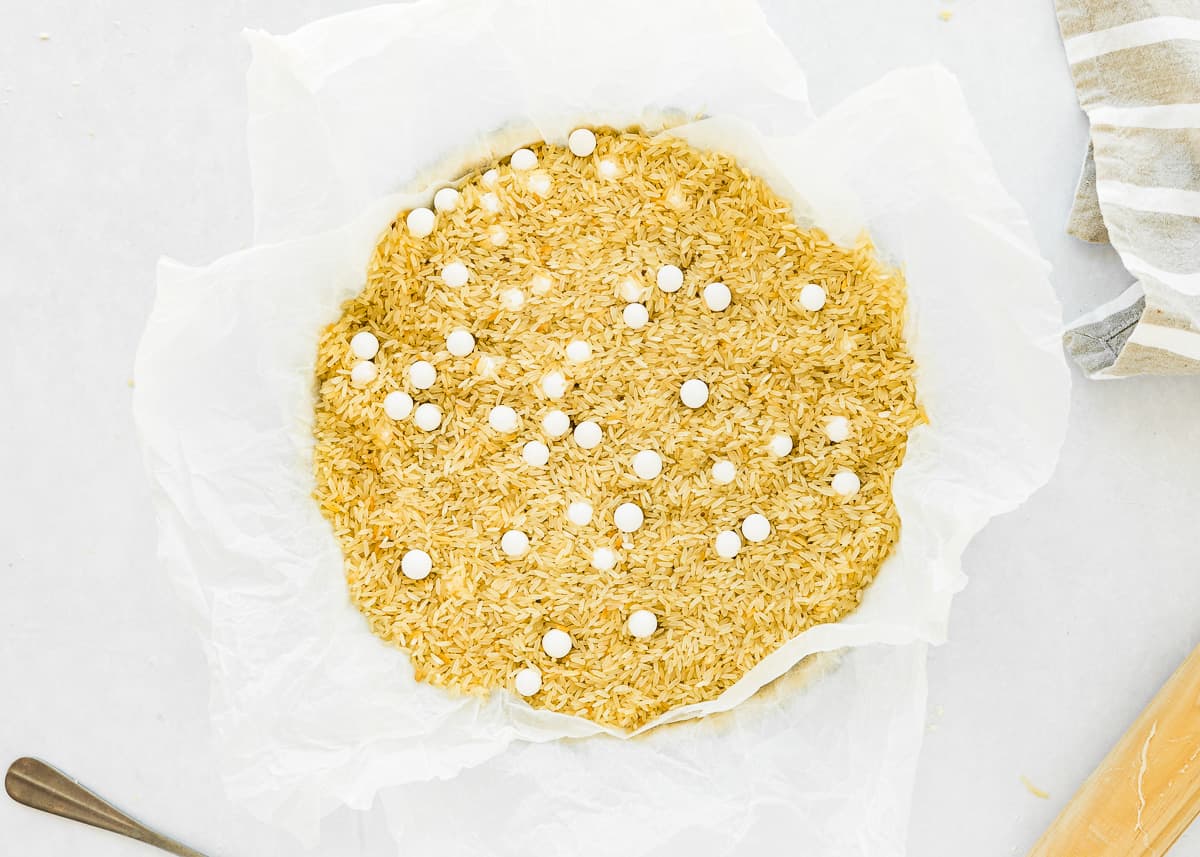
6 – Prepare Blind Baking
Line chilled tart crust with a double layer of parchment paper or aluminum foil. Fill the pie with pie weights (or dried beans, uncooked rice, pennies, etc.). Make sure they are evenly distributed over the entire surface. Bake at 400º F (200º C) for 15 – 18 minutes, or until the edges are set and just beginning to turn golden. CAREFULLY, remove the tart crust from the oven and remove the weights.
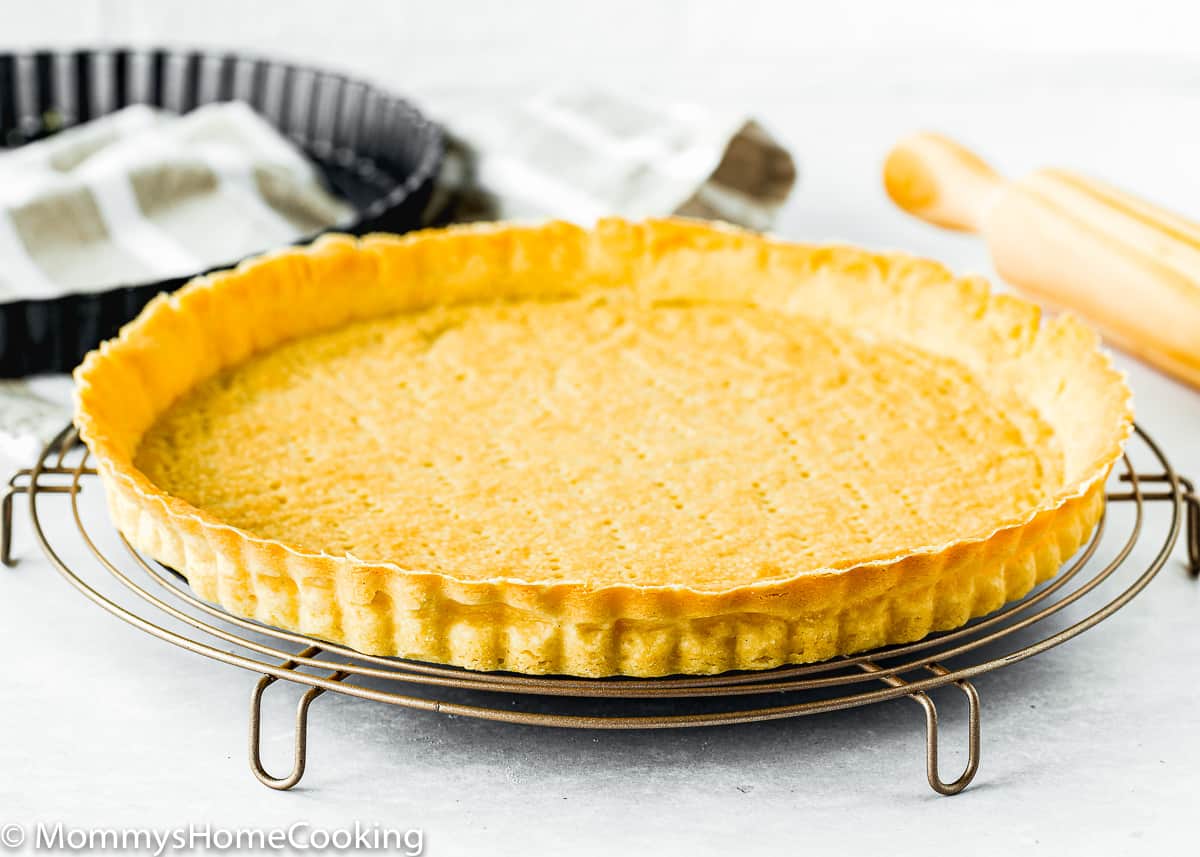
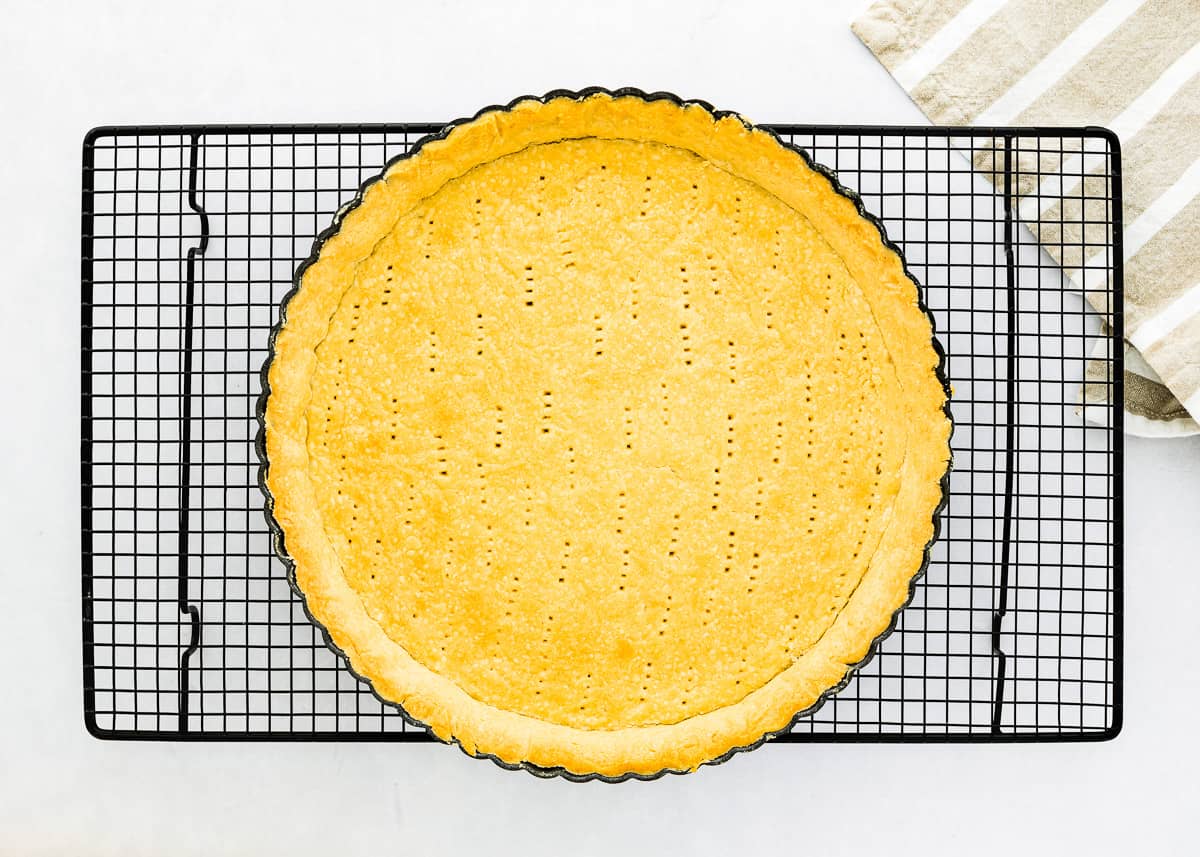
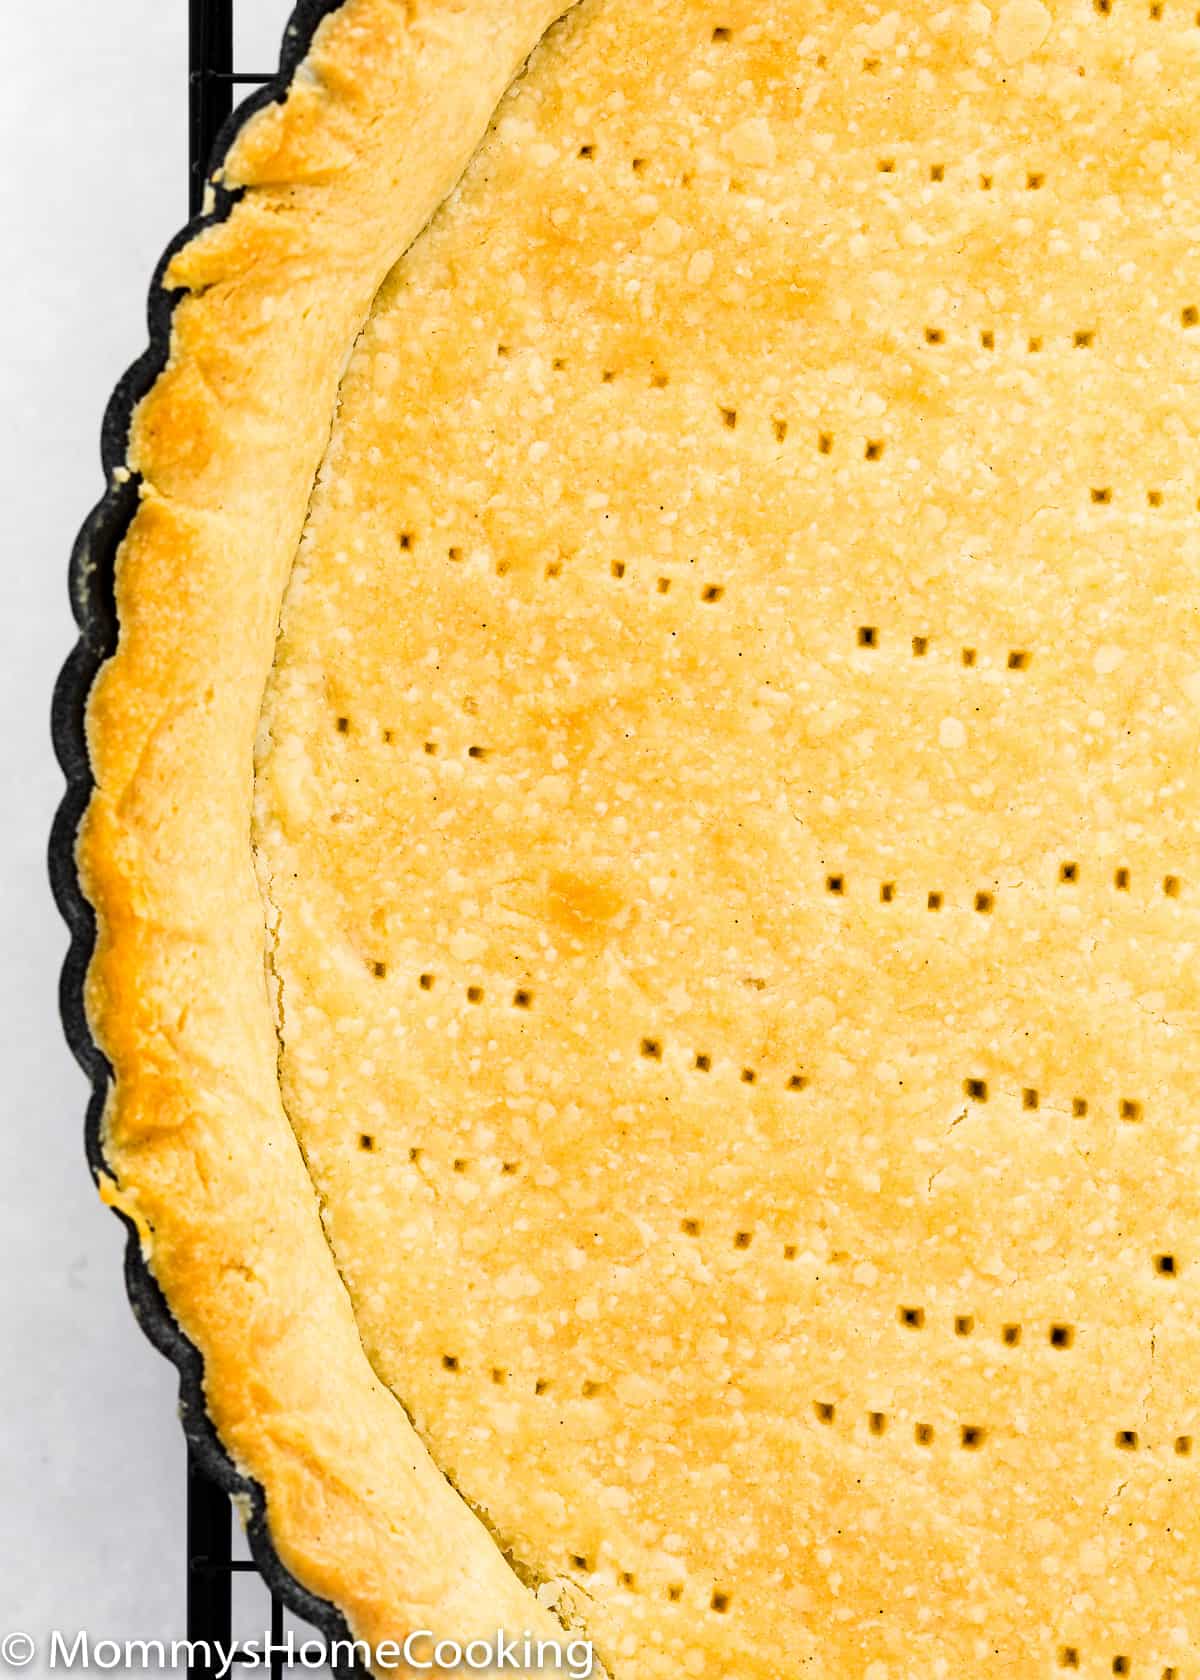
7 – Finish the Baking
At this point, you should follow the specific tart recipe instructions you are making. Usually, if the tart requires more baking after adding the filling, you most likely will need to just partially bake the crust. However, if you are making a no-bake tart, you will need to fully bake the crust.
To partially bake the crust: After removing the weights, bake for 5 minutes longer. You’ll now need to proceed with your tart recipe, add the filling, and finish baking. To fully bake the crust: Bake for about 10 – 12 minutes longer, or until golden and crisp. Transfer to a wire rack and let cool completely.
Storing & Freezing Instructions
Store
Unbaked: Cover well and keep chilled for up to 3 days. Leave it out on the counter for 20 – 30 min (or longer if required) to soften slightly so you can roll it out easily. Baked: store at room temperature or refrigerator for 2 days
Freeze
Unbaked: Cover well and freeze for up to 2 months. When ready to use, let it thaw overnight in the refrigerator, then let sit at room temperature for 20 -30 minutes to soften slightly so you can roll it out easily. Baked: Cover well and freeze for up to 2 months. When ready to serve, let it thaw overnight in the refrigerator, then let sit at room temperature before filling and decorating.
Make Ahead
The dough can be made 3 days ahead. Keep it well covered in the refrigerator. The baked tart crust can be made 2 days ahead and stored well covered at room temperature or refrigerator for 2 days.
How To Use This Tart Crust
Now that I have perfected my tart crust recipe, I promise to add more tart recipes to my collection. But, for now, here are a few ideas: Use your fingers to drape it in and gently pat the dough onto the bottom and sides of the tart pan evenly instead of pulling or stretching it. If the crust slightly bubbles up during baking, you can use a stainless-steel measuring cup to press it down gently. Please do this as soon as you remove the crust from the oven while it is warm. Make sure your tart crust is well chilled before baking. Otherwise, the butter will make too fast, and the tart will lose its shape.
Eggless Fruit Tart Easy Eggless Chocolate Tart Pecan Tart – Partially Bake the tart crust and use my pecan pie filling. Coconut Tart – Fully Bake the tart crust and use my coconut pie filling.
More Eggless Baking Basic Tutorials You’ll Love
How to Make Pie Crust from Scratch Easy Graham Cracker Crust How to Make Evaporated Milk Eggless Meringue more tutorials…
You’ve asked, and I’ve answered! Read on for a handful of answers to the most frequently asked questions about eggless baking. Originally posted in May 2021, the post content was edited to add more helpful information, with no change to the recipe in August 2022.